האם ברוצה ללמוד כיצד להתקין את שרת ה- FTP במחשב שבו פועל Windows? במדריך זה, אנו הולכים להראות לך כיצד להפעיל את שרת FTP במחשב שבו פועל Windows.
• Windows 2012 R2
• Windows 2016
• Windows 2019
• IIS 8.5
ערכת לימוד של Windows:
בדף זה, אנו מציעים גישה מהירה לרשימת ערכות לימוד של Windows.
ערכת לימוד של Windows - התקנת שרת FTP
פתח את היישום מנהל השרת.
גש לתפריט ניהול ולחץ על הוסף תפקידים ותכונות.

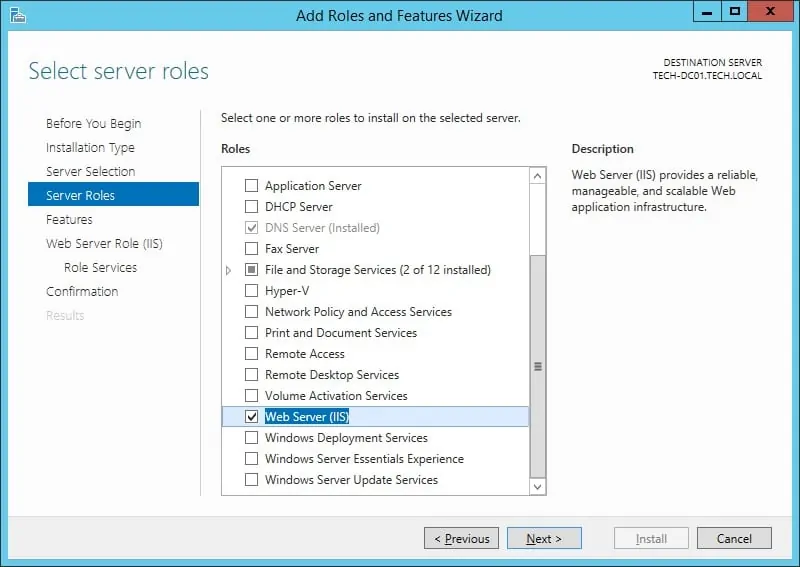
במסך תפקידי שרת, בחר באפשרות בשם: Web Server IIS.
לחץ על לחצן הבא.
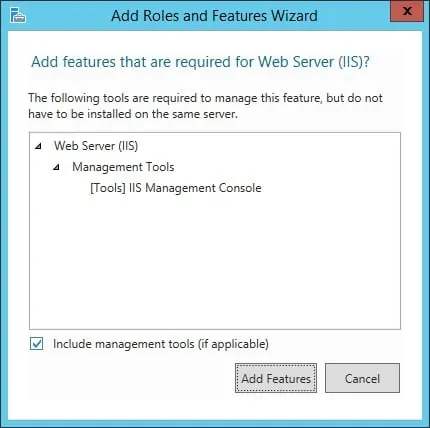
במסך הבא, לחץ על לחצן הוסף תכונות.
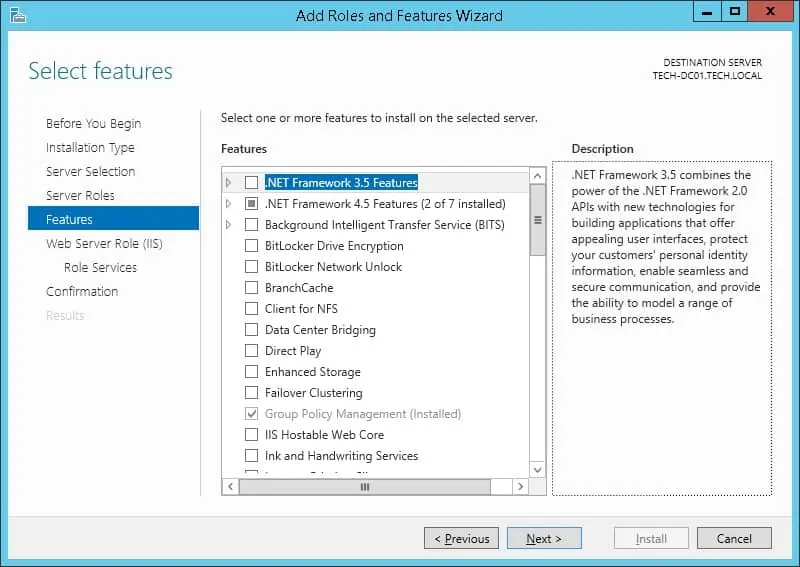
במסך תכונות, לחץ על לחצן הבא.
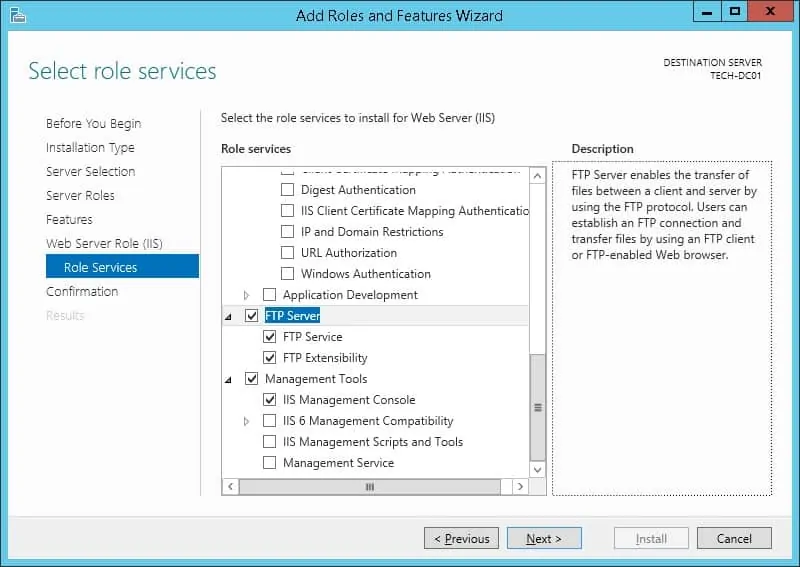
במסך שירות תפקיד, בחר באפשרות בשם שרת FTP ובשני אפשרויות המשנה.
במסך סיכום, לחץ על לחצן התקן.
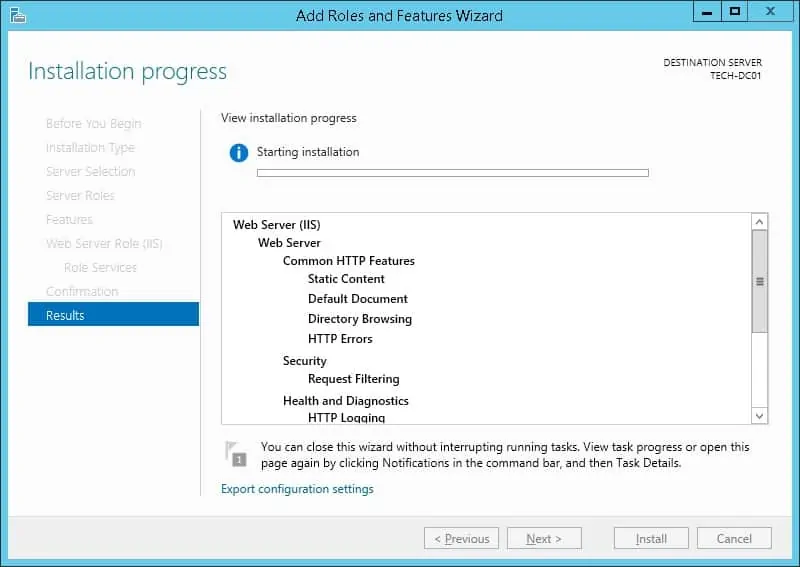
מזל טוב! סיימת את התקנת שירות FTP במחשב שבו פועל Windows Server.
ערכת לימוד של Windows - תצורת שרת FTP
לאחר סיום ההתקנה, צור קבוצת משתמשים.
חברים בקבוצה זו יהיו מורשים להשתמש בשרת FTP.
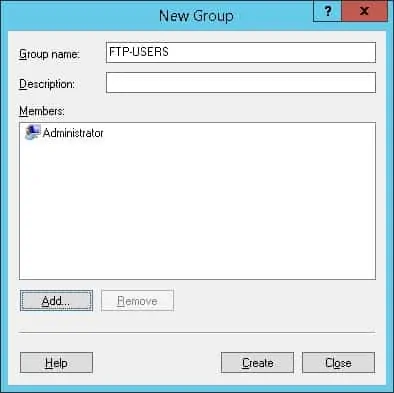
בדוגמה שלנו, יצרנו קבוצה מקומית בשם FTP-USERS.
צור ספריה לשימוש על-ידי שרת ה- FTP.
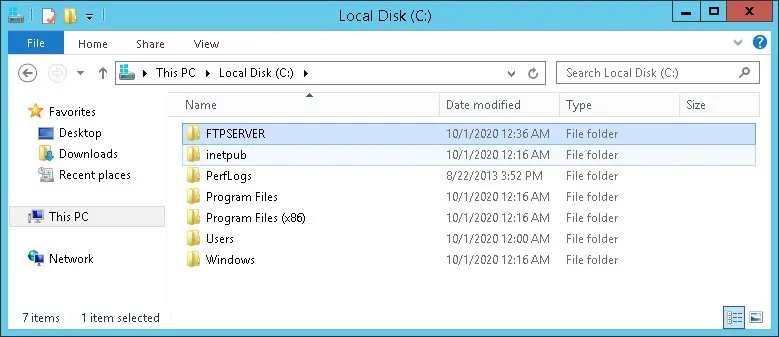
בדוגמה שלנו, יצרנו ספריה בשם FTPSERVER בבסיס כונן C.
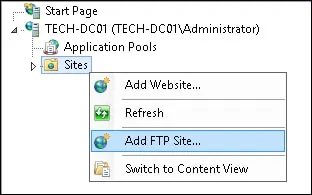
הפעל את היישום בשם: מנהל IIS.

לחץ באמצעות לחצן העכבר הימני על התיקיה בשם אתרים ובחר באפשרות להוסיף אתר FTP.
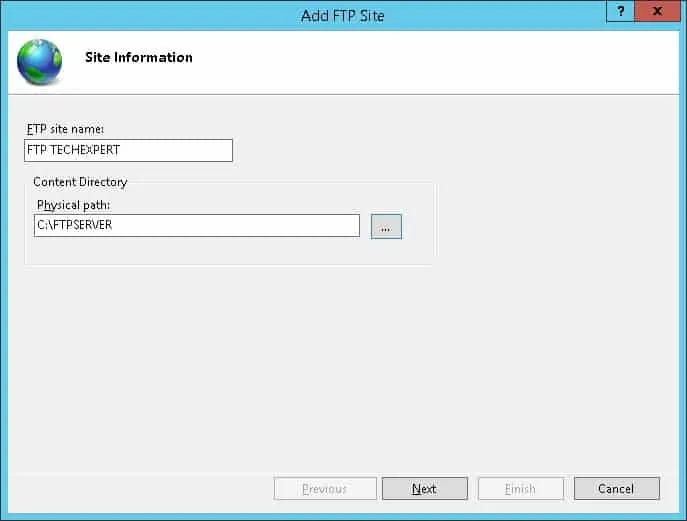
הזן זיהוי לאתר FTP החדש ובחר את הספריה הרצויה.
בדוגמה שלנו, בחרנו את הספריה שנוצרה קודם לכן.
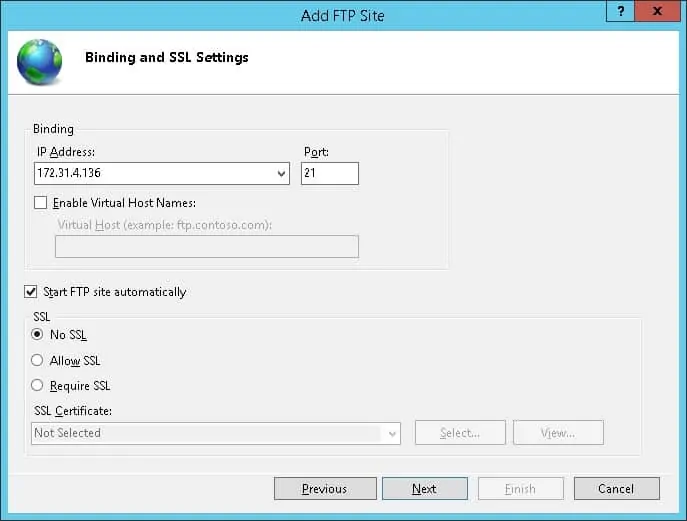
במסך הבא, בצע את התצורה הבאה.
• כתובת IP - בחר את כתובת ה-IP הרצויה
• הפעל אתר FTP באופן אוטומטי - כן
• SSL - אין SSL
לחץ על לחצן הבא.
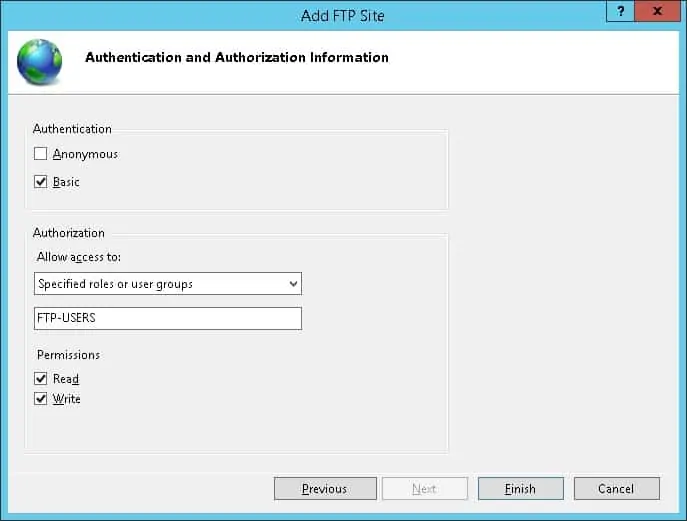
במסך הבא, בצע את התצורה הבאה.
• אימות אנונימי - לא
• אימות בסיסי - כן
• אפשר גישה - תפקידים שצוינו או קבוצות משתמשים
• שם קבוצה - FTP-משתמשים
• הרשאות - קריאה וכתוב
לחץ על לחצן סיום.
מזל טוב! הגדרת בהצלחה את שרת FTP במחשב שבו פועל Windows 2012 R2.
חומת האש של Windows - אפשר חיבור FTP
פתיחת היישום בשם חומת האש של Windows עם אבטחה מתקדמת
בחר באפשרויות כללי כניסה וודא שכללי ה- FTP זמינים.

במחשב מרוחק, פתח בקשה של DOS ונסה להתחבר לשרת ה-FTP שלך.
הנה הפלט של חיבור מוצלח.
גם אם כללי חומת האש של FTP נמצאים במקומם, קיימת אפשרות שהחיבור שלך ייחסם.
לחלופין, באפשרותך ליצור כלל חומת אש כדי לאפשר חיבור FTP.
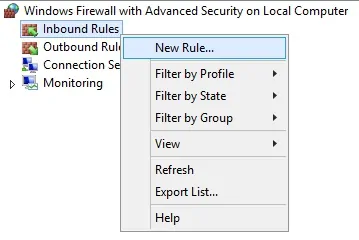
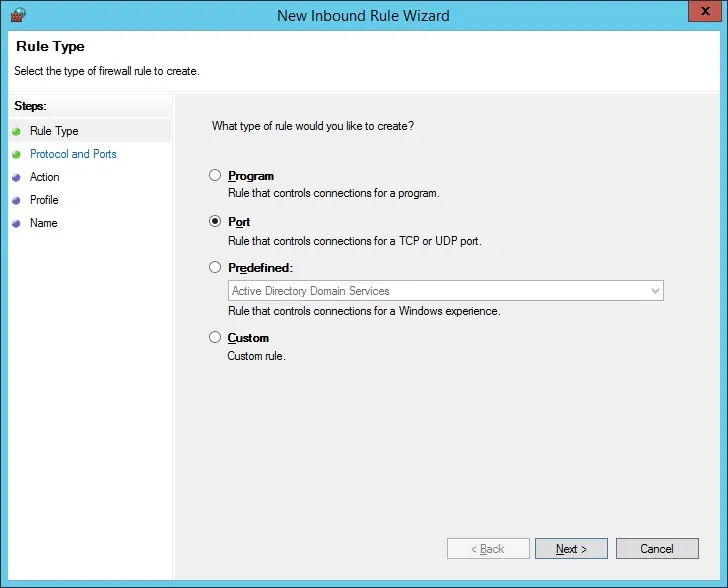
צור כלל חומת אש נכנס חדש.
בחר באפשרות יציאה.
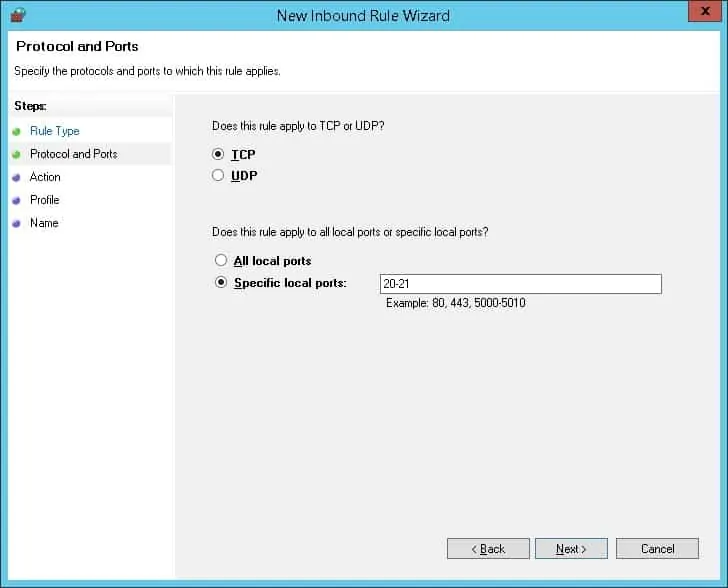
בחר באפשרות TCP.
בחר באפשרות יציאות מקומיות ספציפיות.
הזן את יציאת TCP: 20-21
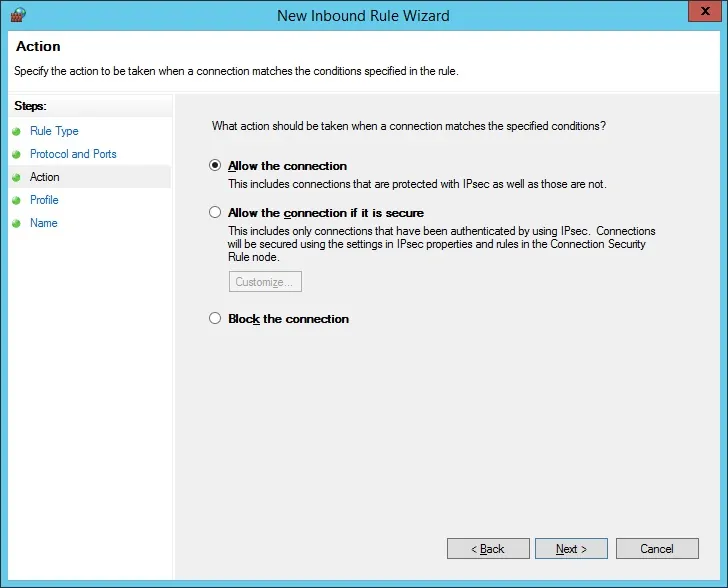
בחר באפשרות אפשר את החיבור.
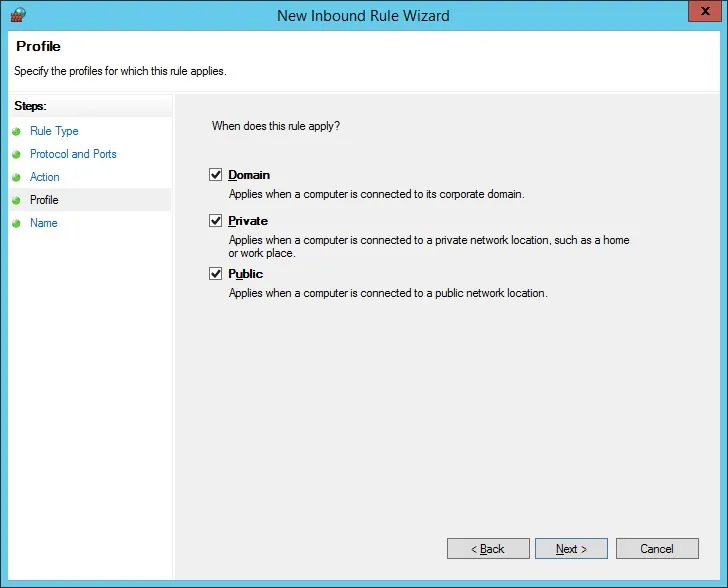
סמן את האפשרות DOMAIN.
בדוק את האפשרות פרטית.
בדוק את האפשרות ציבורית.
הזן תיאור לכלל חומת האש.
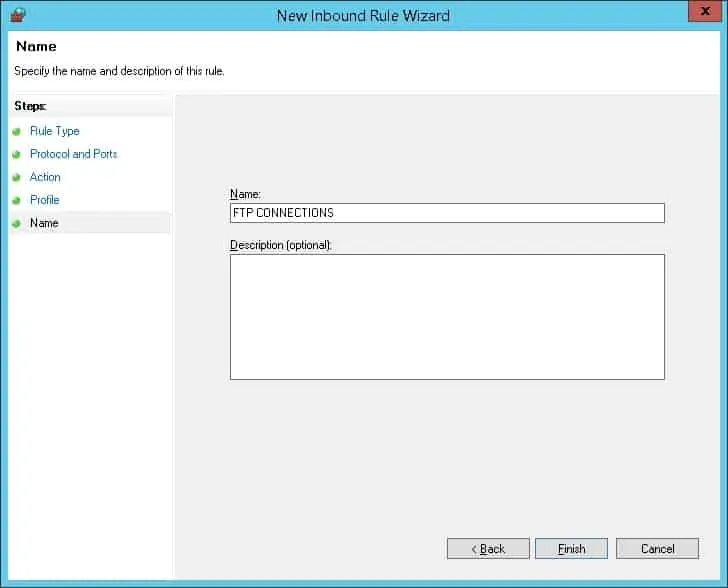
סיימת את תצורת חומת האש.
