Vuoi imparare a creare un certificato autofirmato usando Powershell? In questo tutorial, ti mostreremo come creare un certificato autofirmato su un computer che esegue Windows.
• Windows 2012 R2
• Windows 2016
• Windows 2019
• Finestre 2022
• Windows 10
• Windows 11
Elenco attrezzature
Qui puoi trovare l'elenco delle attrezzature utilizzate per creare questa esercitazione.
Questo link mostrerà anche l'elenco software utilizzato per creare questa esercitazione.
Esercitazione correlata a Windows:
In questa pagina, offriamo un rapido accesso a un elenco di tutorial relativi a Windows.
Esercitazione su Windows - Creare un certificato autofirmato
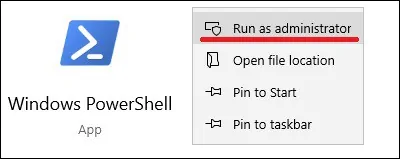
Come amministratore, avviare un nuovo prompt della riga di comando POWERSHELL.

Creare un certificato autofirmato tramite Powershell
Elencare i certificati nell'archivio personale del computer.
Ecco l'output del comando.
Esportare la chiave pubblica del certificato.
Ecco l'output del comando.
Importare questo certificato come autorità di certificazione radice attendibile.
Ecco l'output del comando.
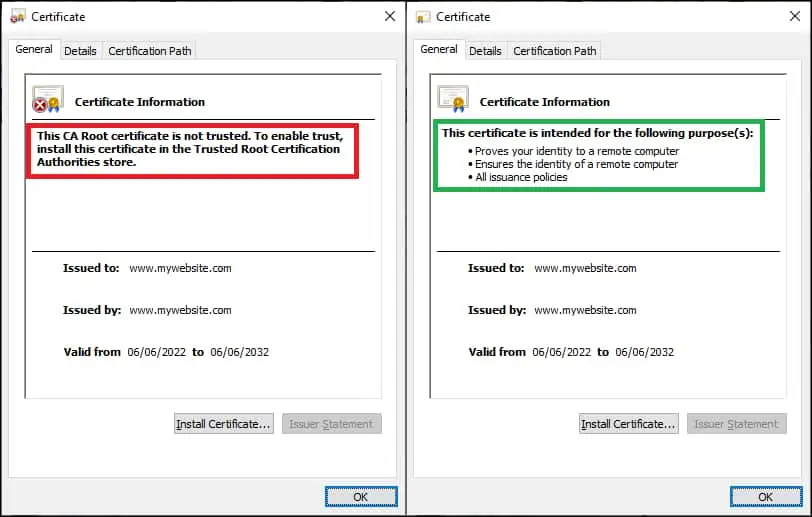
Accedere al file del certificato e verificare se il sistema lo considera attendibile.

Congratulazioni! È possibile creare un certificato autofirmato in Windows.
Esercitazione Powershell - Comandi di certificato autofirmati
Generare un certificato autofirmato con più nomi alternativi.
Esportare le chiavi pubbliche e private del certificato in un file protetto.
Congratulazioni! È possibile creare un certificato autofirmato in Windows.
