Wilt u leren hoe u de Apache Traffic Server installeert als een omgekeerde proxy op Ubuntu Linux? In deze tutorial laten we je alle stappen zien die nodig zijn om de Apache Traffic Server installatie op Ubuntu Linux in 5 minuten of minder uit te voeren.
• Ubuntu 18.04
• Ubuntu 19.10
• Apache Traffic Server 8.0.5
In ons voorbeeld luistert de Apache Traffic Server-service op de TCP-poort 80.
In ons voorbeeld luistert de Apache-service op de TCP-poort 8080.
Apache Traffic Server - Gerelateerde zelfstudie:
Op deze pagina bieden we snelle toegang tot een lijst met tutorials met betrekking tot de Apache Traffic Server.
Tutorial Apache Traffic Server - Reverse Proxy Installation on Ubuntu Linux
Installeer de Apache Traffic Server.
Bewerk het configuratiebestand records.config.
Zoek de volgende regel.
Wijzig de service van poort 8080 naar poort 80.
Start de Apache Traffic Server opnieuw.
Bewerk het configuratiebestand remap.config.
Voeg de volgende regels toe aan het einde van dit configuratiebestand.
In ons voorbeeld wordt elke verbinding met het IP-adres 200.200.200 op poort 80 doorgestuurd naar de localhost op poort 8080.
U moet het IP-adres 200.200.200.200 wijzigen in uw server-IP-adres.
Start de Apache Traffic Server opnieuw.
Controleer of de ATS-service luistert op de TCP-poort 80.
Hier is de opdrachtuitvoer.
U bent klaar met de Configuratie van de Apache-verkeersdienst op Ubuntu LInux.
Zelfstudie Apache Traffic Server - Cacheconfiguratie
De hoeveelheid schijfruimte die is toegestaan voor cache is opgegeven in het configuratiebestand storage.config.
Bewerk dit configuratiebestand.
Hier is de ATS standaard schijfcache configuratie.
Deze configuratie maakt het gebruik van 256 MB schijfruimte voor cache mogelijk.
De ATS-cacheconfiguratie is ingesteld op het configuratiebestand met de naam records.config.
Bewerk het configuratiebestand records.config.
Hier is de ATS standaard cache configuratie.
In deze configuratie wordt het volgende opgegeven:
• De ATS-service beheert automatisch de hoeveelheid RAM die wordt gebruikt voor cache.
• Objecten groter dan 4 MB worden niet bewaard in de RAM-cache.
• De maximale objectgrootte die in de cache wordt opgeslagen, is onbeperkt.
Nadat u de configuratiebestanden hebt gewijzigd, moet u de ATS-service opnieuw starten.
Gefeliciteerd! U de configuratie van de ATS-servicecache wijzigen.
Tutorial - Apache Installatie op Ubuntu Linux
Installeer de Apache-service.
Bewerk het configuratiebestand ports.conf.
Hier is het configuratiebestand ports.conf, vóór onze configuratie.
Wijzig de standaardpoort van Apache van 80 naar 8080.
Hier is het configuratiebestand ports.conf, na onze configuratie.
Start de Apache-service opnieuw.
Controleer of de Apache-service luistert op de TCP-poort 8080.
Hier is de opdrachtuitvoer.
U hebt de Apache-configuratie voltooid om de omgekeerde proxyservice te gebruiken.
Zelfstudie Apache Traffic Server - Uw installatie testen
Na het afronden van de installatie moet u uw configuratie testen.
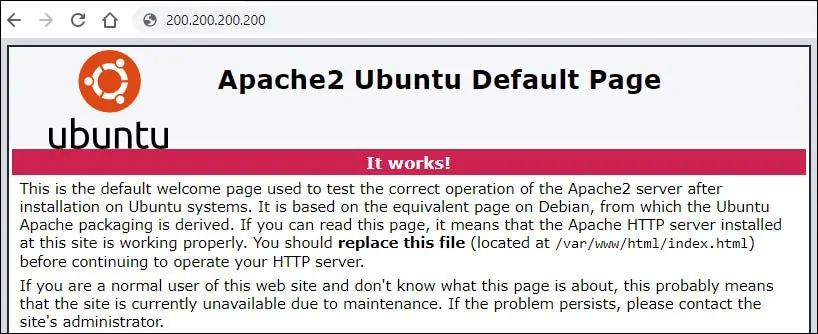
Open een browsersoftware en voer het externe IP-adres van uw Apache Traffic Server in.
In ons voorbeeld is de volgende URL ingevoerd in de browser:
• http://200.200.200.200
De ATS-service communiceert met de Apache-service en beantwoordt uw verzoek.

Gebruik de volgende opdracht om te controleren of de ATS-service uw verzoek beantwoordt.
Hier is de opdrachtuitvoer.
Zoals u zien op de koptekst, beantwoordt de Apache Traffic Server het verzoek van de gebruiker.
