是否希望了解如何在运行 Windows 的计算机上安装 IIS 并启用 Python CGI 功能? 在本教程中,我们将向您展示如何在 IIS 服务器上启用 Python CGI 功能。
• Windows 2012 R2
• Windows 2016
• Windows 2019
• Python 3
• IIS
窗口教程:
在此页上,我们提供对 Windows 教程列表的快速访问。
教程窗口 - IIS 安装
打开服务器管理器应用程序。
访问"管理"菜单并单击"添加角色和功能"。

在"服务器角色"屏幕上,选择名为"Web 服务器 IIS"的选项。
单击"下一步"按钮。
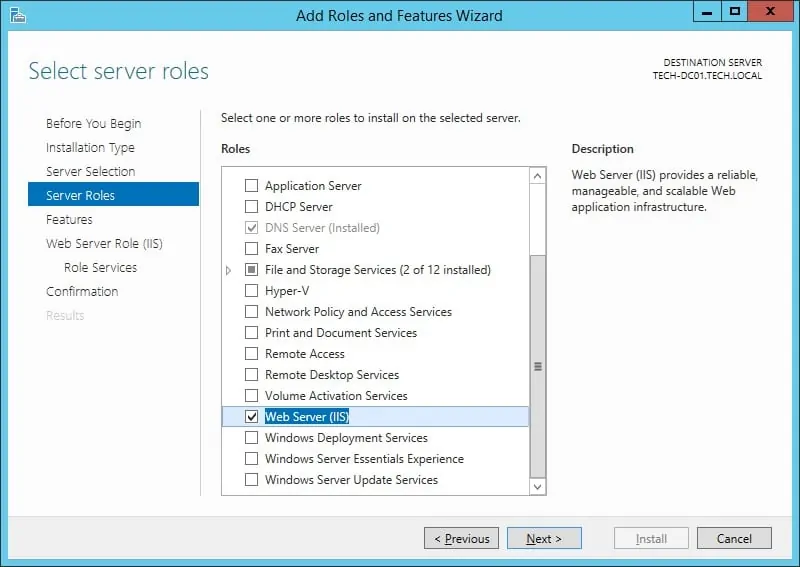
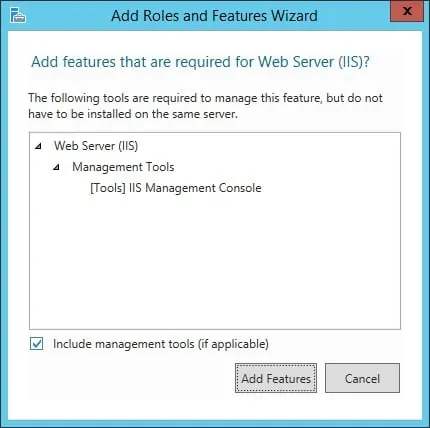
在以下屏幕上,单击"添加功能"按钮。
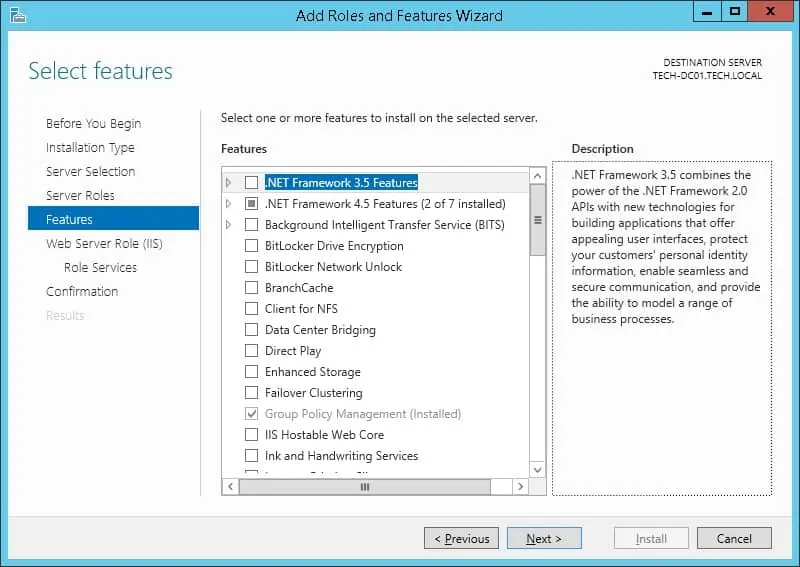
在"功能"屏幕上,单击"下一步"按钮。
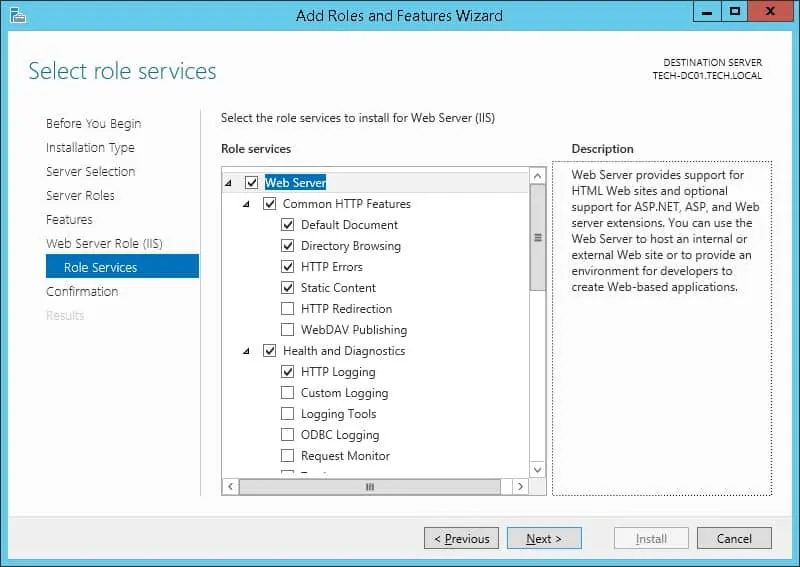
在"角色服务"屏幕上,单击"下一步"按钮。
在"摘要"屏幕上,单击"安装"按钮。
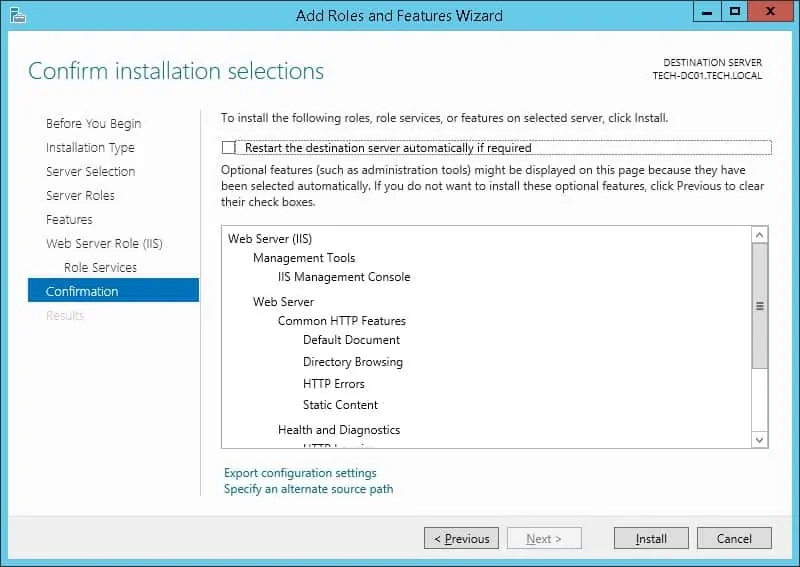
祝贺! 您已完成运行 Windows 的计算机上的 IIS 服务安装。
教程 IIS - 启用 CGI 功能
打开服务器管理器应用程序。
访问"管理"菜单并单击"添加角色和功能"。

在"服务器角色"屏幕上,展开名为:Web 服务器 IIS 的条目。
访问应用程序开发菜单并选择名为: CGI 的选项
单击"下一步"按钮。
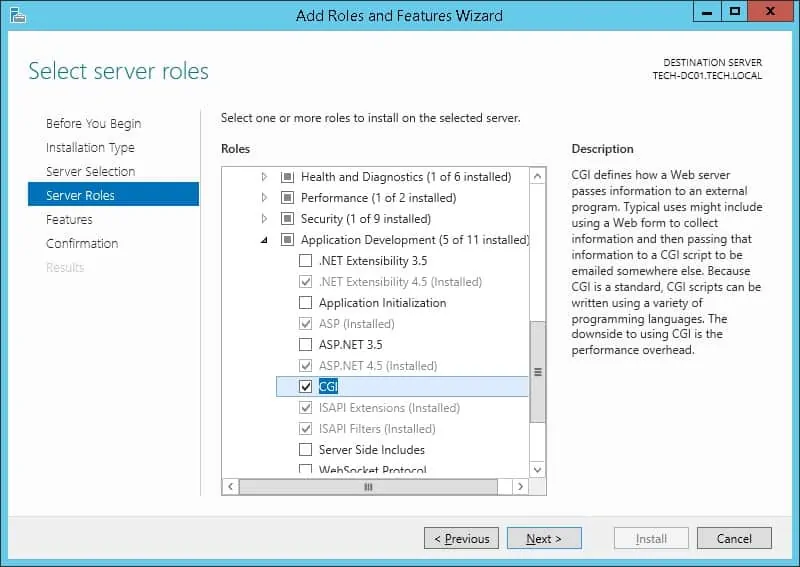
在"功能"屏幕上,单击"下一步"按钮。

在"摘要"屏幕上,单击"安装"按钮。
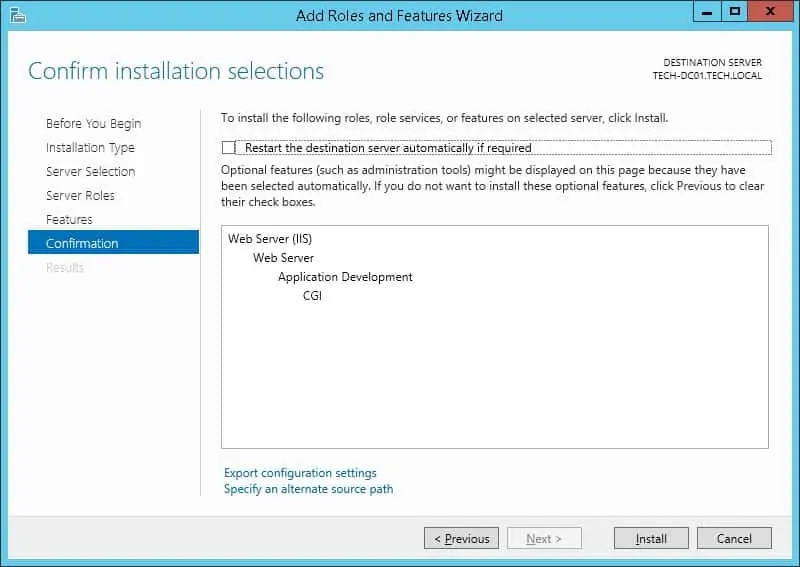
祝贺! 您已完成 IIS 上的 CGI 功能安装。
教程窗口 - Python 安装
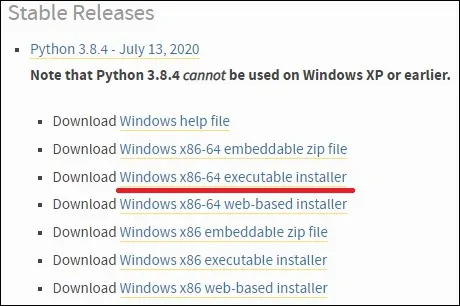
访问 Python网站并下载最新版本的 Python 安装程序。
在我们的示例中,我们下载了名为: Python-3.8.4-amd64.exe 的文件
作为管理员,启动 Python 安装。
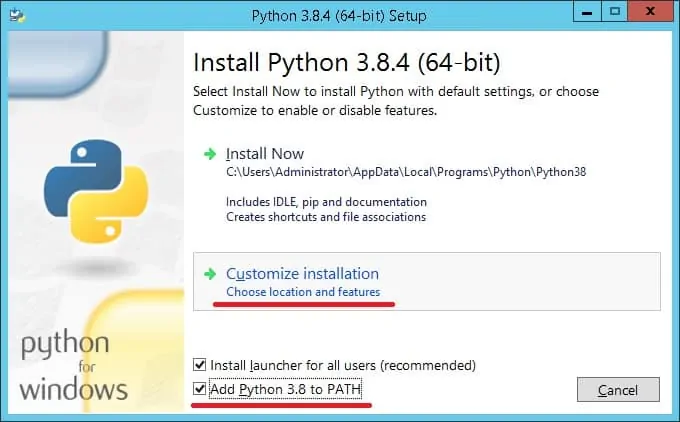
选择屏幕底部的两个复选框。
单击该按钮可自定义 Python 安装。
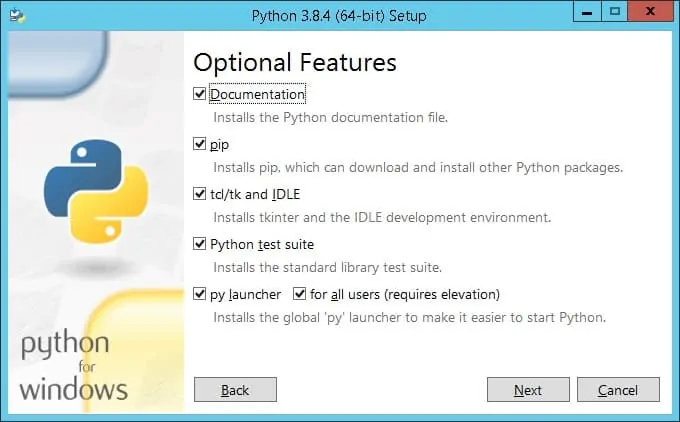
选择所有复选框,然后单击"下一步"按钮。
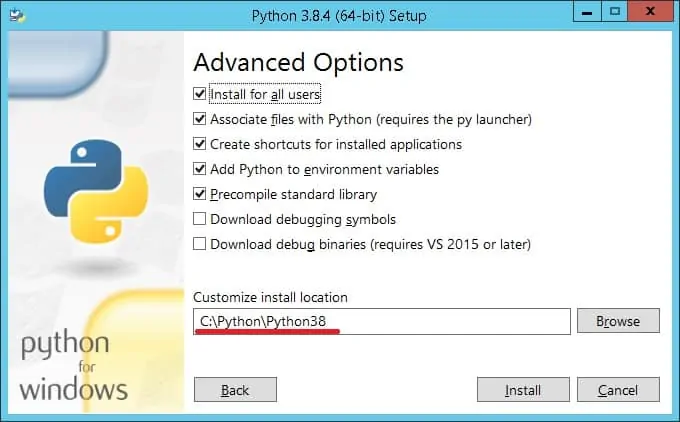
选择名为":所有用户安装"复选框。
将 Python 安装路径更改为驱动器 C 的根目录。
单击"下一步"按钮。
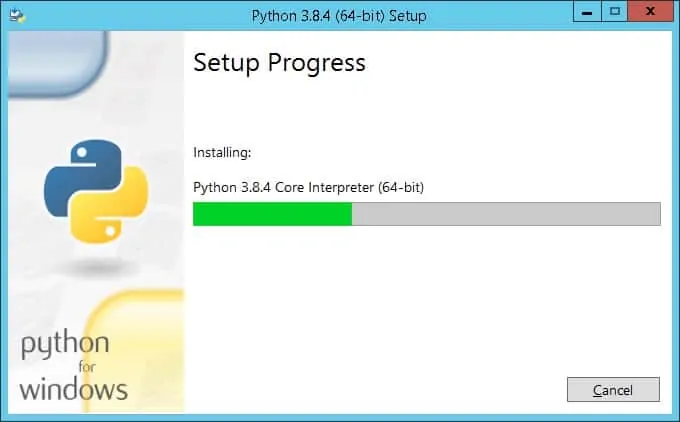
等待 Python 安装完成。
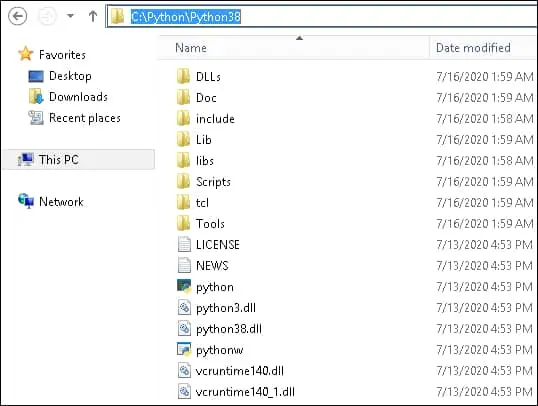
在我们的示例中,Python 安装在以下目录上。
重新启动计算机。
祝贺! 您已经完成了 Windows 上的 Python 安装。
教程 IIS - 在 IIS 服务器上启用 Python
启动名为:IIS 管理器的应用程序。

在 IIS 管理器应用程序上,选择 IIS 服务器名称。
在屏幕右侧,访问名为:处理程序映射的选项

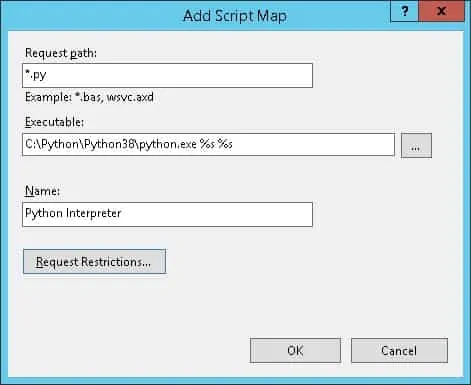
选择名为"添加脚本映射"的选项

执行以下配置:
• 请求路径 - *.py
• 可执行 - C:\Python\Python38\python.exe s s
• 口译员 - Python 解释器
单击"确定"按钮。
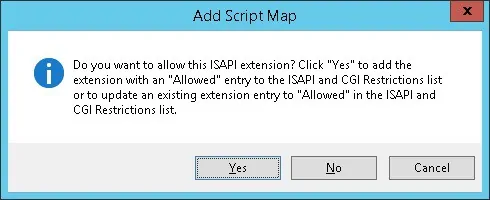
如果显示以下消息,请单击"是"按钮。
重新启动 IIS 服务。
祝贺! 在 IIS 服务器上成功启用了 Python。
教程 IIS - 创建 Python 页面
启动新的 DOS 命令行提示符。

使用 PIP 应用程序安装名为 ART 的 Python 库。
在我们的示例中,我们将使用此库创建一个测试页。
访问 IIS 根目录。
创建 Python 测试页。
使用记事本应用程序打开 Python 测试页。
将其内容替换为以下代码。
打开浏览器并输入 Web 服务器的 IP 地址加上 /test.py。
在我们的示例中,浏览器中输入了以下 URL:
• http://172.31.7.220/test.py
Python 页面应显示以下消息。
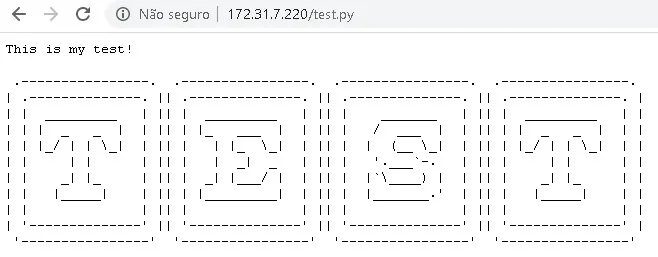
祝贺! Python 扩展在 IIS 上已成功安装。
