Would you like to learn how to configure the Moodle LDAP authentication on Active Directory? In this tutorial, we are going to show you how to authenticate Moodle users using the Active Directory from Microsoft Windows and the LDAP protocol.
• Ubuntu 18.04
• Ubuntu 19.04
• Moodle 3.8.1
Moodle Related Tutorial:
On this page, we offer quick access to a list of tutorials related to Moodle.
Tutorial Windows - Domain Controller Firewall
• IP - 192.168.15.10
• Operacional System - WINDOWS 2012 R2
• Hostname - TECH-DC01
First, we need to create a Firewall rule on the Windows domain controller.
This firewall rule will allow the Moodle server to query the Active directory.
On the domain controller, open the application named Windows Firewall with Advanced Security
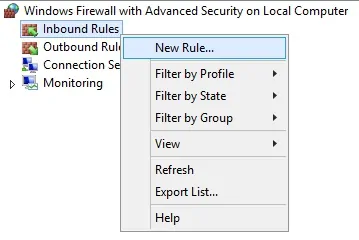
Create a new Inbound firewall rule.
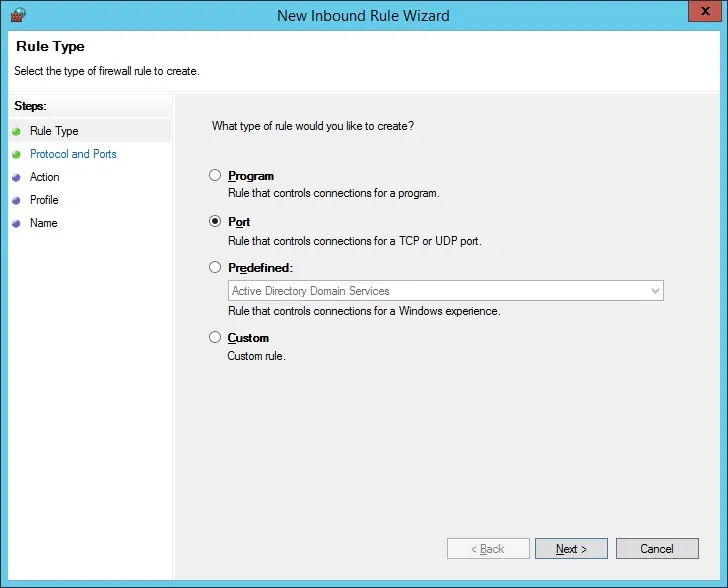
Select the PORT option.
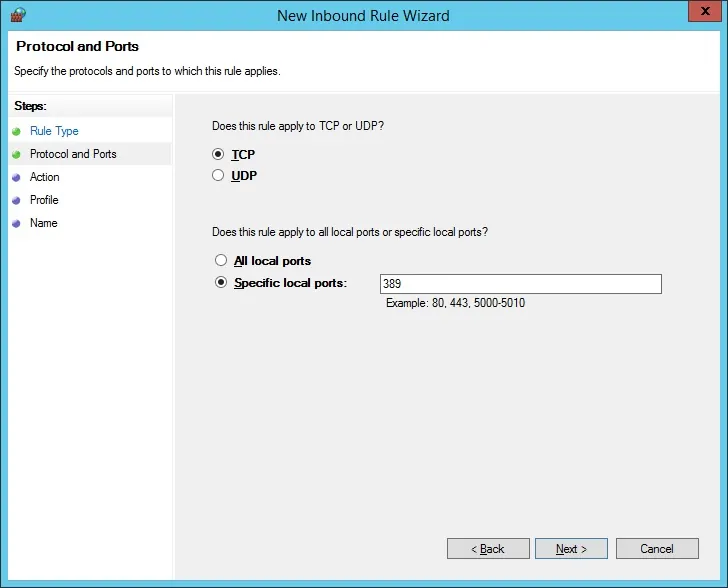
Select the TCP option.
Select the Specific local ports option.
Enter the TCP port 389.
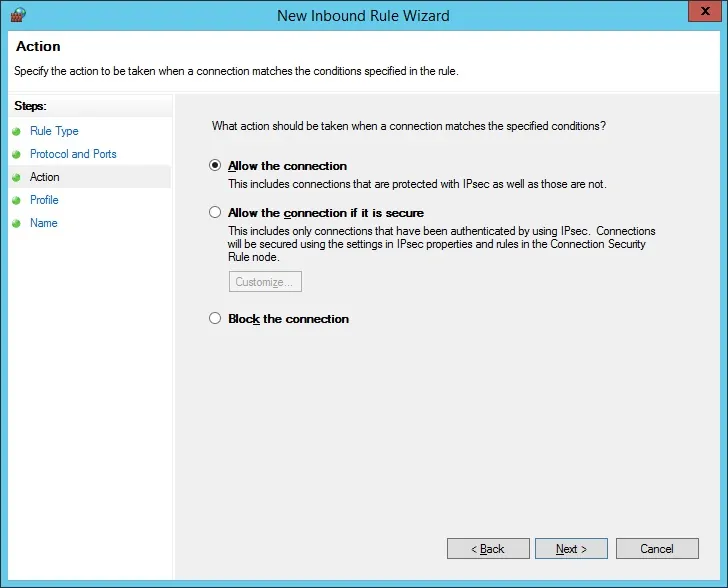
Select the Allow the connection option.
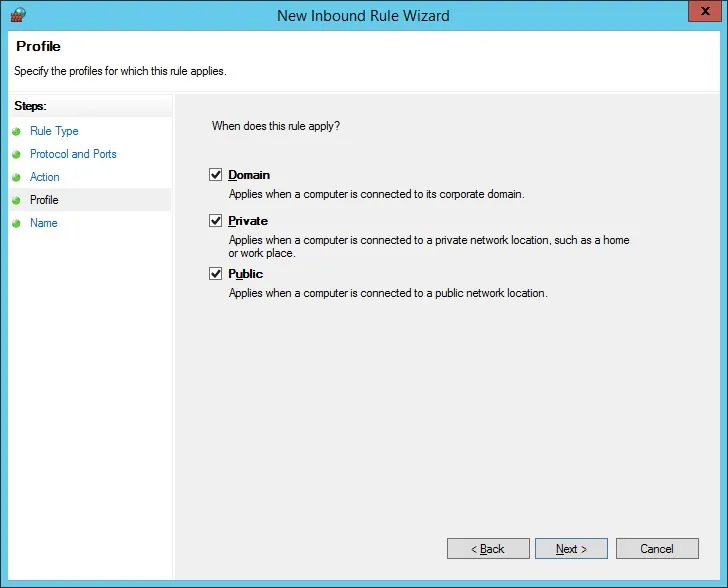
Check the DOMAIN option.
Check the PRIVATE option.
Check the PUBLIC option.
Enter a description to the firewall rule.
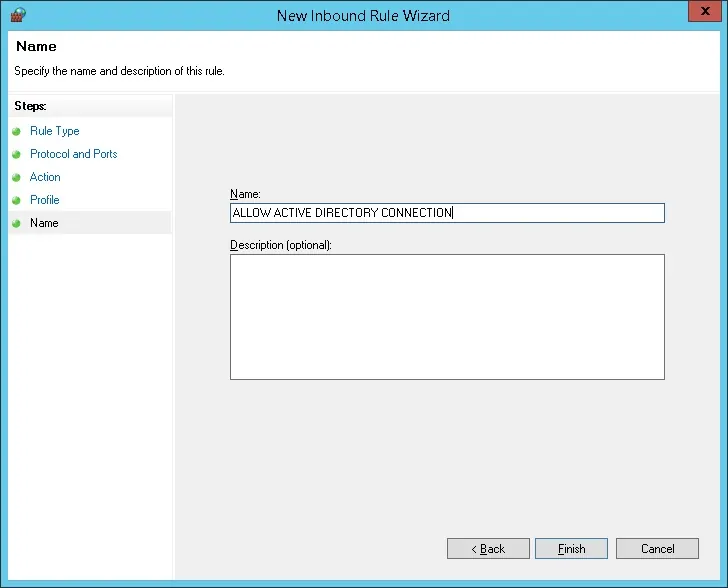
Congratulations, you have created the required firewall rule.
This rule will allow the Moodle server to query the Active directory database.
Tutorial Windows - Domain Account Creation
Next, we need to create at least 2 accounts on the Active directory database.
The ADMIN account will be used to login on the Moodle server.
The BIND account will be used to query the Active Directory database.
On the domain controller, open the application named: Active Directory Users and Computers
Create a new account inside the Users container.
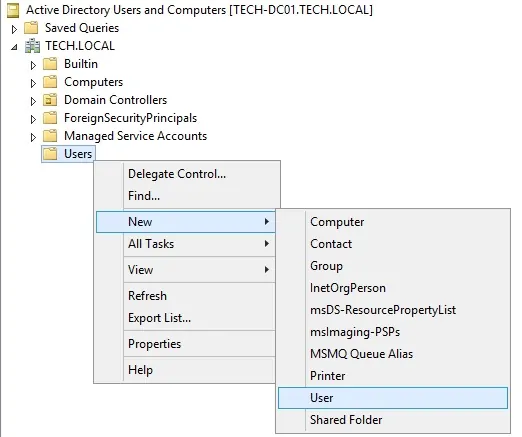
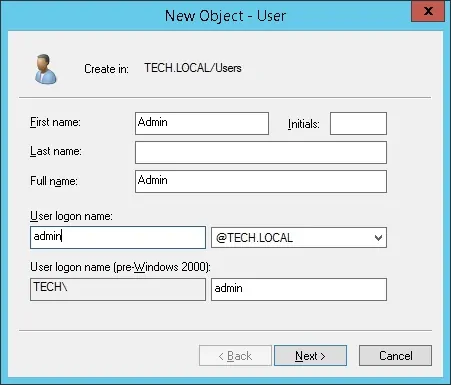
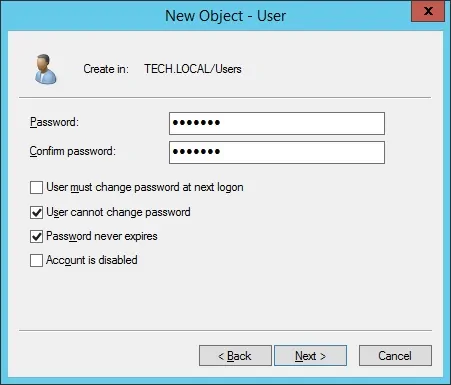
Create a new account named: admin
Password configured to the ADMIN user: 123qwe..
This account will be used to authenticate on the Moodle web interface.
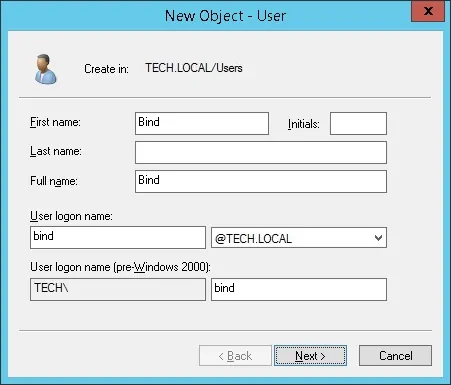
Create a new account named: bind
Password configured to the BIND user: kamisama123..
This account will be used to query the passwords stored on the Active Directory database.
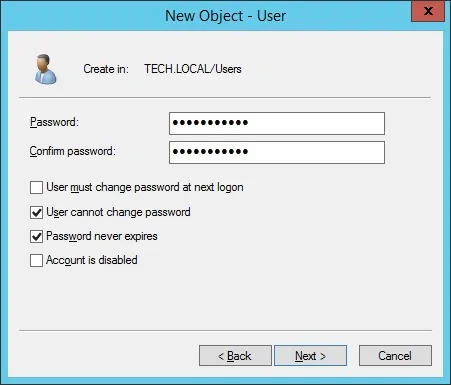
Congratulations, you have created the required Active Directory accounts.
Tutorial Windows - Domain Group Creation
Next, we need to create at least 2 groups on the Active directory database.
On the domain controller, open the application named: Active Directory Users and Computers
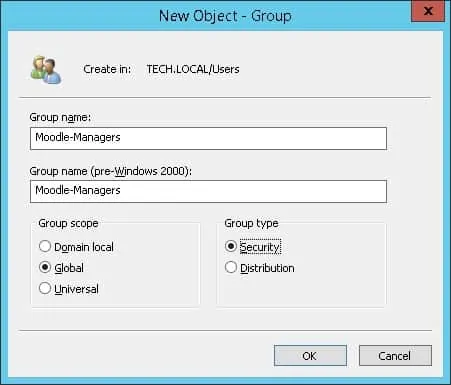
Create a new group inside the Users container.
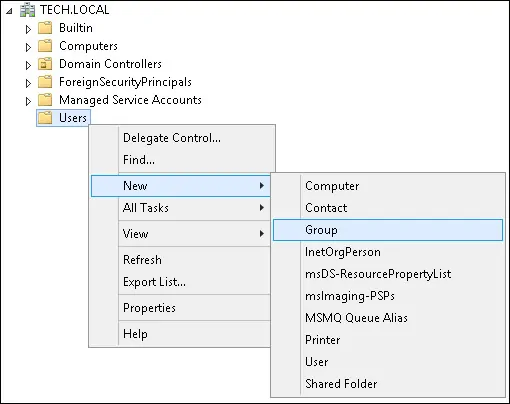
Create a new group named: Moodle-Managers.
Members of this group will have the administrative permission on the Moodle web interface.
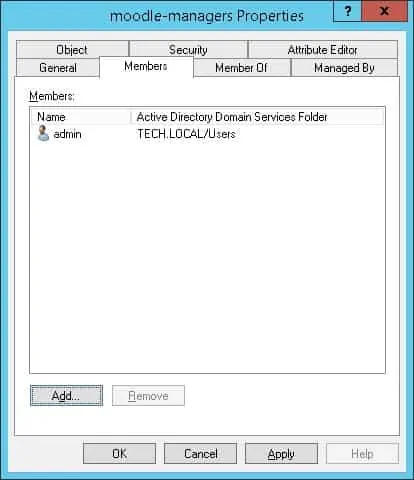
Important! Add the admin user as a member of the Moodle-Managers group.
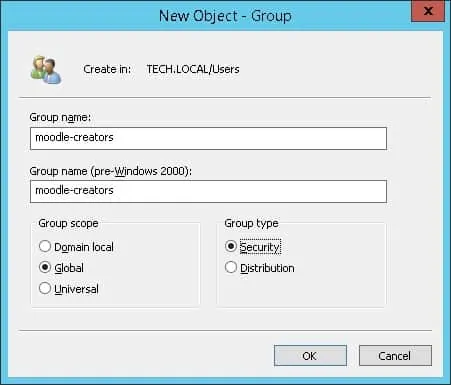
Create a new group named: Moodle-Creators.
Members of this group will have the permission to create training courses on the Moodle web interface.
Congratulations, you have created the required Active Directory group.
Moodle - LDAP Authentication on Active Directory
On the Moodle server, install the required PHP module.
Restart the Apache service.
Open your browser and enter the IP address of your moodle server /moodle
In our example, the following URL was entered in the Browser:
• http://192.168.0.15/moodle
The Moodle web interface should be presented, click on the Login option.
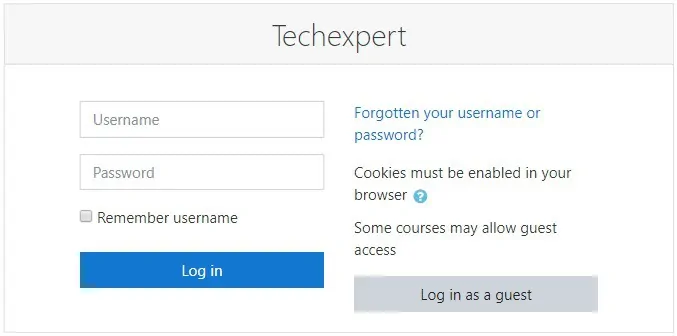
On the prompt screen, enter the administrative account login information.
After a successful login, the Moodle dashboard will be displayed.

Access the Site administration menu and select the Plugins tab.

On the Plugins tab, locate the Authentication area and select the option named Manage authentication.

Access the LDAP server settings.

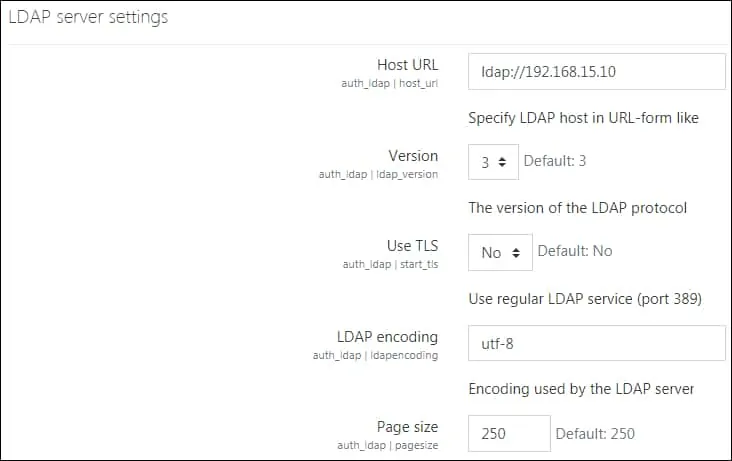
On the LDAP Server settings area, perform the following configuration:
• Host URL - ldap://192.168.15.10
• Version - 3
• Use TLS - No
You need to change the IP address to your domain controller IP.
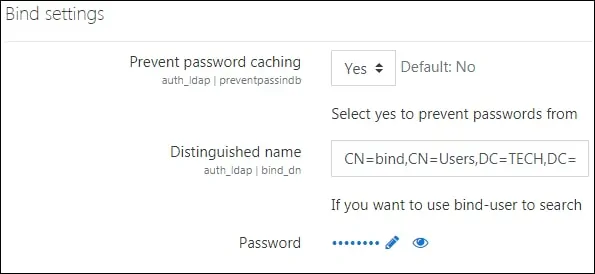
On the Bind settings area, perform the following configuration:
• Prevent password caching - Yes
• Distinguished name - CN=bind,CN=Users,DC=TECH,DC=LOCAL
• Password - kamisama123..
You need to change the bind credentials to reflect your Network environment.
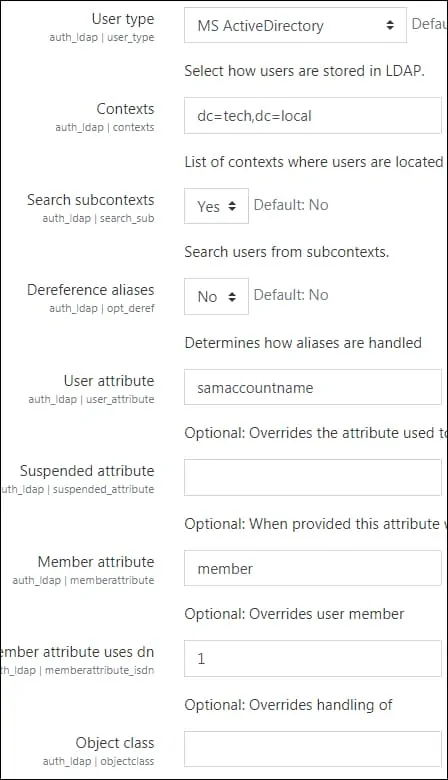
On the User lookup settings area, perform the following configuration:
• User type - MS ActiveDirectory
• Contexts - dc=tech,dc=local
• Search subcontexts - Yes
• User attribute - samaccountname
• Member attribute - member
• Member attribute uses dn - 1
You need to change the domain information to reflect your Network environment.
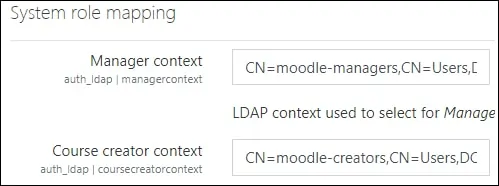
On the System role mapping area, perform the following configuration:
• Manager context - CN=moodle-managers,CN=Users,DC=TECH,DC=LOCAL
• Course creator context - CN=moodle-creators,CN=Users,DC=TECH,DC=LOCAL
In our example, members of the Moodle-Managers group will have the administrative permission on the Moodle web interface.
In our example, members of the Moodle-Creators group will have permission to create courses on the Moodle web interface.
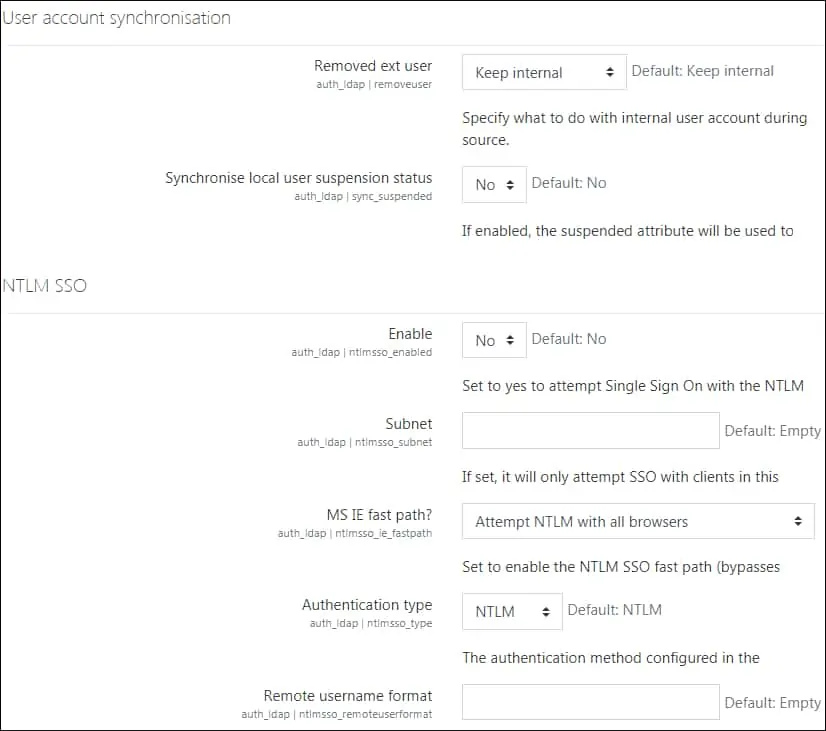
On the User account synchronisation area, perform the following configuration:
• Removed ext user - Keep internal
• Synchronise local user suspension status - No
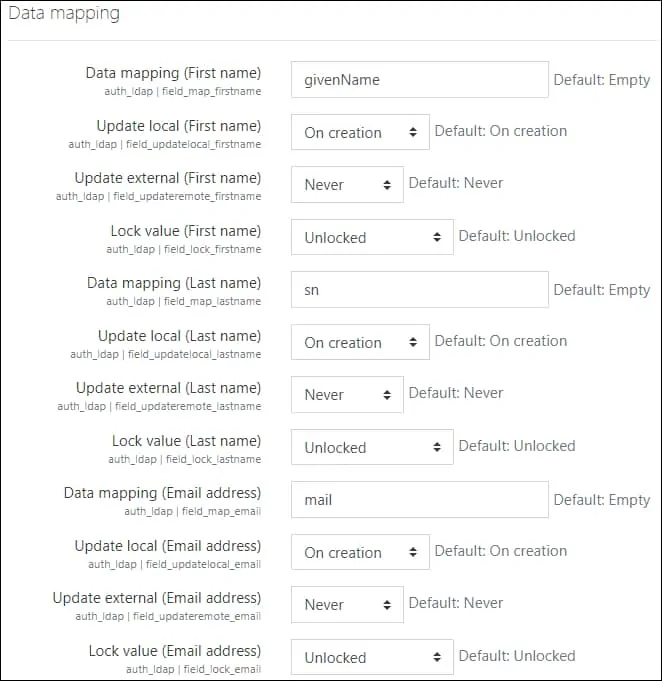
On the Data mapping area, perform the following configuration:
• Data mapping (First name) - givenName
• Data mapping (Last name) - sn
• Data mapping (Email address) - mail
Click on the Save changes button to finish the configuration.
Moodle - Enabling the LDAP Authentication
Access the Site administration menu and select the Plugins tab.

On the Plugins tab, locate the Authentication area and select the option named Manage authentication.

Click on the eye icon to enable the LDAP authentication.

After finishing your configuration, you should log off the Moodle web interface.
Try to login using the admin user and the password from the Active Directory.
• Username: Admin
• Password: Enter the Active directory password.

Congratulations! You have configured the Moodle authentication to use the Active Directory.
