Would you like to learn how to install Apache Kafka on a computer running Ubuntu Linux on the Amazon AWS cloud? In this tutorial, we are going to show you how to create a new account at Amazon AWS, how to create an Ubuntu virtual machine instance and how to perform the Apache Kafka installation on a new virtual machine on the Amazon EC2 cloud.
• Ubuntu 18.04
• Ubuntu 19.04
• Ubuntu 19.10
• Apache Kafka 2.12-2.3.1
• Openjdk version 11.0.4
Hardware List:
The following section presents the list of equipment used to create this Apache Kafka tutorial.
Every piece of hardware listed above can be found at Amazon website.
Apache Kafka Related Tutorial:
On this page, we offer quick access to a list of tutorials related to Apache Kafka.
Tutorial AWS - How to Create a Key Pair
To access a Linux Virtual Machine on AWS, first, you need to create a private Key.
Open your browser, access the Amazon AWS website and enter your login information.
After a successful login, you will be sent to the AWS Dashboard.
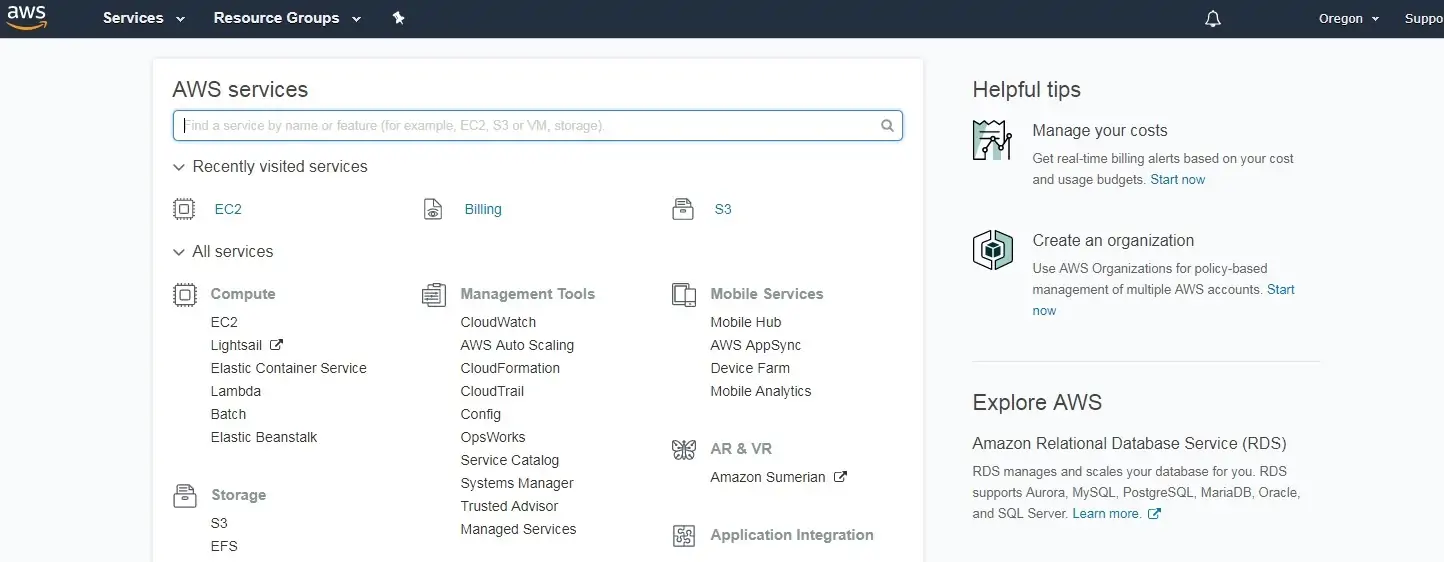
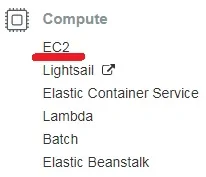
Access the COMPUTE menu and select the EC2 option.
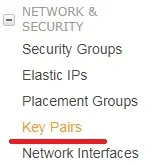
On the EC2 Dashboard, access the Network & Security menu and click on the Key Pairs option.
On the Key Pairs screen, click on the Create Key Pair button.
You will have to enter a name to the new Key Pair.
You will have to save locally your private key.
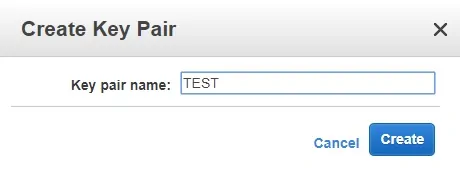
In our example, we created a key pair named TEST.
In our example, we saved a file named TEST.PEM.
Tutorial - How to Create an AWS EC2 Ubuntu
On the EC2 Dashboard, access the Instances menu and click on the Instances option.
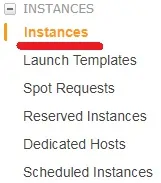
On the EC2 Instance screen, click on the Launch Instance button.

Now, it is time to select the desired Operational system image.
On the list presented, locate and select the Ubuntu Linux image.

As the second step, you will have to select the type of virtual machine that will run the Ubuntu Linux.
Basically, you will select the number of processors and the amount of RAM that you want.

If you do not want to specify the amount of hard disk available to this virtual machine, click on the Review and Launch button.
If you want to specify the amount of hard disk available to this virtual machine, click on the Configure instance detail button.
On the summary screen, click on the Launch button.

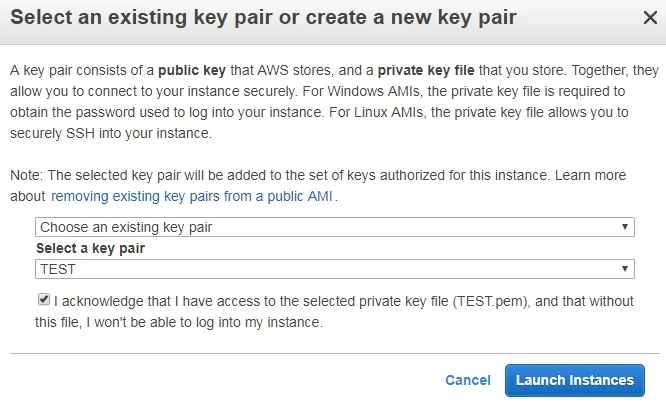
Select the Key pair authorized to connect to the new virtual machine and click on the Launch Instances.
In our example, the key pair named TEST was selected.
On the EC2 Dashboard, access the Instances menu and click on the Instances option.
As you can see a new virtual machine was created.

In our example, the virtual machine got the Dynamic IP address: 34.217.14.140
Tutorial - How to Access an AWS Ubuntu
To access the Linux virtual machine you will have to download the following software:
• Putty
• PuttyGen
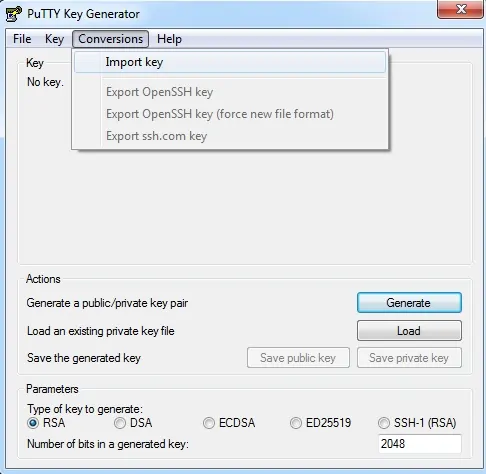
First, we need to convert the private key from the PEM format to the PPK format.
Open the PuttyGen software, access the Conversions menu and select the Import key.
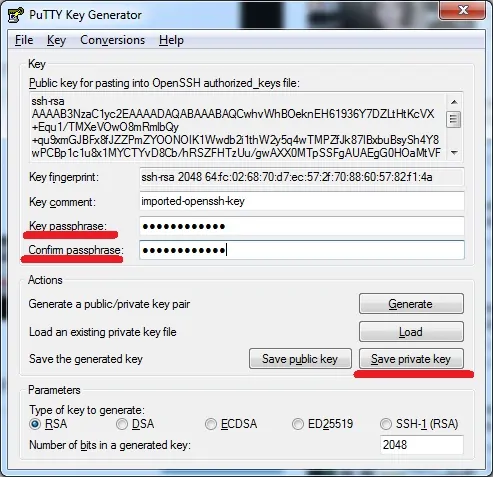
After importing the PEM file, you need to set a password to protect your private key.
Click on the Save private key button to generate a file with the PPK extension.
In our example, a file named TEST.PPK was created.
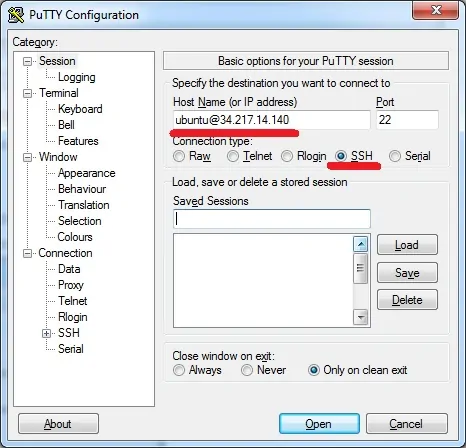
Open the Putty software, select the SSH option and enter the username ubuntu@ followed by the IP address of the AWS virtual machine.
In our example, we used ubuntu@34.217.14.140.
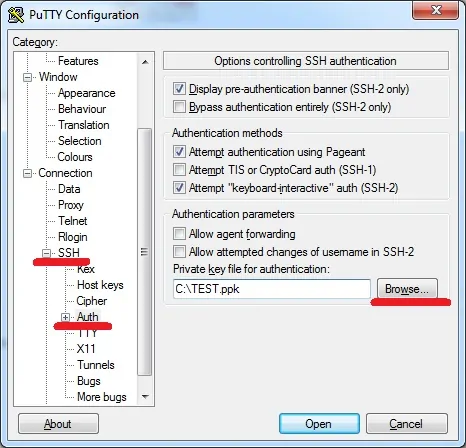
Access the SSH authentication tab, click on the Browse button, locate the PPK file and click on the Open button.
An SSH connection will be started with your Ubuntu virtual machine.
Use the following command to become the root user on the Ubuntu virtual machine.
You have successfully created an Ubuntu virtual Machine on Amazon AWS.
Tutorial - Apache Kafka Installation on Ubuntu Linux
Install the Java JDK package.
Use the following command to find the Java JDK installation directory.
This command output should show you the Java installation directory.
In our example, our Java JDK is installed under the folder: /usr/lib/jvm/java-11-openjdk-amd64
Now, you need to create an environment variable named JAVA_HOME.
Let’s create a file to automate the required environment variables configuration
Here is the java.sh file content.
Reboot the computer.
Use the following command to verify if the JAVA_HOME variable was created.
Here is the command output:
Use the following command to test the Java installation.
Here is the command output:
Install the Zookeeperd package.
Verify if the Zookeeperd service is running.
Here is the command output:
Configure Zookeeperd to start automatically during boot time.
Download the Apache Kafka package.
Install the Apache Kafka server.
Now, you need to create an environment variable named KAFKA_HOME.
Let’s create a file to automate the required environment variables configuration
Here is the kafka.sh file content.
Reboot the computer.
Use the following command to verify if the KAFKA_HOME variable was created.
Here is the command output:
Create a symbolic link to make it easier to find the Kafka configuration file.
Start the Apache Kafka service.
Here is a sample of the information that should be displayed:
Congratulations! You have finished the Apache Kafka installation on Ubuntu Linux.
Apache Kafka Command Examples
Use the following command to create a topic named TopicTest on your Apache Kafka server.
Use the following command to send a message to the Topic named TopicTest using the Kafka Producer API.
Enter the desired message.
Keep this terminal open.
On another Linux terminal, use the following command to fetch the messages from the Topic named TopicTest using the Kafka Consumer API.
Congratulations! You are able to send and receive messages from an Apache Kafka server.
