証明機関を Windows サーバーにインストールする方法を学習しますか? このチュートリアルでは、Windows サーバーを実行しているコンピューターに証明機関をインストールして構成する方法を説明します。
• ウィンドウズ 2012 R2
ハードウェアリスト:
次のセクションでは、この Windows チュートリアルを作成するために使用する機器の一覧を示します。
上記のハードウェアの一部は、Amazonのウェブサイトで見つけることができます。
ウィンドウズプレイリスト:
このページでは、Windows のインストールに関連するビデオの一覧にすばやくアクセスできます。
FKITという名前の私たちのユーチューブチャンネルに登録することを忘れないでください。
ウィンドウズ関連のチュートリアル:
このページでは、Windows のインストールに関連するチュートリアルの一覧にすばやくアクセスできます。
チュートリアル - Windows への証明機関のインストール
サーバー マネージャー アプリケーションを開きます。
[管理] メニューにアクセスし、[ロールと機能の追加] をクリックします。

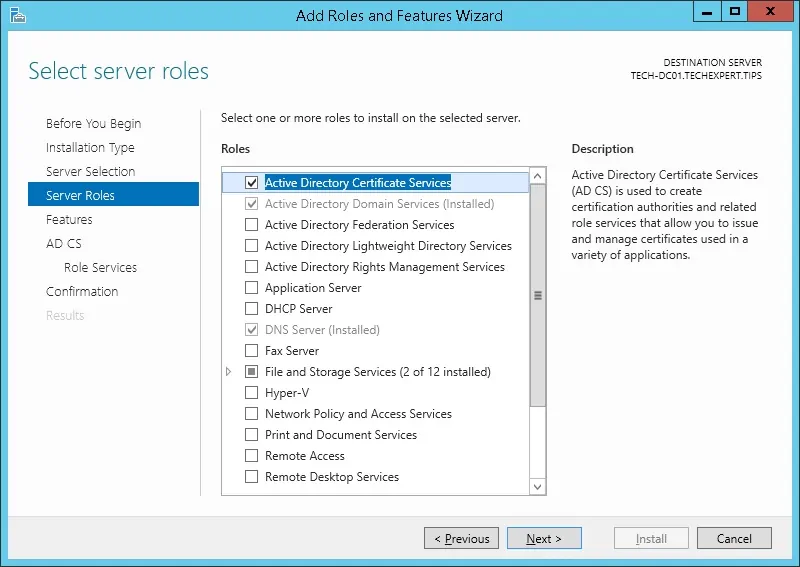
[サーバーの役割] 画面にアクセスし、[Active Directory 証明書サービス] を選択して [次へ] ボタンをクリックします。
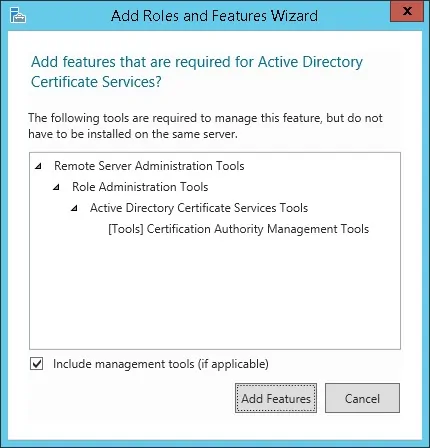
次の画面で、[機能の追加] ボタンをクリックします。
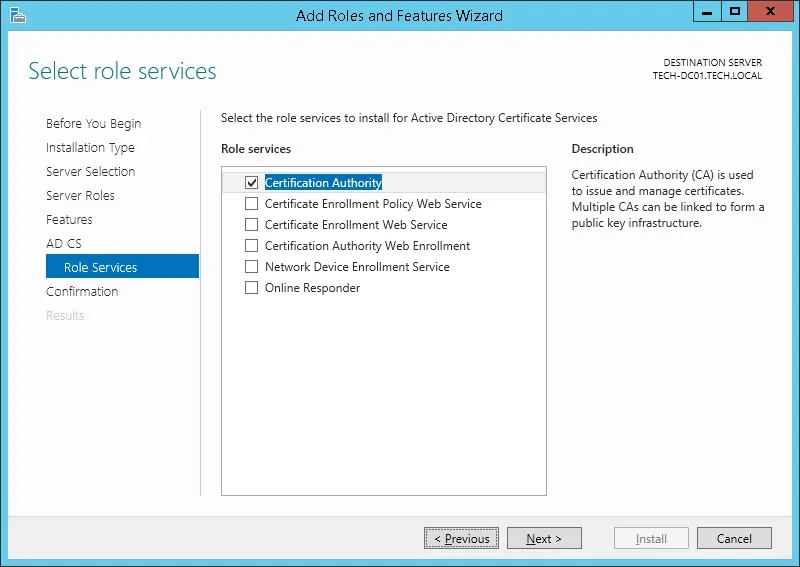
役割サービス画面が表示されるまで、[次へ] ボタンをクリックし続けます。
[証明機関] という名前のオプションを有効にし、[次へ] をクリックします。
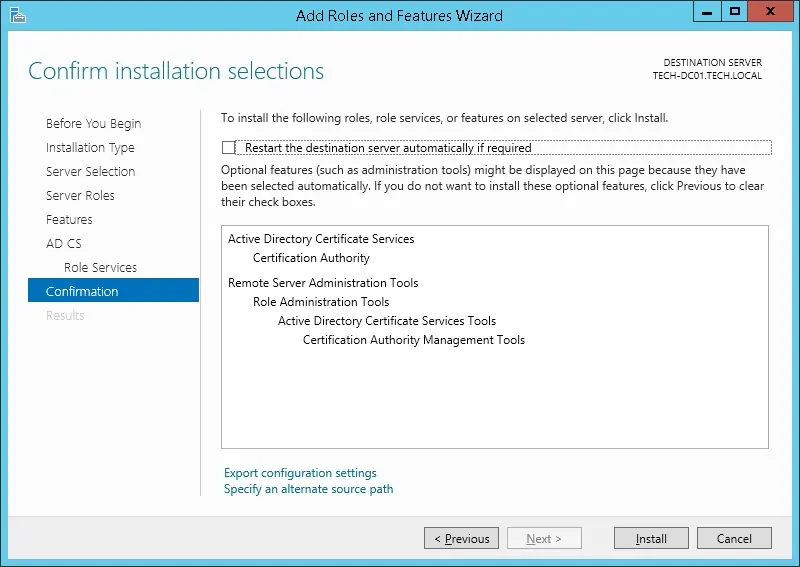
確認画面で、[インストール]ボタンをクリックします。
証明機関のインストールが完了するまで待ちます。
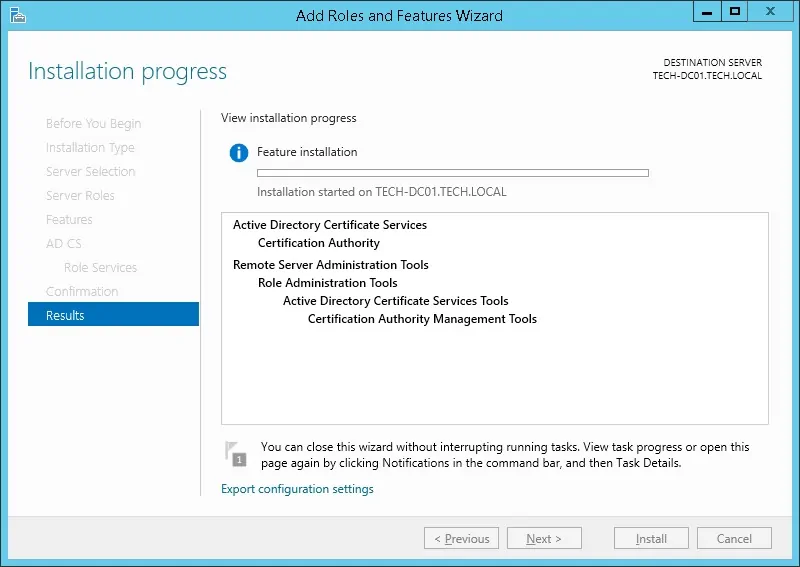
Windows サーバーでの Active ディレクトリ証明機関のインストールが完了しました。
チュートリアル - Active Directory 証明機関の構成
サーバー マネージャー アプリケーションを開きます。
黄色のフラグ メニューをクリックし、オプションを選択します。

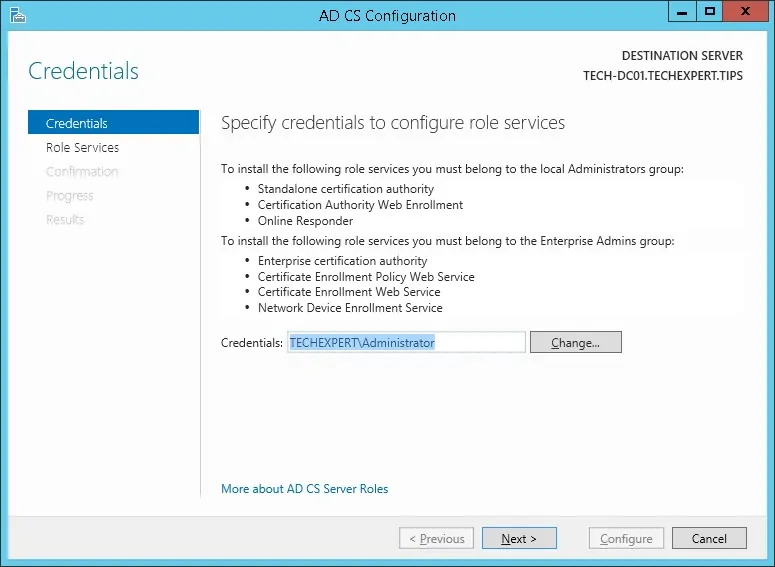
資格情報画面で、[次へ] ボタンをクリックします。
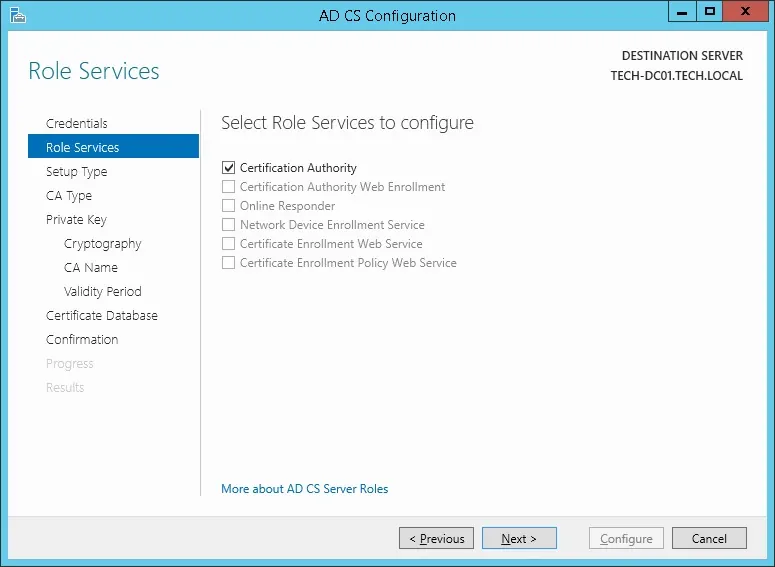
[証明機関] オプションを選択し、[次へ] ボタンをクリックします。
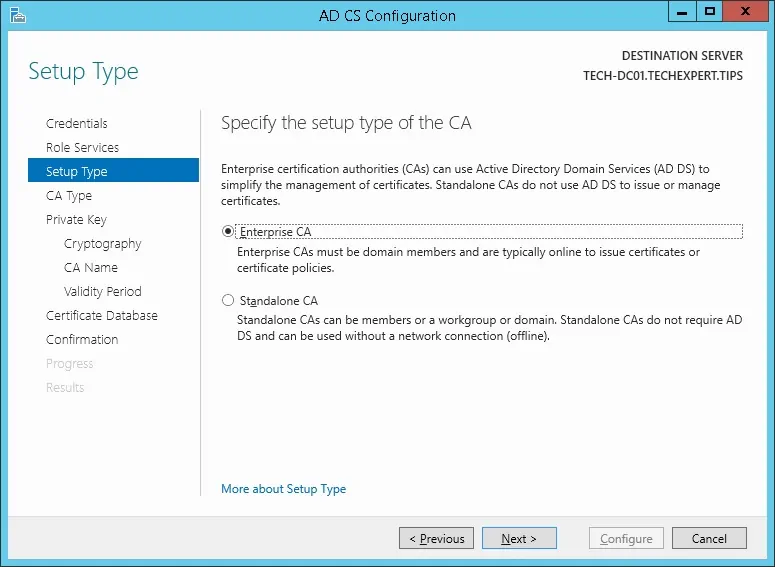
[エンタープライズ CA] オプションを選択し、[次へ] をクリックします。
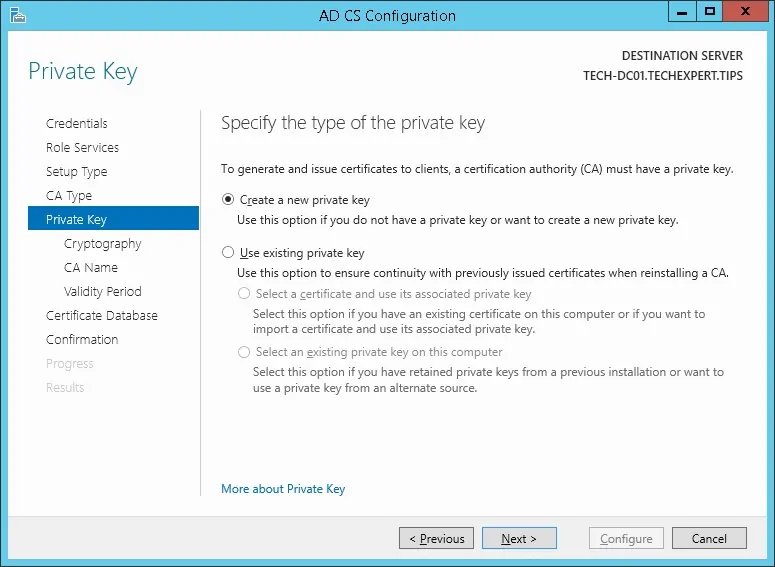
[新しい秘密キーを作成する] オプションを選択し、[次へ] ボタンをクリックします。
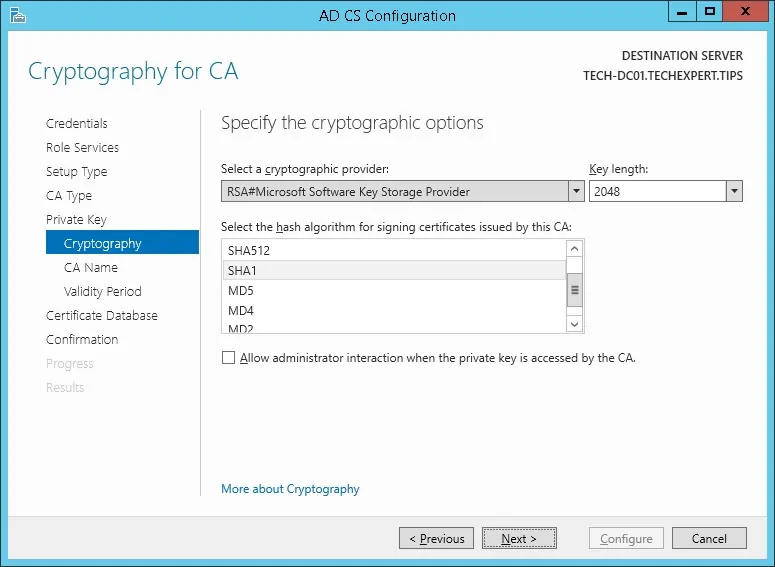
デフォルトの暗号化構成を維持し、[次へ] ボタンをクリックします。
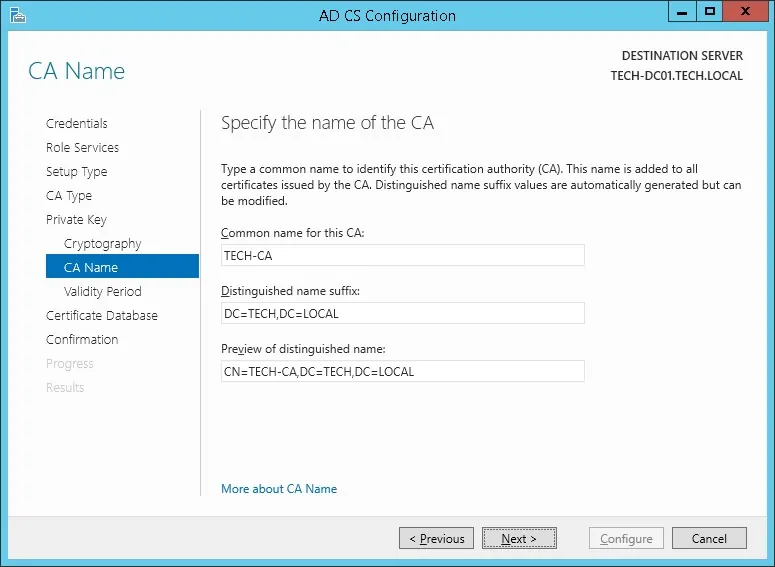
共通名を証明機関に設定し、[次へ] をクリックします。
この例では、共通名を設定します。
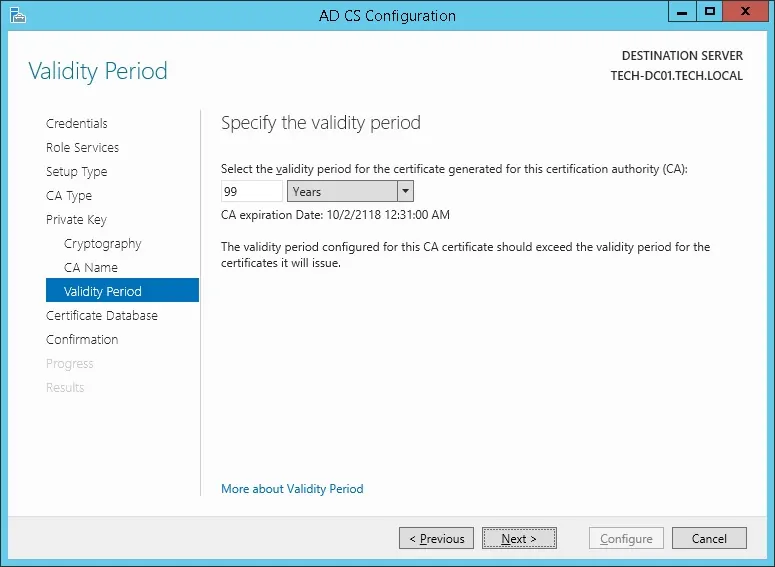
Windows 証明機関の有効期間を設定します。
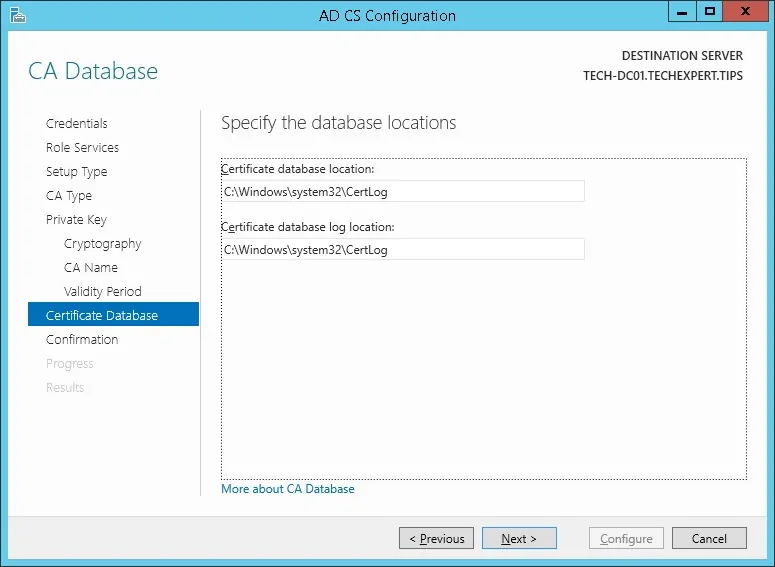
既定の Windows 証明機関データベースの場所を保持します。
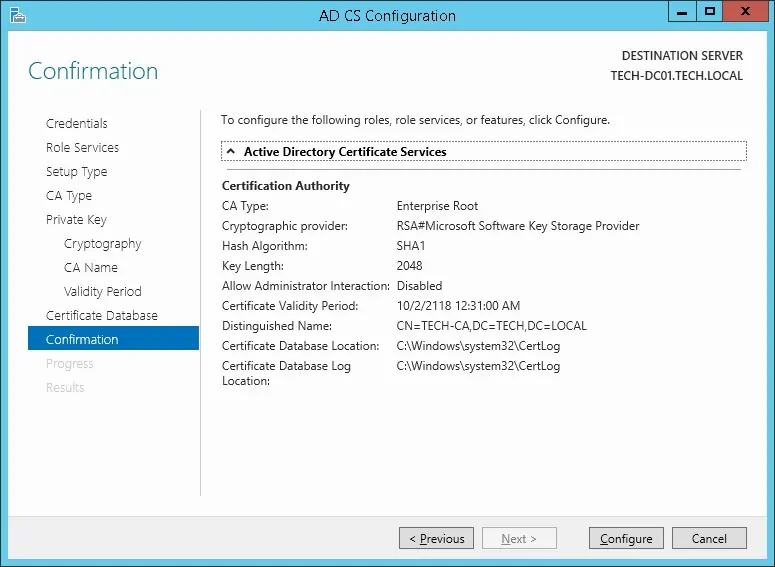
概要を確認し、[構成] ボタンをクリックします。
Windows サーバー証明機関のインストールが完了するまで待ちます。
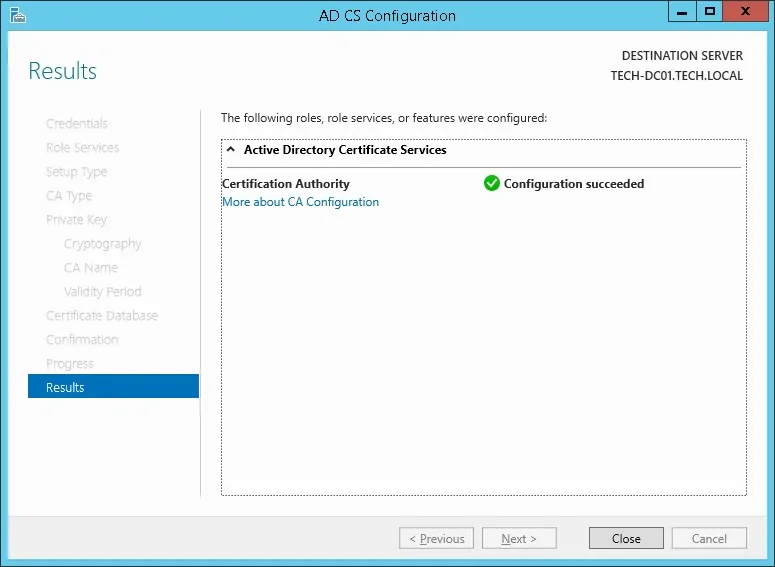
証明機関のインストールが完了したら、コンピュータを再起動します。
Windows 証明機関のインストールが完了しました。
