您想学习如何使用群组策略来配置 Windows 上的 BGinfo 吗? 在此教程中,我们将向您展示如何创建一个组策略来配置 BGInfo 壁纸。
• Windows 2012 R2
• Windows 2016
• Windows 2019
• Windows 10
• Windows 7
硬件列表:
以下部分介绍用于创建本教程的设备列表。
上面列出的每一件硬件都可以在亚马逊网站上找到。
与 Windows 相关的教程:
在此页上,我们提供对与 Windows 相关的教程列表的快速访问。
教程GPO - 配置BG因福
创建共享文件夹并放置 BGInfo 应用程序和配置文件的副本。
这将是BGInfo对网络的分布点。
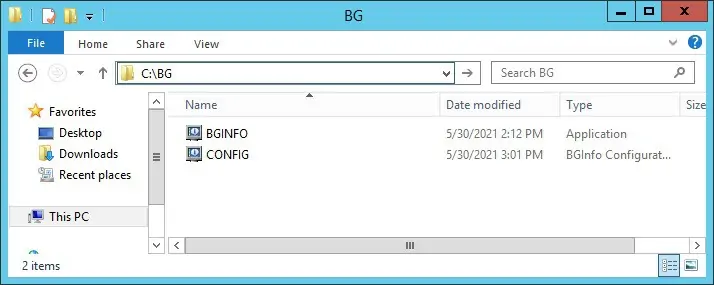
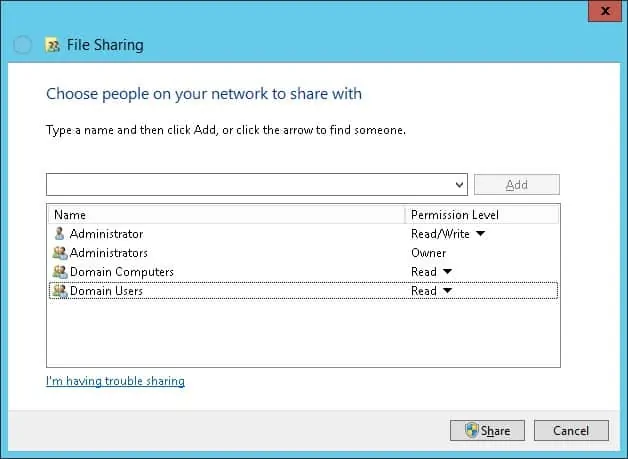
在我们的示例中,创建了一个名为 BG 的共享文件夹。
所有域用户和所有域计算机都已为此文件夹授予读取权限。
在我们的示例中,这是访问网络共享的路径。
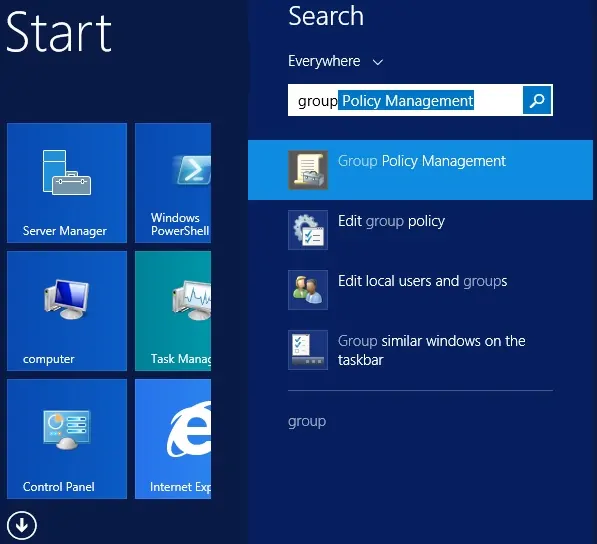
在域控制器上,打开组策略管理工具。
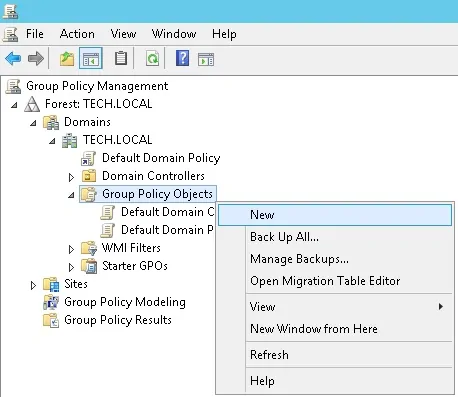
创建新的组策略。
输入新组策略的名称。
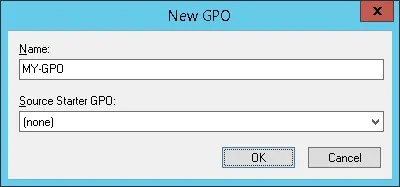
在我们的示例中,新的 GPO 被命名为:MY-GPO。
在组策略管理屏幕上,展开名为"组策略对象"的文件夹。
右键单击新的组策略对象并选择"编辑"选项。
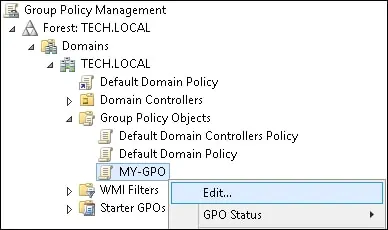
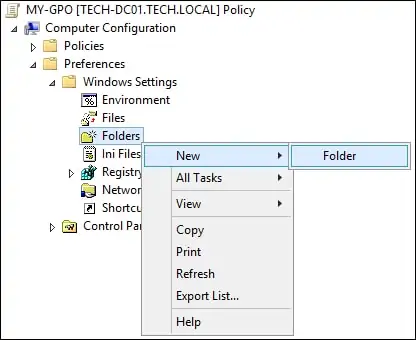
在组策略编辑器屏幕上,展开"计算机配置"文件夹并找到以下项。
创建一个新的文件夹。
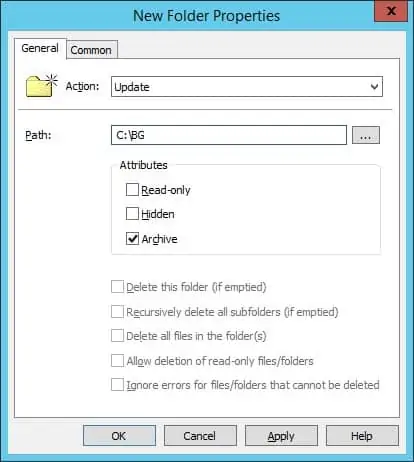
在"常规"选项卡上,执行以下配置。
单击"确定"按钮。
在组策略编辑器屏幕上,展开"计算机配置"文件夹并找到以下项。
右键单击"文件"选项并创建新文件。
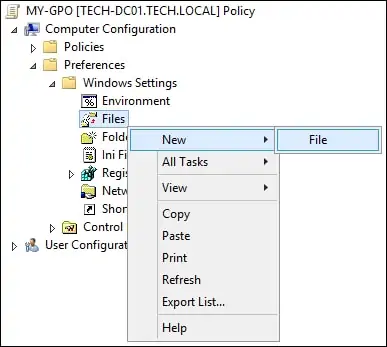
在"常规"选项卡上,执行以下配置。
单击"确定"按钮。
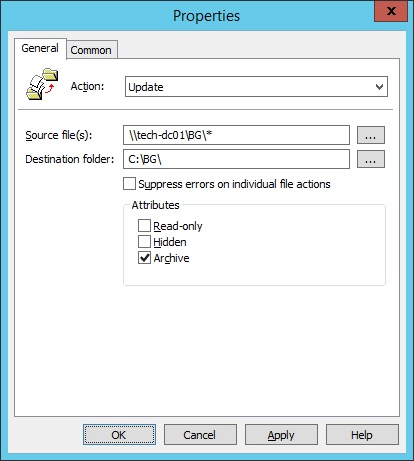
在我们的示例中,GPO 将创建 BGInfo 应用程序和配置文件的本地副本。
接下来,配置 GPO 以自动启动 BGInfo 应用程序。
在组策略编辑器屏幕上,展开"计算机配置"文件夹并找到以下项。
右键单击快捷方式选项并创建新的快捷方式。
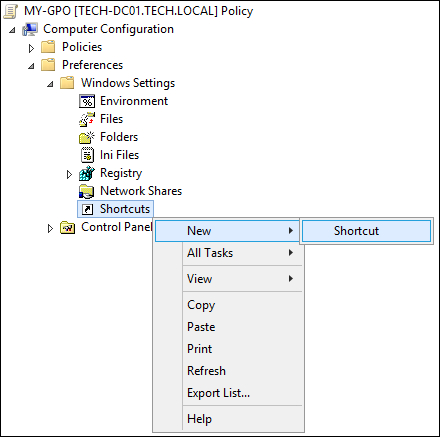
在"常规"选项卡上,执行以下配置。
单击"确定"按钮。
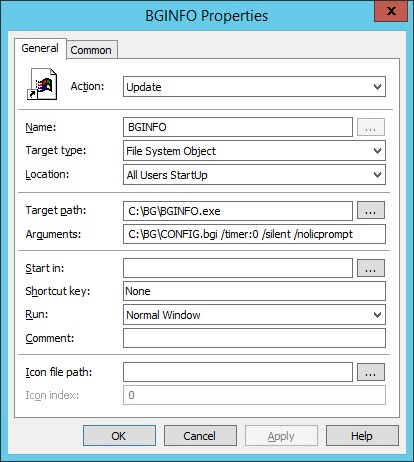
若要保存组策略配置,需要关闭组策略编辑器。
祝贺! 您已完成 GPO 创建。
教程 GPO - 比金福
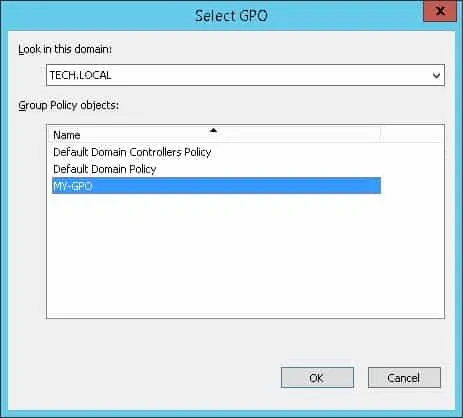
在组策略管理屏幕上,您需要右键单击所需的组织单位,然后选择链接存在 GPO 的选项。

在我们的示例中,我们将将名为 MY-GPO 的组策略链接到域的根目录。
应用 GPO 后,您需要等待 10 或 20 分钟。
在此期间,GPO 将复制到其他域控制器。
在远程计算机上,登录并验证墙纸。

在我们的示例中,我们使用 GPO 自动将 BGinfo 配置应用于 Windows 壁纸。
