Would you like to learn how to do the Openalpr agent installation on Ubuntu Linux? In this tutorial, we are going to show you how to install, configure and access the Openalpr agent for car plate recognition on a computer running Ubuntu Linux version 18.
In our example, the following Camera was used: Vivotek - IB8369A
Hardware List:
The following section presents the list of equipment used to create this Ubuntu Linux tutorial.
Every piece of hardware listed above can be found at Amazon website.
Openalpr Related Tutorial:
On this page, we offer quick access to a list of tutorials related to Openalpr.
Car Plate Recognition based on Cloud services.
You need to understand how the car plate recognition is going to work.
The camera will stream the main entrance of the company building.
The agent will get the images from the stream and process to find car license plates.
The agent will report to a Web server located on the Openalpr cloud.
You will access the reports on the Openalpr cloud dashboard.
Tutorial - Openalpr Agent Installation - Cloud Based
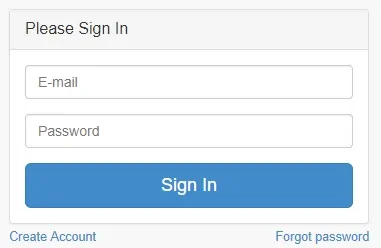
First, you need to access the OPENALPR website and create an account.
On the Linux console, use the following commands to download and start the installation script.
# apt-get update
# apt-get install curl
# bash <(curl -s https://deb.openalpr.com/install)
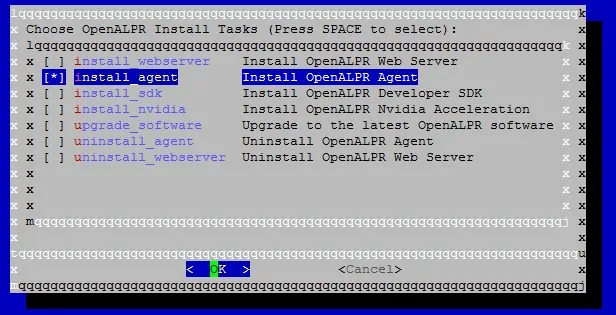
On the installation screen, select install_agent option
The installation script will download and install all the required packages using the following commands:
You don't need to execute this commands, I am just showing you what is happening:
# curl -L https://deb.openalpr.com/openalpr.gpg.key | apt-key add -
# echo 'deb https://deb.openalpr.com/bionic/ bionic main' | tee /etc/apt/sources.list.d/openalpr.list
# apt-get update
# apt-get install -y openalpr openalpr-daemon openalpr-link
# rm /etc/apt/sources.list.d/openalpr.list
The script will ask you the login information of the account created on the Openalpr website.
This is required to register your agent on the Openalpr cloud services.
-------------------------------
Executing task: register_agent
-------------------------------
Agent Registration
Do you wish to register the agent with https://cloud.openalpr.com? [y/n]: y
Enter your account e-mail: virtualcoin.videos@gmail.com
Enter your password:
Registration successful.
Data accepted for processingSend heartbeat succeeded
Restarting services...
Installation Complete
After entering your Openalpr login, the agent will automatically connect to the cloud.
Now, you need to configure the Openalpr agent.
All the agent configuration is done on the cloud Dashboard.
Access the Openalpr website and log in to access your dashboard.

On the Openalpr dashboard, access the Configuration menu, and select the Agent option.
You should see that your agent is online.

Click on the configure button, in order to customize your agent configuration.
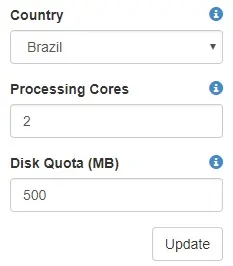
Now you need to set the following configuration parameters:
Country of the car plates.
The number of CPU cores that you will make available to analyze video images.
Disk space for the agent to use.
The recommendation is to use 1 CPU core to each camera connected to the agent.
Now, you need to connect the agent to the camera streaming.
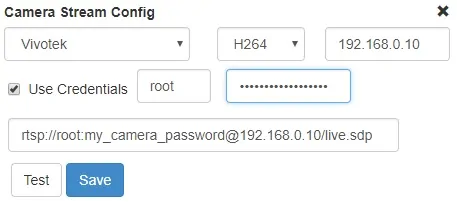
You will need to read your camera manual and learn how to connect to the H264 streaming.
In our example, we used the camera Vivotek IB8369A.
In our example, the Vivotek IB8369A camera is using the IP address: 192.168.0.10
The Vivotek IB8369A camera uses the following URL to connect to the H264 streamin: rtsp://root:my_camera_password@192.168.0.10/live.sdp
After finishing the camera configuration, click on the save button.
Go back to the Openalpr dashboard main screen.
Wait for a car to pass in front of your camera and the system to detect the license plate.
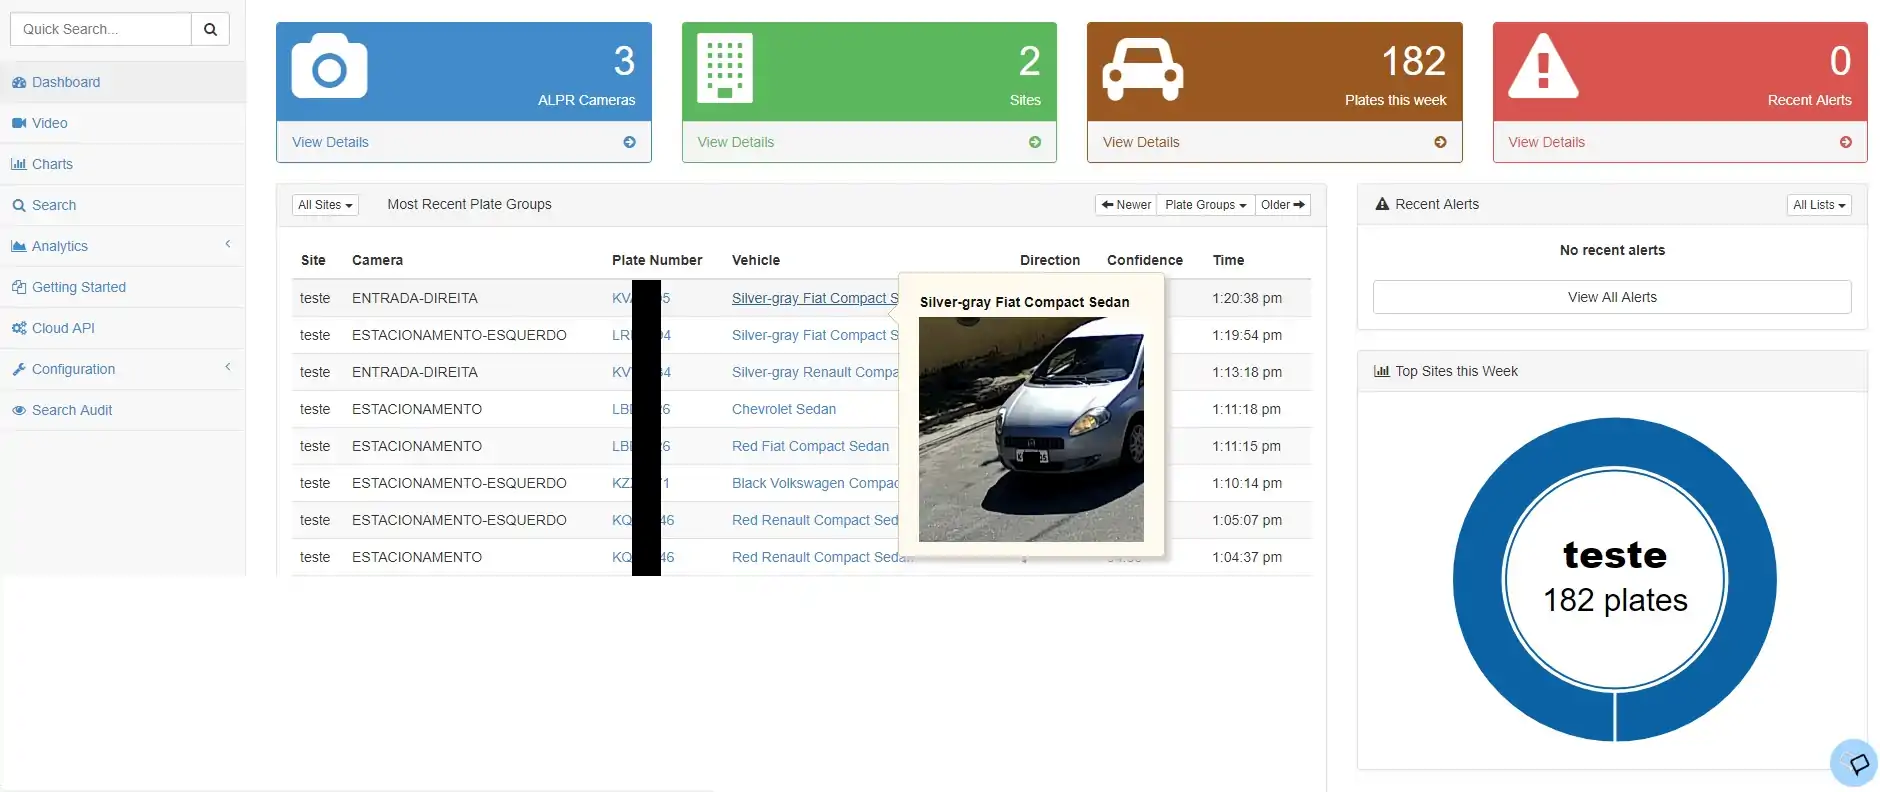
Congratulations, you have successfully installed a car plate recognition system.
The Openalpr service cost 39 dollars for each camera connected to the cloud.
Congratulations, you are now able to do car plate recognition using the command line on Ubuntu Linux.
