Would you like to learn how to use configure GLPI E-mail Notification Setup? In this tutorial, we are going to show you how to configure GLPI to send e-mails using GMAIL.
• GLPI version: 9.3.1
Hardware List:
The following section presents the list of equipment used to create this GLPI tutorial.
Every piece of hardware listed above can be found at Amazon website.
GLPI Playlist:
On this page, we offer quick access to a list of videos related to Zabbix installation.
Don't forget to subscribe to our youtube channel named FKIT.
GLPI Related Tutorial:
On this page, we offer quick access to a list of tutorials related to GLPI installation.
Tutorial - Gmail Integration
First, we need to enable your Gmail account to receive connections from external programs.
Open your browser and access your Gmail account.
In our example, the following URL was entered in the Browser:
On the login screen, enter your Gmail username and password.
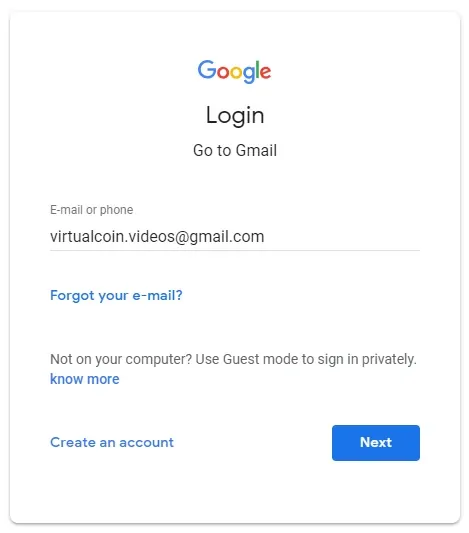
After the login, you need to access the following URL:
• https://myaccount.google.com/lesssecureapps
Select the option to enable the use of less secure applications.
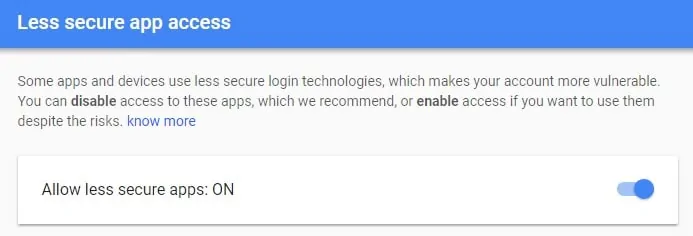
Now, we need to test if we can use the Linux command-line to send an email using Gmail.
Use the following command to install the required packages.
# sudo apt-get update
# sudo apt-get install ssmtp
Edit the ssmtp.conf file to connect to our Gmail account.
# vi /etc/ssmtp/ssmtp.conf
root=virtualcoin.videos@gmail.com
mailhub=smtp.gmail.com:465
FromLineOverride=YES
AuthUser=virtualcoin.videos@gmail.com
AuthPass=kamisama123
UseTLS=YES
In our example, we are using the Gmail account virtualcoin.videos@gmail.com.
In our example, the Gmail account virtualcoin.videos@gmail.com is using the password kamisama123.
You need to change the Gmail account and password to reflect your account.
Use the following command to send an email using the command-line.
# echo "E-Mail using the command-line" | ssmtp virtualcoin.videos@gmail.com
Check your Gmail inbox for the test message that you just sent.

If the test was successful you may advance to the next section of this tutorial.
If the test was unsuccessful, the following message may be presented.
• ssmtp: Authorization failed (534 5.7.14 https://support.google.com/mail/answer/78754 v24-v6sm2921112pfl.31 - gsmtp)
To solve this problem, you need to access the following URL .
• https://accounts.google.com/DisplayUnlockCaptcha
Select the option to unblock your account.

Try again to send the email using the command-line.
If the test was successful you may advance to the next section of this tutorial.
Tutorial - GLPI Email Notification Setup
Open your browser and enter the IP address of your web server plus /glpi.
In our example, the following URL was entered in the Browser:
• http://35.162.85.57/glpi
On the login screen, use the default username and default password.
• Default Username: glpi
• Default Password: glpi
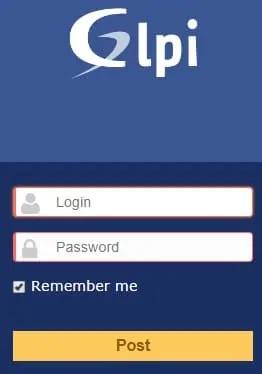
After a successful login, you will be sent to the GLPI Dashboard.

On the dashboard screen, access the Setup menu and select the Notifications option.
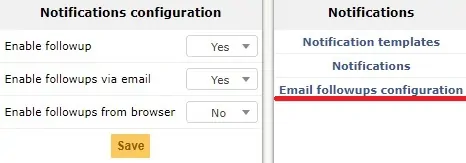
Locate and enable the following options:
• Enable Followup
• Enable Followup via email
Click on the Save button.
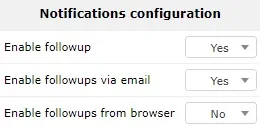
On the dashboard screen, a new notification window will be displayed.
Select the option: Email followups configuration
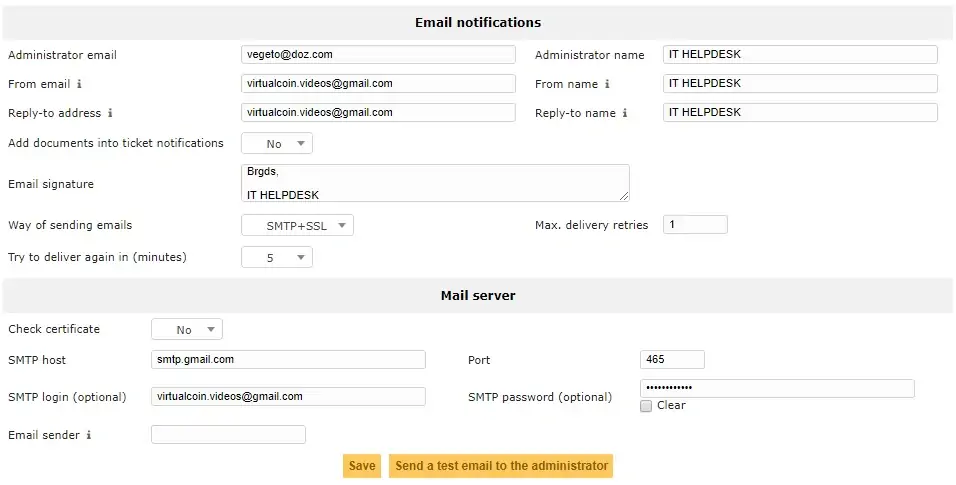
On the Email properties screen, you need to enter the following configuration.
• Way of sending emails - SMTP+SSL
• Try to deliver again - 5
• Max Delivery Retries - 1
• Check Certificate - No
• SMTP Host - SMTP.GMAIL.COM
• Port - 465
• SMTP Login - Your Gmail account
• SMTP Password - Your Gmail password
In our example, we used the Gmail account virtualcoin.videos@gmail.com.
Click on the Save button.
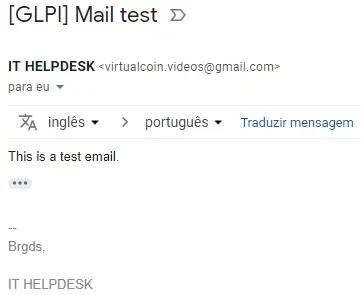
Click on the Send a test email to the Administrator button.
The GLPI administrator e-mail account should receive a test message.
Now, we need to configure the Linux server to automatically send all e-mail notifications every 5 minutes
First, locate and edit the php.ini file from the PHP-CLI program.
Keep in mind that your PHP version and the location of the file may not be the same as mine.
# updatedb
# locate cli/php.ini
# vi /etc/php/7.2/cli/php.ini
Here is the original file, before our configuration.
;date.timezone =
memory_limit = -1
Here is the new file with our configuration.
Keep in mind that your PHP timezone may not be the same as mine.
date.timezone = America/Sao_Paulo
memory_limit = 128M
On the Linux console, create a scheduled task to run the cron.php script every 5 minute.
# crontab -e
*/5 * * * * /usr/bin/php /var/www/html/glpi/front/cron.php
Access the Setup > Automatic actions menu.
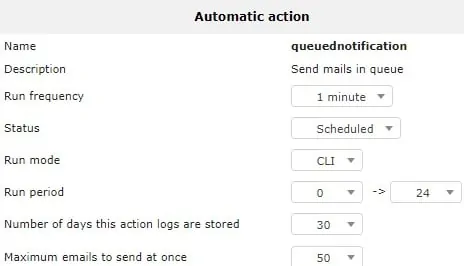
Access the properties of the task named queuednotification.
Change the queuednotification Run mode to CLI.
Access the properties of the task named queuednotificationclean.
Change the queuednotificationclean Run mode to CLI.
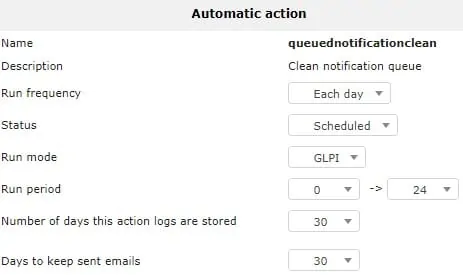
Congratulations! You have configured the GLPI server e-mail notification.
You can monitor if the emails are being sent using the following command.
# tail -f /var/www/html/glpi/files/_log/cron.log
2018-10-30 17:27:01 [@ip-172-31-29-42]
External #1: Launch queuednotification
2018-10-30 17:27:51 [2@ip-172-31-29-42]
Internal #1: Launch graph
2018-10-30 17:28:01 [@ip-172-31-29-42]
External #1: Launch queuednotification
2018-10-30 17:29:01 [@ip-172-31-29-42]
External #1: Launch queuednotification
2018-10-30 17:30:01 [@ip-172-31-29-42]
External #1: Launch queuednotification
2018-10-30 17:31:01 [@ip-172-31-29-42]
External #1: Launch queuednotification
2018-10-30 17:31:04 [6@ip-172-31-29-42]
Internal #1: Launch reservation
2018-10-30 17:32:02 [@ip-172-31-29-42]
External #1: Launch queuednotification
