Would you like to learn how to install Joomla using Docker on Ubuntu Linux? In this tutorial, we are going to show you all the steps required to perform the Joomla installation using Docker on a computer running Ubuntu Linux in 5 minutes or less.
• Ubuntu 20.04
• Ubuntu 18.04
• Ubuntu 19.04
• Joomla 3.9.21
• MySQL 5.7
Tutorial Joomla - Docker Installation
Install the Docker service.
Create a Docker network
Download the MySQL docker image from the online repository.
Download the Joomla docker image from the online repository.
List the Docker images installed on your system.
Here is the command output:
Create a docker volume to store the MySQL persistent data.
Verify the persistent data directory.
Here is the command output:
Optionally, create a symbolic link to an easier access location.
Start a MySQL container with persistent data storage.
Here is the command output:
In our example, the MySQL image was used to start a new container.
The new container has persistent data storage.
The container ID is f1a30a79e31804e79ae2228cc84f73f4e0b368caff72a9a5a0d40702b0992455.
The database ROOT account password configured was kamisama123.
A database named Joomla was created.
A database account named Joomla was created and the password kamisama123 was configured.
Create a docker volume to store Joomla's persistent data.
Verify the persistent data directory.
Here is the command output:
Optionally, create a symbolic link to an easier access location.
Start a Joomla container with persistent data storage.
Here is the command output:
In our example, the Joomla image was used to start a new container.
The new container has persistent data storage.
The container ID is 29c459718ea78ce303e1a4241d022d77649132cb141fd97cf3aca0d9c47530a7.
Tutorial Docker - Joomla installation
Open your browser and enter the IP address of your web server.
In our example, the following URL was entered in the Browser:
• http://192.168.100.10
The Joomla web installation interface will be presented.

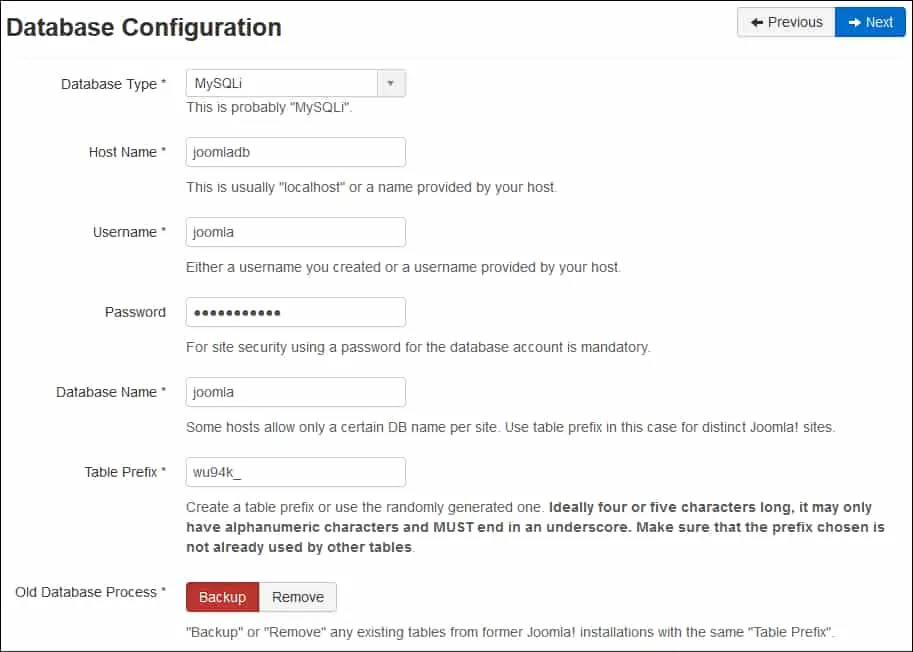
On the database configuration screen, perform the following configuration.
• Database type - MySQLi
• Hostname - joomladb
• Username - joomla
• Password - kamisama123
• Database - joomla

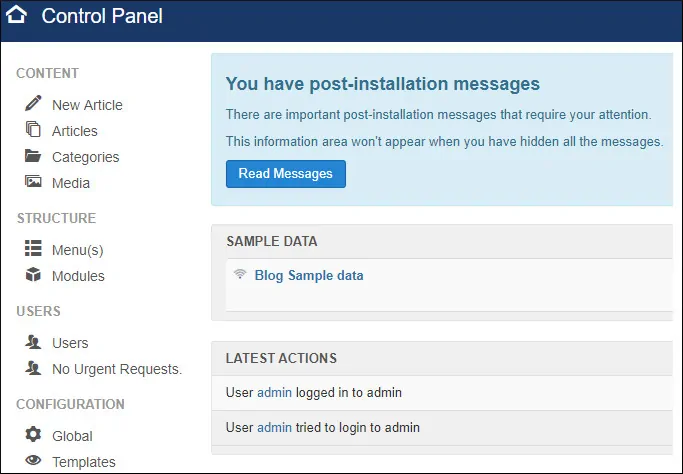
After finishing the installation and perform a successful login, the Joomla dashboard should be presented.

Congratulations! You have finished the Joomla Docker installation.
Tutorial Joomla - Docker container management
Verify the status of all Docker containers using the following command:
Verify the status of a container.
To stop a container, use the following command:
To start a container, use the following command:
To restart a container, use the following command:
In case of error, use the following command to verify the container logs.
In our examples, we demonstrated how to manage Joomla containers.
