Would you like to learn how to do an Apache PHP installation on Ubuntu Linux? In this tutorial, we are going to show you how to install the MariaDB database server, how to install the Apache webserver and how to enable the PHP module on a computer running Ubuntu Linux version 17.
Hardware List:
The following section presents the list of equipment used to create this Ubuntu tutorial.
Every piece of hardware listed above can be found at Amazon website.
Ubuntu Playlist:
On this page, we offer quick access to a list of videos related to Ubuntu Linux.
Don't forget to subscribe to our youtube channel named FKIT.
Ubuntu Related Tutorial:
On this page, we offer quick access to a list of tutorials related to Ubuntu.
Tutorial - NTP on Ubuntu Linux
First, we are going to configure the system to use the correct date and time using NTP.
On the Linux console, use the following commands to set the correct timezone.
# dpkg-reconfigure tzdata
Install the Ntpdate package and set the correct date and time immediately.
# apt-get update
# apt-get install ntpdate
# ntpdate pool.ntp.br
The Ntpdate command was used to set the correct date and time using the server: pool.ntp.br
Let's install the NTP service.
# apt-get install ntp
NTP is the service that will keep our server updated.
Use the command date to check the date and time configured on your Ubuntu Linux.
# date
If the system shown the correct date and time, this means that you followed all the steps correctly.
Tutorial - MariaDB on Ubuntu Linux
Now, we can proceed to the installation of the database service.
On the Linux console, use the following commands to install the required packages.
# apt-get update
# apt-get install mariadb-server mariadb-client
The installation wizard will ask you for a password to the root user.
After finishing the installation, use the following command to access the MariaDB database server.
To access the database server, enter the password set on the MariaDB server installation wizard.
# mysql -u root -p
Use the following SQL command to change the MariaDB root user password.
Tutorial - Apache PHP Installation on Ubuntu
Now, we need to install the Apache web server and the PHP modules.
On the Linux console, use the following commands to install the required packages.
# apt-get install apache2 php7.0 php7.0-mysql libapache2-mod-php7.0
You should also restart apache manually and verify the service status.
# service apache2 stop
# service apache2 start
# service apache2 status
Here is an example of the Apache service status output.
● apache2.service - LSB: Apache2 web server
Loaded: loaded (/etc/init.d/apache2; bad; vendor preset: enabled)
Drop-In: /lib/systemd/system/apache2.service.d
└─apache2-systemd.conf
Active: active (running) since Fri 2018-05-11 23:04:34 -03; 3s ago
You have finished your Apache PHP Installation.
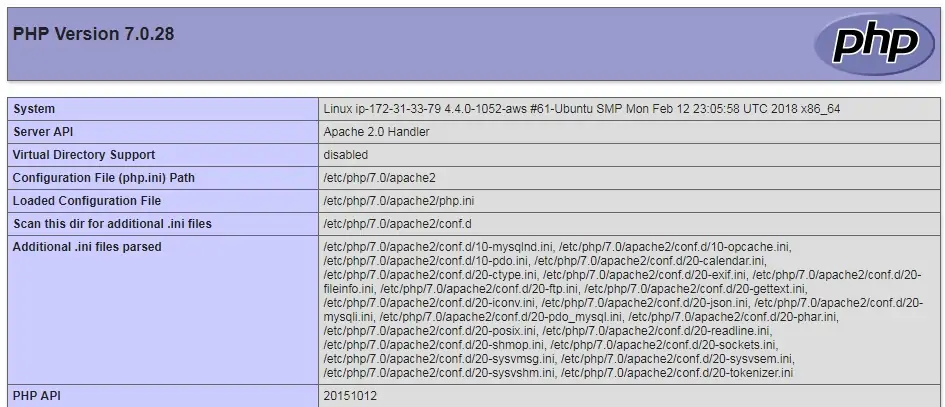
Let’s create a quick page to test our php installation.
# vi /var/www/html/test.php
<?php
phpinfo();
?>
Now, you can open your browser and try to access the test file.
http://52.35.134.29/test.php
In our example, our web server has the IP address 52.35.134.29.

You are now the proud owner of an Apache PHP installation
