Would you like to learn how to do a Nagios installation on Ubuntu Linux? In this tutorial, we are going to show you how to install, configure and access Nagios on a computer running Ubuntu Linux.
Hardware List:
The following section presents the list of equipment used to create this Zabbix tutorial.
Every piece of hardware listed above can be found at Amazon website.
Nagios Playlist:
On this page, we offer quick access to a list of videos related to Nagios.
Don't forget to subscribe to our youtube channel named FKIT.
Nagios Related Tutorial:
On this page, we offer quick access to a list of tutorials related to Nagios installation.
Tutorial - NTP on Ubuntu Linux
First, we are going to configure the system to use the correct date and time using NTP.
On the Linux console, use the following commands to set the correct timezone.
# dpkg-reconfigure tzdata
Install the Ntpdate package and set the correct date and time immediately.
# apt-get update
# apt-get install ntpdate
# ntpdate pool.ntp.br
The Ntpdate command was used to set the correct date and time using the server: pool.ntp.br
Let's install the NTP service.
# apt-get install ntp
NTP is the service that will keep our server updated.
Use the command date to check the date and time configured on your Ubuntu Linux.
# date
If the system shown the correct date and time, this means that you followed all the steps correctly.
Tutorial - Installing Apache on Linux
Next, we need to install the Apache web server and all the required software.
On the Linux console, use the following commands to install the required packages.
# apt-get install libgd-dev unzip wget build-essential
# apt-get install apache2 php libapache2-mod-php php-gd
Stop the Apache service, enable the required modules and start the Apache service.
# service apache2 stop
# a2enmod rewrite
# a2enmod cgi
# service apache2 start
# service apache2 status
Here is an example of the Apache service status output.
● apache2.service - LSB: Apache2 web server
Loaded: loaded (/etc/init.d/apache2; bad; vendor preset: enabled)
Drop-In: /lib/systemd/system/apache2.service.d
└─apache2-systemd.conf
Active: active (running) since Mon 2018-04-23 00:02:09 -03; 1min 4s ago
Tutorial - Nagios Installation on Ubuntu
Now, we need to install the Nagios core on Ubuntu Linux.
On the Linux console, use the following commands to create the necessary accounts.
# useradd nagios
# groupadd nagcmd
# usermod -a -G nagcmd nagios
Use the following commands to download the Nagios packages.
# mkdir /downloads
# cd /downloads
# wget https://ufpr.dl.sourceforge.net/project/nagios/nagios-4.x/nagios-4.4.2/nagios-4.4.2.tar.gz
Extract, compile and install the Nagios package.
# tar -zxvf nagios-4.4.2.tar.gz
# cd nagios-4.4.2/
# ./configure --with-nagios-group=nagios --with-command-group=nagcmd
# make all
# make install
# make install-init
# make install-config
# make install-commandmode
# make install-webconf
Let's create the password to the Nagios administrator account.
# htpasswd -c /usr/local/nagios/etc/htpasswd.users nagiosadmin
New password: *****
Re-type new password: *****
Adding password for user nagiosadmin
You should also restart apache manually and verify the service status.
# service apache2 restart
Use the following command to verify the nagios.cfg configuration file.
# /usr/local/nagios/bin/nagios -v /usr/local/nagios/etc/nagios.cfg
Use the following command to start the Nagios server:
# service nagios start
Open your browser and enter the IP address of your web server plus /nagios.
In our example, the following URL was entered in the Browser:
• http://35.162.85.57/nagios
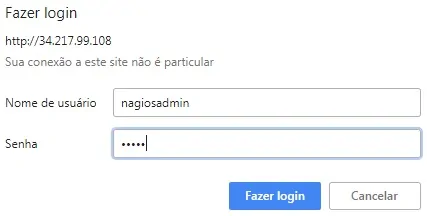
On the prompt screen, enter the administrative login information.
Factory default access information:
• Username: nagiosadmin
• Password: Your password

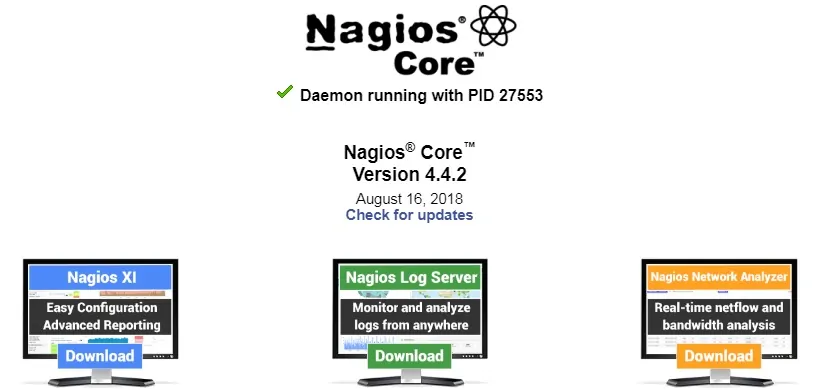
After a successful login, the Nagios dashboard will be displayed.

Congratulations, you have installed the Nagios system on Ubuntu Linux.
Tutorial - Nagios Plugins Installation on Ubuntu
Next, we need to install the Nagios plugins.
On the Linux console, use the following commands to install the required packages.
# apt-get install autoconf libc6 libmcrypt-dev libssl-dev bc
# apt-get install gawk dc snmp libnet-snmp-perl gettext libperl-dev
# apt-get install libpqxx3-dev libdbi-dev libldap2-dev
# apt-get install libmysqlclient-dev smbclient qstat fping
Use the following commands to download the Nagios plugins.
# cd /downloads
# wget https://nagios-plugins.org/download/nagios-plugins-2.2.1.tar.gz
Extract, compile and install the Nagios plugins package.
# tar -zxvf nagios-plugins-2.2.1.tar.gz
# cd nagios-plugins-2.2.1/
# ./configure --enable-perl-modules
# make
# make install
Use the following command to Restart the Nagios server:
# service nagios restart
Congratulations, you have installed the Nagios plugins on Ubuntu Linux.
