Would you like to learn how to do a WAP371 initial configuration? In this tutorial, we are going to show you how to do the initial IP address configuration on a Cisco WAP371 access point?
Hardware List:
The following section presents the list of equipment used to create this Cisco tutorial.
Every piece of hardware listed above can be found at Amazon website.
WAP371 Playlist:
On this page, we offer quick access to a list of videos related to Cisco Access Point.
Don't forget to subscribe to our youtube channel named FKIT.
WAP371 Related Tutorial:
On this page, we offer quick access to a list of tutorials related to WAP371.
Tutorial - Cisco WAP371 Initial Configuration
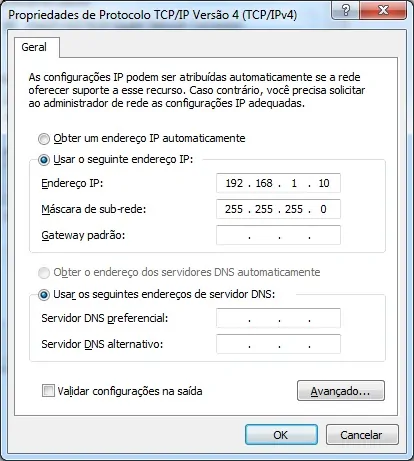
Connect your computer to the Cisco WAP371 access point using a crossover cable and configure the following network address on your computer:
• IP - 192.168.1.10
• MASK - 255.255.255.0

Turn on the WAP371 and wait 1 minute.
Press the reset button located on the back of your equipment for 15 seconds.
Now, it is time to test the connectivity between the Access point and your desktop.
Open a DOS prompt and try to ping the default IP address of the WAP371 equipment: 192.168.1.245
C:\> ping 192.168.1.245
Disparando 192.168.1.245 com 32 bytes de dados:
Resposta de 192.168.1.245: bytes=32 tempo=5ms TTL=255
Resposta de 192.168.1.245: bytes=32 tempo=5ms TTL=255
As our next step, we need to access the WAP371 web interface.
Open your browser and enter the IP address of the WAP371.
On the login screen, use the default username and default password.
• Default Username: cisco
• Default Password: cisco

After a successful login, you will be sent to the WAP371 Dashboard.
The system will require you to change the administrator password immediately.
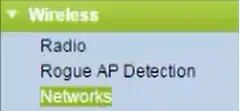
On the Web interface, access the Wireless menu and select the Wireless networks option.

Select the Radio 2 interface to configure the 2.4 GHz network.

Change the name of your wireless network.
Select the type of network security: WPA Personal

Configure the wireless password and save your configuration.

On the web interface, access the Wireless menu and select the Radio option.

Select the Radio 2 interface to configure the 2.4 GHz network.

In order to finish the wireless setup, you need to enable your radio configuration.

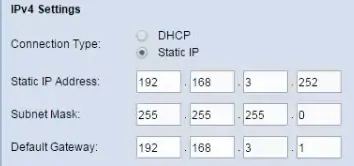
If you need to change the IP address of the device.
Access the LAN menu and select the VLAN and IPV4 option.

Change the IP address from DHCP to Static and configure the desired IP address.

Don't forget to save your configuration.
Congratulations, you have installed the Cisco WAP371 Accesspoint.
