Would you like to learn how to configure Cisco WAP321 Captive Portal? In this tutorial, we are going to show you how to do access the wireless device and configure the captive portal on Cisco Wap321.
Hardware List:
The following section presents the list of equipment used to create this Cisco tutorial.
Every piece of hardware listed above can be found at Amazon website.
WAP321 Playlist:
On this page, we offer quick access to a list of videos related to Cisco Access Point.
Don’t forget to subscribe to our youtube channel named FKIT.
WAP321 Related Tutorial:
On this page, we offer quick access to a list of tutorials related to WAP321.
Tutorial – Cisco WAP321 Captive Portal
First, we need to access the WAP321 web interface.
Open your browser and enter the IP address of the WAP321.
On the login screen, use the default username and default password.
• Default Username: cisco
• Default Password: cisco
• Default IP address: 192.168.1.245

After a successful login, you will be sent to the WAP321 Dashboard.
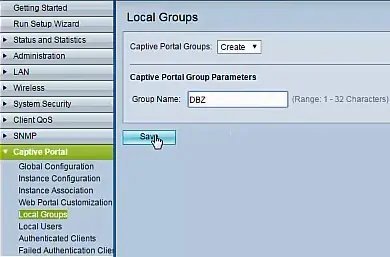
On the Web interface, access the Captivate portal menu and select the Local Groups option.
Enter a local group name and click on the save button.
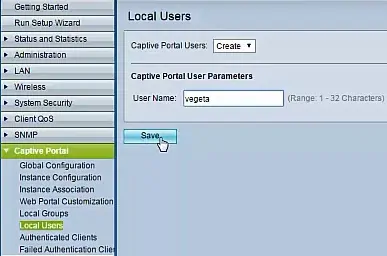
On the Web interface, access the Captivate portal menu and select the Local Users option.
Enter a new username and click on the save button.
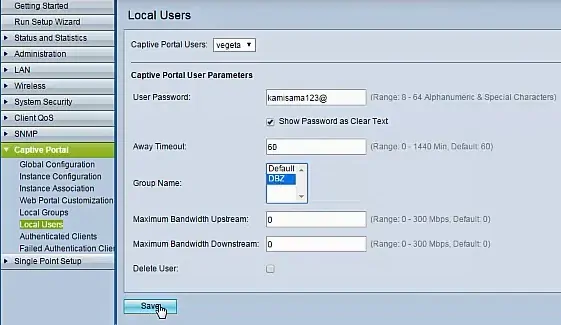
After creating a local user you will have to configure the account.
Enter the user password.
Select the group membership.
After finishing the configuration you need to click on the save button.
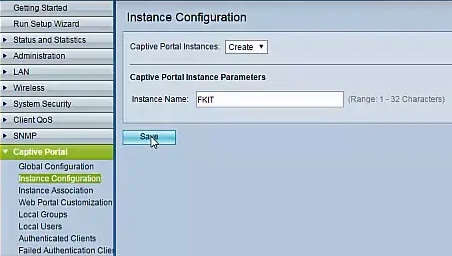
On the Web interface, access the Captivate portal menu and select the Instance configuration option.
Enter a name to the Captive portal instance and click on the save button.
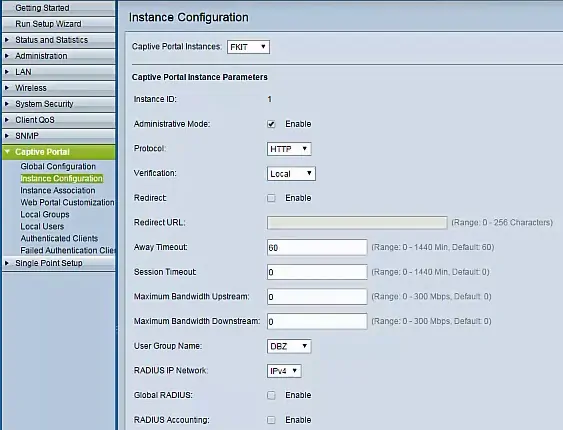
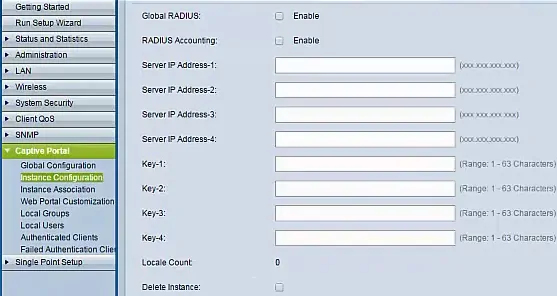
After creating a new instance, you will have to configure the instance settings.
The following image show a basic configuration.
After finishing the configuration you need to click on the save button.
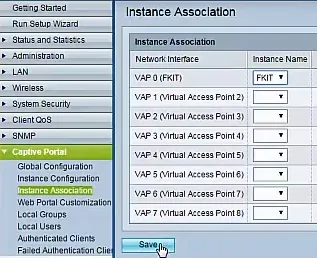
On the Web interface, access the Captivate portal menu and select the Instance association option.
You will have to assign your instance to the wireless network.
On the Web interface, access the Captivate portal menu and select the Web portal customization option.
Name the customization file and click on the save button.
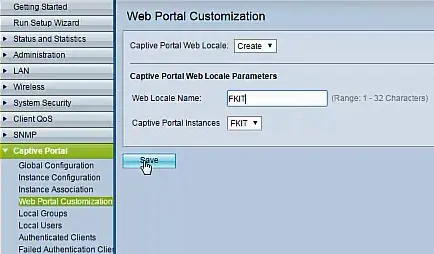
After creating a new customization, you will have to configure the desired settings.
We made no changes to the default customization file.
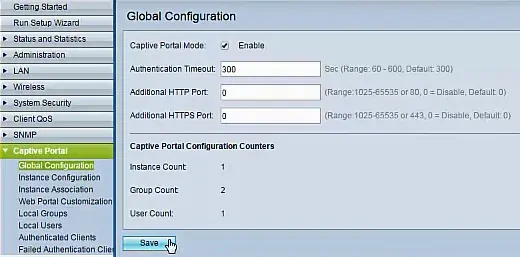
On the Web interface, access the Captivate portal menu and select the Global configuration option.
It is time to enable the Captive portal.
After finishing the configuration you need to click on the save button.
Time to test your captive portal installation.
Use a laptop and connect it to the wireless network that you created.
Now, open a browser and try to access any website.
The following screen will be displayed and the user will be required to authenticate before accessing the network.
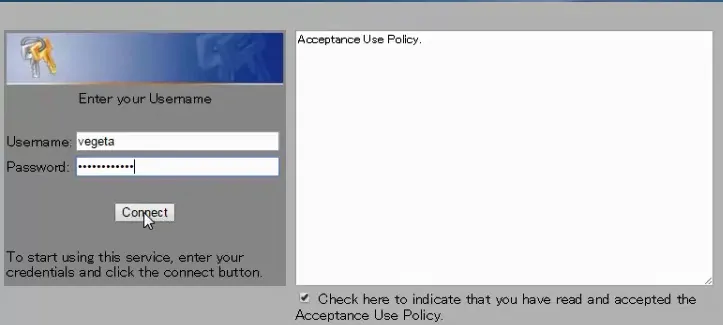
After a successful login, the user will be allowed to use the wireless network.
Congratulations, you have installed a new Cisco wap321 captive portal.
