Would you like to learn how to configure Asterisk Conference Bridge feature on Ubuntu Linux? In this tutorial, we are going to show you how to install the Asterisk VoIP server, how to configure a SIP extension and how to enable the Conference Bridge feature on Ubuntu Linux version 16.
Ubuntu 17 was not able to compile the required packages.
Hardware List:
The following section presents the list of equipment used to create this Asterisk tutorial.
Every piece of hardware listed above can be found at Amazon website.
Asterisk Playlist:
On this page, we offer quick access to a list of videos related to Asterisk.
Don't forget to subscribe to our youtube channel named FKIT.
Asterisk Related Tutorial:
On this page, we offer quick access to a list of tutorials related to Asterisk.
Tutorial - Asterisk Installation on Linux
On the Linux console, use the following commands to set the correct timezone.
# dpkg-reconfigure tzdata
Install the Ntpdate package and set the correct date and time immediately.
# apt-get install ntpdate
# ntpdate pool.ntp.br
In our example, the Ntpdate command was used to set the correct date and time using the Brazilian server pool.ntp.br
Let's install the NTP service.
# apt-get install ntp
NTP is the service that will keep our server updated.
Use the command date to check the date and time configured on your Ubuntu Linux.
# date
If the system shown the correct date and time, this means that you followed all the steps correctly.
Use the following commands to install the required packages.
# apt-get update
# apt-get install linux-headers-`uname -r`
# apt-get install build-essential
Download, compile and install the DAHDI package.
# mkdir /downloads
# cd /downloads
# wget http://downloads.asterisk.org/pub/telephony/dahdi-linux-complete/dahdi-linux-complete-current.tar.gz
# tar -zxvf dahdi-linux-complete-current.tar.gz
# cd dahdi-linux-complete-2.11.1+2.11.1/
# make all
# make install
Download, compile and install the LIBPRI package.
# cd /downloads
# wget http://downloads.asterisk.org/pub/telephony/libpri/libpri-current.tar.gz
# tar -zxvf libpri-current.tar.gz
# cd libpri-1.6.0
# make all
# make install
Download the Asterisk software and install the required packages.
# cd /downloads
# wget http://downloads.asterisk.org/pub/telephony/asterisk/asterisk-15-current.tar.gz
# tar -zxvf asterisk-15-current.tar.gz
# cd asterisk-15.4.0/contrib/scripts/
# ./install_prereq install
Compile and install the ASTERISK software.
# cd /downloads/asterisk-15.4.0
# ./configure
# make menuselect
# make
# make install
The make menuselect command will open a menu where you can select modules that should be installed.
If you don't know what to do, leave default modules and click on the Save and Exit button.
Use the following commands to install configuration files samples:
# make samples
Use the following commands to install the configuration files:
# make config
# make install-logrotate
Use the following commands to start the asterisk service:
# /etc/init.d/asterisk start
Tutorial - Asterisk Conference Bridge
After finishing the Asterisk Installation we need to create the Sip extensions.
Delete the content of the sip.conf configuration file.
# echo > /etc/asterisk/sip.conf
Edit the sip.conf configuration file.
# vi /etc/asterisk/sip.conf
Here is the file content.
[general]
allowguest=no
srvlookup=no
udpbindaddr=0.0.0.0
tcpenable=no
canreinvite = no
dtmfmode=auto
;
[ramal-voip](!)
type=friend
context=INTERNO
host=dynamic
disallow=all
allow=ulaw
allow=alaw
allow=g729
;
[100](ramal-voip)
secret=pass100
callerid="Vegeto" <100>
;
[200](ramal-voip)
secret=pass200
callerid="Kakarot" <200>
Next, we need to create the dial plan.
Delete the content of the extensions.conf configuration file
# echo > /etc/asterisk/extensions.conf
Edit the extensions.conf configuration file.
# vi /etc/asterisk/extensions.conf
Here is the file content.
[general]
[INTERNO]
;
; EXTENSION 100 (FOR TEST ONLY)
;
exten => 100,1,Dial(SIP/100)
;
; EXTENSION 200 (FOR TEST ONLY)
;
exten => 200,1,Dial(SIP/200)
;
;CONFERENCE - GUEST
;
exten => 666,1,Progress()
exten => 666,2,Wait(1)
exten => 666,3,ConfBridge(1,default_bridge,default_user)
;
;CONFERENCE - ADMIN
;
exten => 777,1,Progress()
exten => 777,2,Wait(1)
exten => 777,3,ConfBridge(1,default_bridge,admin_user)
In our example, the user extension 100 was created.
In our example, the user extension 200 was created.
In our example, the conference extension 777 should be used by conference administrator to create a conference call.
In our example, the conference extension 666 should be used by conference guests to enter an existing conference call.
Delete the content of the confbridge.conf configuration file.
# echo > /etc/asterisk/confbridge.conf
Edit the confbridge.conf configuration file.
# vi /etc/asterisk/confbridge.conf
Here is the file content.
[general]
[admin_user]
type=user
pin=5555
marked=yes
admin=yes
music_on_hold_when_empty=yes
announce_user_count=yes
[default_user]
type=user
pin=1234
wait_marked=yes
end_marked=yes
music_on_hold_when_empty=yes
announce_user_count=yes
[default_bridge]
type=bridge
max_members=10
In our example, two users were created.
The first user created was the administrator which has the password PIN 5555.
The second user created was the common user which has the password PIN 1234.
You should restart Asterisk manually and verify the service status.
# service asterisk stop
# service asterisk start
# service asterisk status
Here is an example of the Asterisk service status output.
● asterisk.service - LSB: Asterisk PBX
Loaded: loaded (/etc/init.d/asterisk; bad; vendor preset: enabled)
Active: active (running) since Thu 2018-05-03 11:16:27 -03; 4s ago
Docs: man:systemd-sysv-generator(8)
Process: 28268 ExecStop=/etc/init.d/asterisk stop (code=exited, status=0/SUCCESS)
Process: 28318 ExecStart=/etc/init.d/asterisk start (code=exited, status=0/SUCCESS)
Tasks: 82
Memory: 34.1M
CPU: 645ms
CGroup: /system.slice/asterisk.service
└─28332 /usr/sbin/asterisk
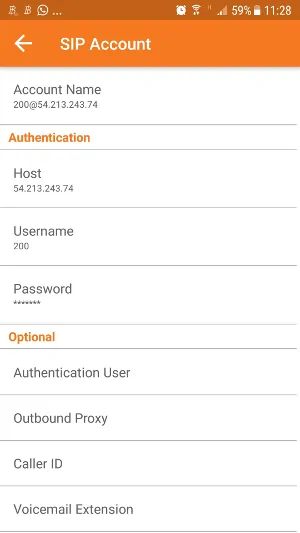
Now, you can use a SIP VoIP Client to connect to the Asterisk Server.
I like to use the Zoiper VoIP Client.
• Username - 100
• Password - pass100
• Host - Asterisk server IP address
• Domain - Asterisk server IP address

Time to test your Asterisk Conference Bridge.
Use the 100 extension to call 666 and enter the PIN 5555 to create a conference bridge.
Use the 200 extension to call 777 and enter the PIN 1234 to join the conference call.
If you want to debug the asterisk communication, stop the Asterisk service and start it using the following command.
# service asterisk stop
# asterisk -vvvvvv -g -dddddd -c
