Would you like to learn how to configure Django LDAP authentication on Active directory? In this tutorial, we are going to show you how to authenticate Django users using the Active directory database from Microsoft Windows and the LDAP protocol.
• Ubuntu 18
• Ubuntu 19
• Django 2.2.6
• Windows 2012 R2
Hardware List:
The following section presents the list of equipment used to create this Django tutorial.
Every piece of hardware listed above can be found at Amazon website.
Django Related Tutorial:
On this page, we offer quick access to a list of tutorials related to Django installation.
Tutorial - Windows Domain Controller Firewall
First, we need to create a Firewall rule on the Windows domain controller.
This firewall rule will allow the Django server to query the Active directory database.
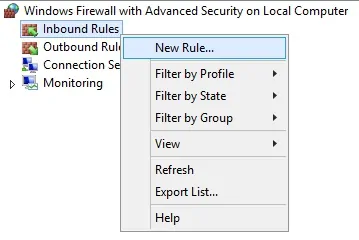
On the domain controller, open the application named Windows Firewall with Advanced Security
Create a new Inbound firewall rule.
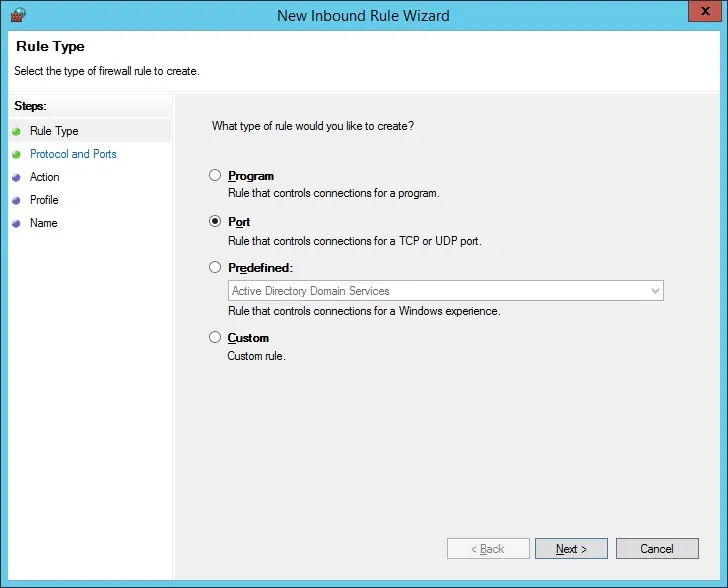
Select the PORT option.
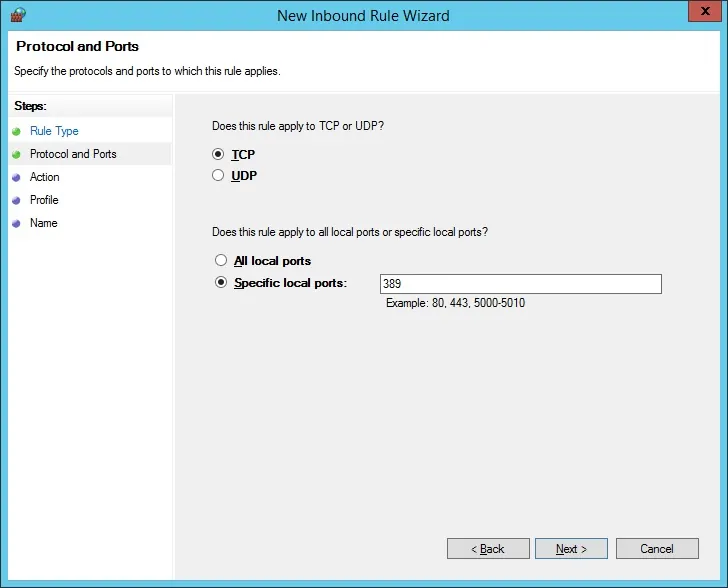
Select the TCP option.
Select the Specific local ports option.
Enter the TCP port 389.
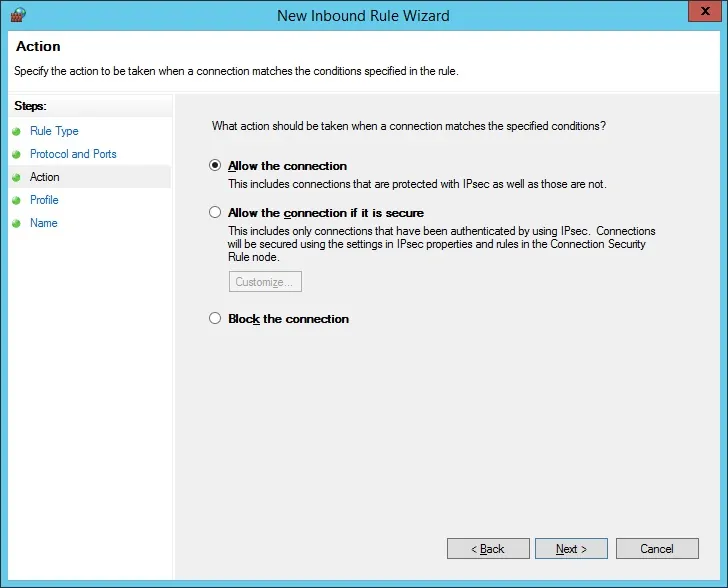
Select the Allow the connection option.
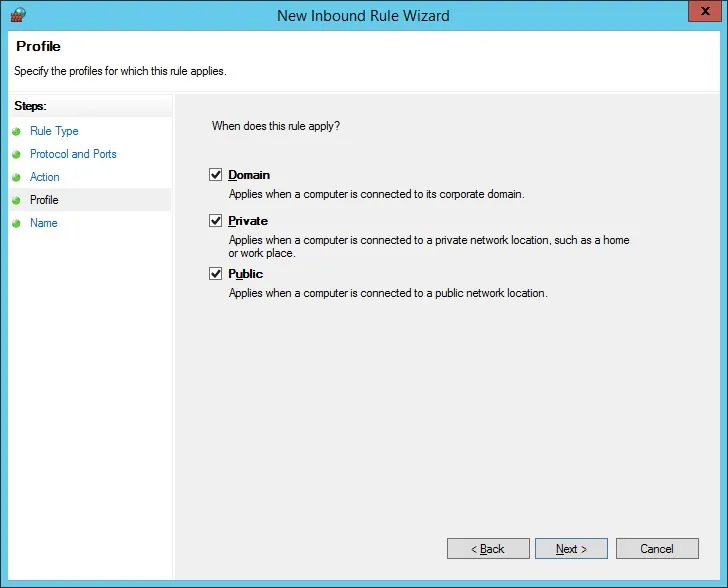
Check the DOMAIN option.
Check the PRIVATE option.
Check the PUBLIC option.
Enter a description to the firewall rule.
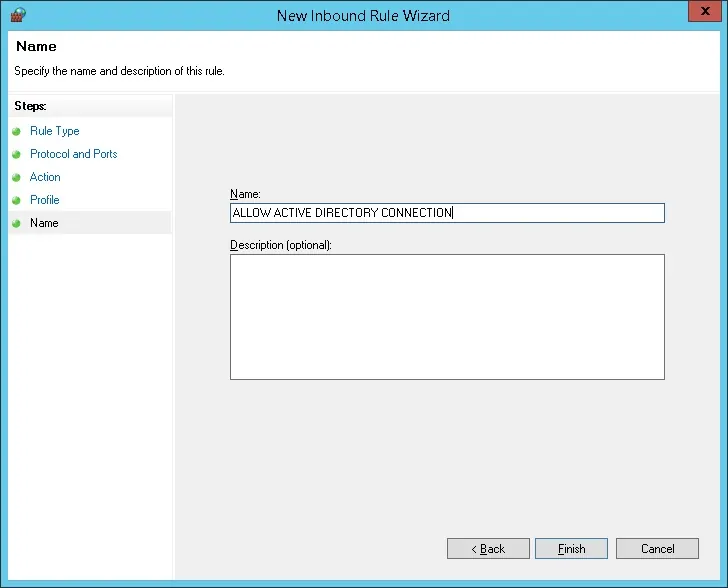
Congratulations, you have created the required firewall rule.
This rule will allow Django to query the Active directory database.
Tutorial - Windows Domain Account Creation
Next, we need to create at least 2 accounts on the Active directory database.
The ADMIN account will be used to login on the Django web interface.
The BIND account will be used to query the Active Directory database.
On the domain controller, open the application named: Active Directory Users and Computers
Create a new account inside the Users container.
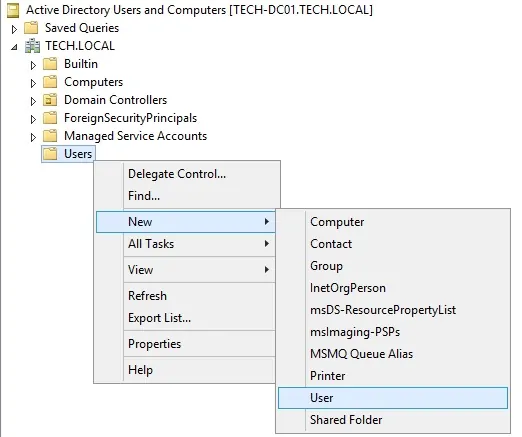
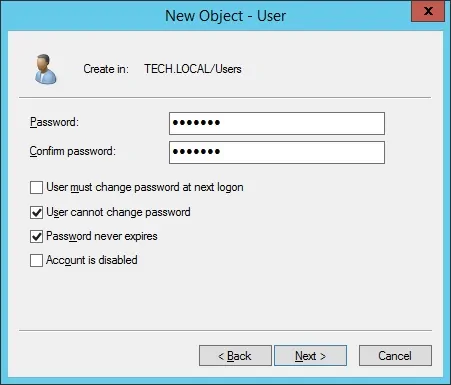
Create a new account named: admin
Password configured to the ADMIN user: 123qwe..
This account will be used to authenticate as admin on the Django web interface.
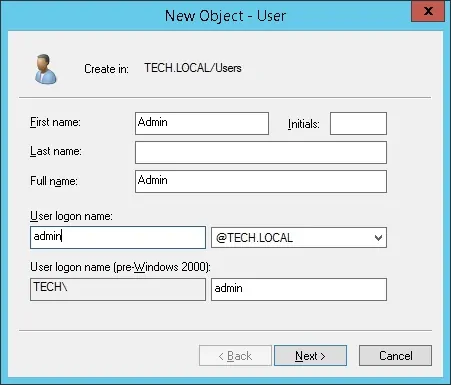
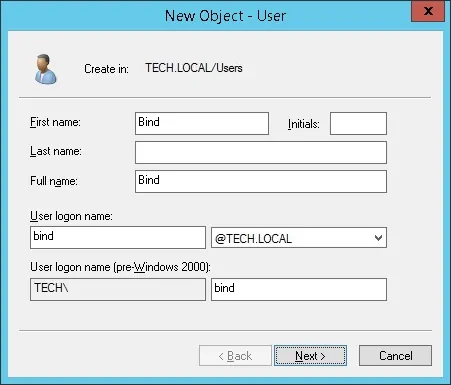
Create a new account named: bind
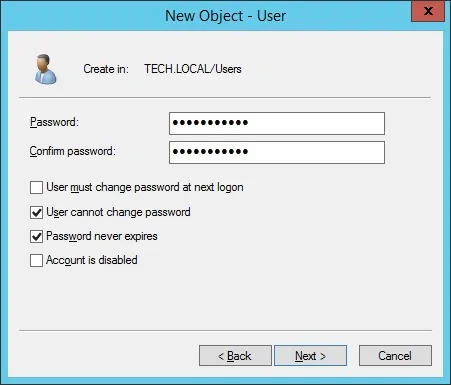
Password configured to the BIND user: kamisama123@
This account will be used to query the passwords stored on the Active Directory database.
Congratulations, you have created the required Active Directory accounts.
Tutorial - Windows Domain Group Creation
Next, we need to create at least 1 group on the Active directory database.
On the domain controller, open the application named: Active Directory Users and Computers
Create a new group inside the Users container.
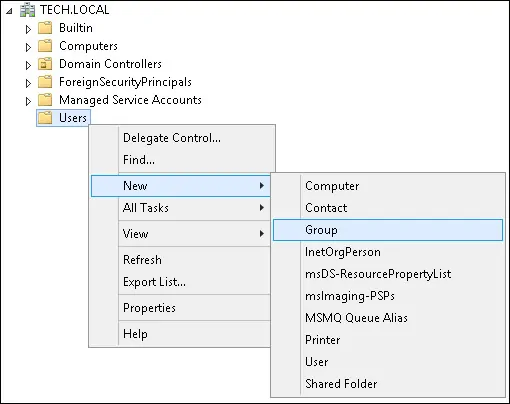
Create a new group named: django-admin
Members of this group will have the Admin permission on the Django web interface.
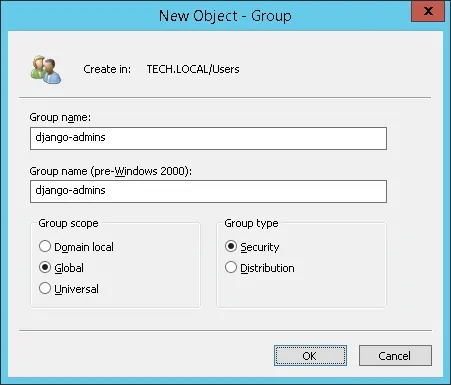
Important! Add the admin user as a member of the django-admins group.
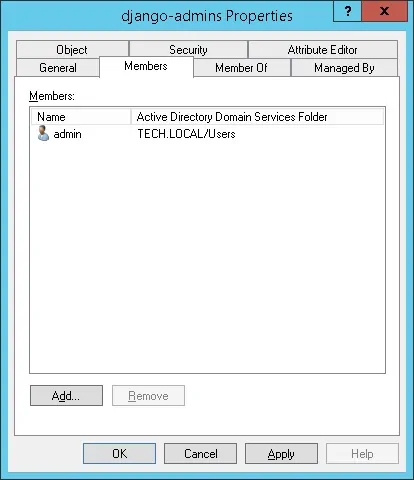
Congratulations, you have created the required Active Directory group.
Tutorial - Django Installation on Ubuntu Linux
Upgrade your Ubuntu installation.
If required, reboot your computer.
Use apt-get to install the required packages.
Verify the default Python version installed on your system.
Verify the latest Python version installed on your system.
Change the default Python version to the Latest edition detected.
Verify the default Python version installed on your system.
Install Django.
Here is the Django installation output.
Create your first Django project.
Edit the settings.py file
Locate the ALLOWED_HOSTS entry and configure your Django server IP address.
In our example, the Djando server is running on a computer using the IP address 192.168.15.11.
Start the Django server.
Open a browser software, enter the IP address of your Django server firewall plus :8000 and access web interface.
In our example, the following URL was entered in the Browser:
• https://192.168.15.11:8000
The Django web interface should be presented
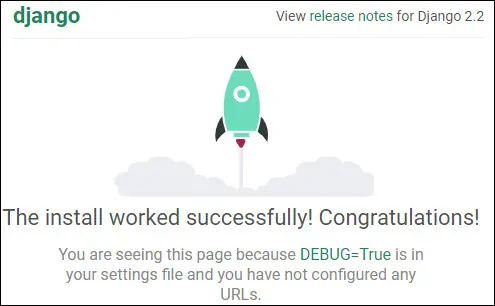
On the Linux command-line, press CTRL+C to stop the Djando server.
Create the Django SQLite database schema.
Here is the Django migration output:
Create a local Administrative user account.
In our example, we create a local user account named root with the password kamisama123.
Start the Django server.
Open your browser and enter the IP address of your web server plus :8000/admin
In our example, the following URL was entered in the Browser:
• http://192.168.15.11:8000/admin
On the login screen, use the Django username and password created before.
• Default Username: root
• Default Password: kamisama123
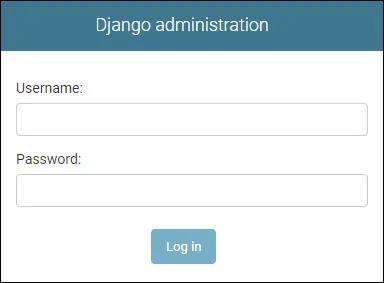
After a successful login, you will be sent to the Django Dashboard.

Congratulations! You have finished the Django Installation on Ubuntu Linux.
Tutorial Django - LDAP Authentication on Active Directory
On the Linux command-line, press CTRL+C to stop the Djando server.
Install the required packages to allow the django-auth-ldap installation.
Install the django-auth-ldap package using PIP.
Here is the django-auth-ldap installation output.
Edit your Django project settings.py file.
Locate this area on the top of your settings.py file.
Add the LDAP user authentication configuration below this line.
In our example, we used the following configuration for user authentication:
• Domian controller IP - 192.168.15.10
• Active directory domain - dc=tech,dc=local
• Authentication containers - DC=tech,DC=local
• Bind user - CN=bind,CN=Users,DC=tech,DC=local
• Bind user password - kamisama123@
• Group permission - Members of the django-admin group will have total access to the web interface
Keep in mind that you need to change this to reflect your network environment.
Start the Django server.
As an example, here is the content of our settings.py file.
Open your browser and enter the IP address of your web server plus :8000/admin
In our example, the following URL was entered in the Browser:
• http://192.168.15.11:8000/admin
On the login screen, use the Django username and password created before.
• Default Username: admin
• Default Password: Enter the Active directory password

After a successful login, you will be sent to the Django Dashboard.

Access the users menu and verify if the Active directory user is listed.

Congratulations! You have finished the Django ldap authentication using Active Directory on Ubuntu Linux.
