Would you like to learn how to do a Icinga2 installation on Ubuntu Linux? In this tutorial, we are going to show you how to install, configure and access Icinga2 on a computer running Ubuntu Linux.
• Ubuntu version: 18
• Ubuntu version: 19
Hardware List:
The following section presents the list of equipment used to create this Icinga2 tutorial.
Every piece of hardware listed above can be found at Amazon website.
Icinga2 Related Tutorial:
On this page, we offer quick access to a list of tutorials related to Icinga2 installation.
Tutorial Icinga2 - Installation on Ubuntu Linux
Install the required packages.
Download and install the Icinga2 repository key.
Use the following command to discover your Ubuntu linux code name.
In our example, the Ubuntu linux code is DISCO.
Add the oficial Icinga2 repository to you APT database.
Update your APT database and install the Icinga2 package.
Install the Icinga2's standard monitoring plugins.
List Icinga2 features instaled.
Enable the Icinga2 service to automatically start during boot time.
Congratulations! You have finished the Icinga2 installation.
Tutorial Icinga2 - MySQL Installation
Install the icinga2-ido-mysql package.
This will enable Icinga2 server to store the configuration in Mysql.
Enable the Icinga 2's ido-mysql feature.

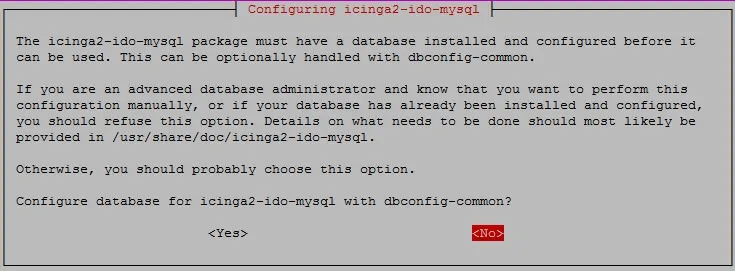
Configure database for icinga2-ido-mysql with dbconfig-common? No.
Enable the ido-mysql feature.
Restart Icinga2
Install the MySQL database service.
Access the MySQL database server.
Set a Password for the MySQL root user.
In our example, we set the root password kamisama123.
Create a database named icinga2.
Create a mysql user named icinga2.
Give the MySQL user named icinga2 permission over the database named icinga2.
Import the Icinga2 database template inside MySQL.
The system will request the password of the icinga2 MysQL user to import the template.
Edit the ido-mysql.conf configuration file to enable the communication with the MySQL service.
Here is our configuration.
Restart Icinga2
You have finished the database installation.
You have imported the Icinga2 database templates in the MySQL Server.
Tutorial - Installing the Icinga2 Web Interface
Next, we need to install the Apache web server and all the required software.
On the Linux console, use the following commands to install the required packages.
Locate the PHP configuration file on your system.
Edit the PHP configuration file and set the correct timezone.
Keep in mind that your PHP version and the location of the file may not be the same of mine.
As an example, our timezone was set to America/Sao_Paulo.
Restart the Apache service.
Access the MySQL database server.
Create a database named icingaweb_db.
Create a mysql user named icingaweb_db.
Give the MySQL user named icingaweb_db permission over the database named icingaweb_db.
Install the Icinga web interface package named icingaweb2.
Restart the Apache service.
Generate the Icinga installation token.
Open your browser and enter the IP address of your web server plus /icingaweb2.
In our example, the following URL was entered in the Browser:
• http://192.168.15.10/icingaweb2
The Icinga2 web installation interface should be presented.
Enter the Icinga web2 setup token.

On the Icinga web modules screen, click on the Next button.
On the Icinga web requirements screen, click on the Next button.

Select the Database option and click on the Next button.

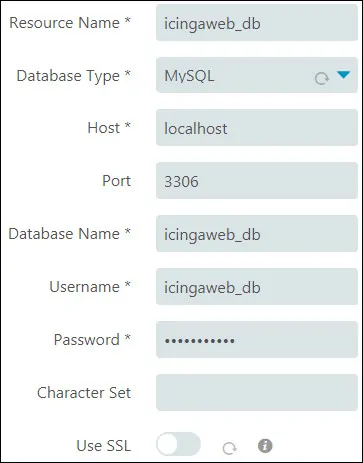
On the Icinga Database Resource screen, perform the following configuration:
• Resource Name - icingaweb_db
• Database Type - MYSQL
• Host - localhost
• Port - 3306
• Database Name - icingaweb_db
• Username - icingaweb_db
• Password - kamisama123
Click on the Next button.
On this screen, enter the MySQL root login to import the Icingaweb2 database template.

Set the Backend Name icingaweb2 and click on the Next button.

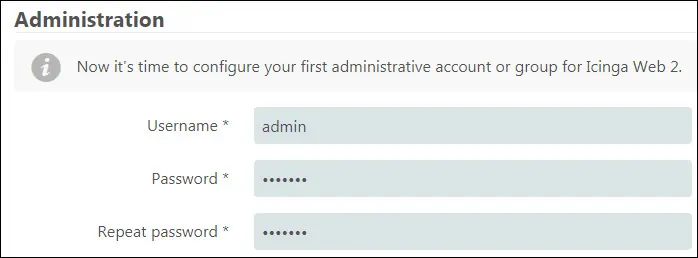
Set an administrative account to access the Icinga web interface.
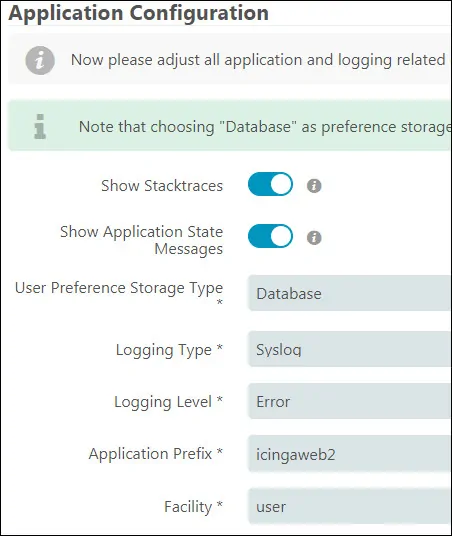
Application Configuration screen, perform the folowing configuration:
• Show Stacktraces - Enabled
• Show Application State Messages - Enabled
• User Preference Storage Type - Database
• Logging Type - Syslog
• Logging Level - Error
• Application Prefix - icingaweb2
• Facility - User
Click on the Next button.
On the Icinga installation summary screen, click on the Next button.
On the Welcome screen, click on the Next button.

On the monitoring backend screen, perform the following configuration:
• Backend Name - icinga
• Backend Type - IDO
Click on the Next button.

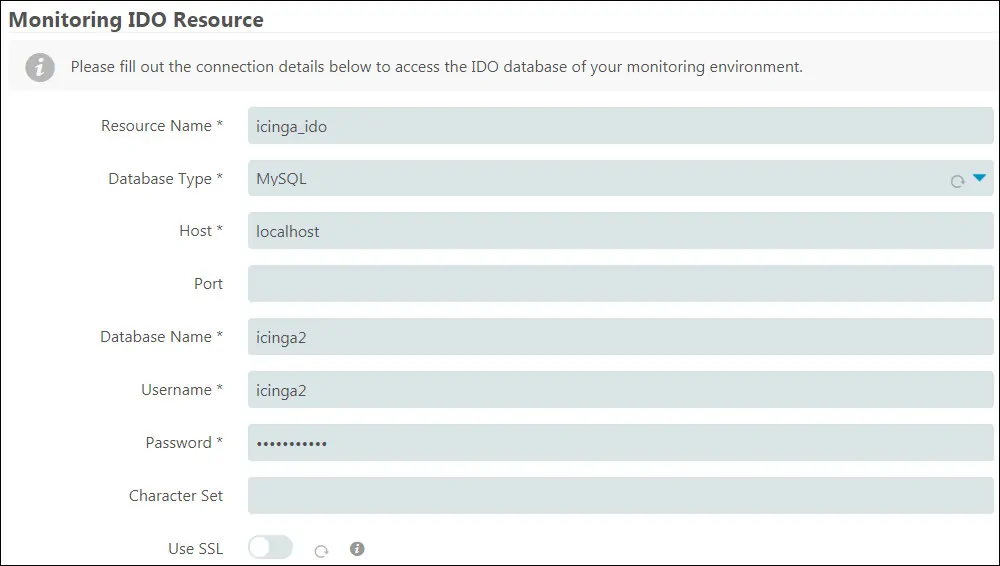
On the Monitoring IDO Resource screen, perform the following configuration:
• Resource Name - icinga_ido
• Database Type - MYSQL
• Host - localhost
• Port - 3306
• Database name - icinga2
• Username - icinga2
• Password - kamisama123
Click on the Next button.
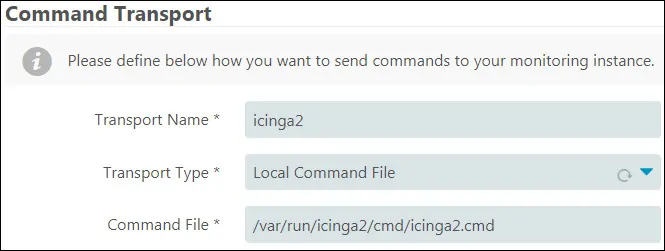
On the Command Transport screen, perform the following configuration:
• Transport name - icinga2
• Transport Type - Local Comand File
• Comand File - /var/run/icinga2/cmd/icinga2.cmd
Click on the Next button.
On the Monitoring Security screen, perform the following configuration:
• Protected Custom Variables - *pw*,*pass*,community
Click on the Next button.

On the last screen, click on the Finish button and wait for the Icinga2 installation to finish.
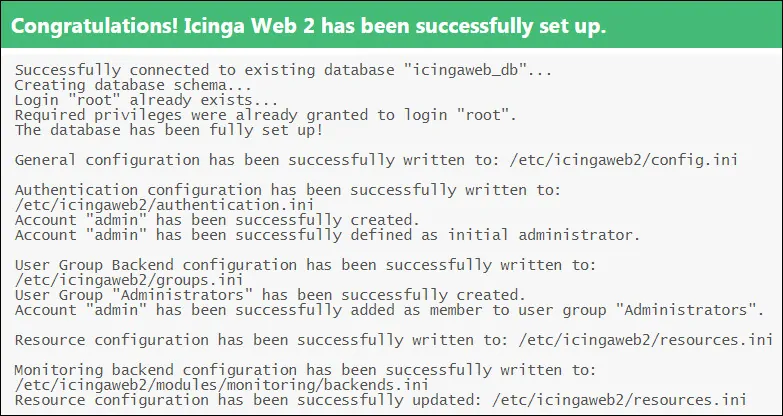
After finishing the installation click on the option: Login to Icinga Web 2.
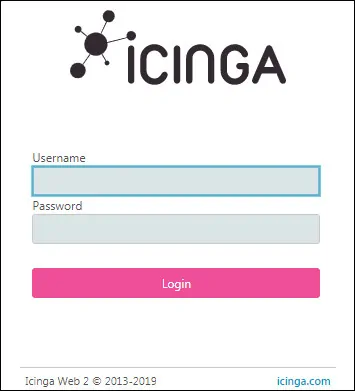
Finally, you will be presented with the Icinga2 login screen.
• Iicnga2 default username: You set before
• Icinga2 default Password: You set before
The Icinga2 login interface should be displayed.
After a successful login, you will be sent to the Icinga2 Dashboard.

Congratulations, you have installed the Icinga2 web interface on Ubuntu Linux.
