IIS를 설치하고 Windows를 실행하는 컴퓨터에서 HTTPS 기능을 활성화하는 방법을 알아보시겠습니까? 이 자습서에서는 IIS 서버에서 HTTPS를 사용하도록 설정하는 방법을 보여 드리겠습니다.
• Windows 2012 R2
• Windows 2016
• Windows 2019
• 윈도우 2022
• Windows 10
• 윈도우 11
윈도우 자습서 :
이 페이지에서는 Windows 자습서 목록에 빠르게 액세스할 수 있습니다.
튜토리얼 윈도우 - IIS 설치
서버 관리자 응용 프로그램을 엽니다.
관리 메뉴에 액세스하고 역할 및 기능 추가를 클릭합니다.

서버 역할 화면에서 웹 서버 IIS라는 옵션을 선택합니다.
다음 버튼을 클릭합니다.
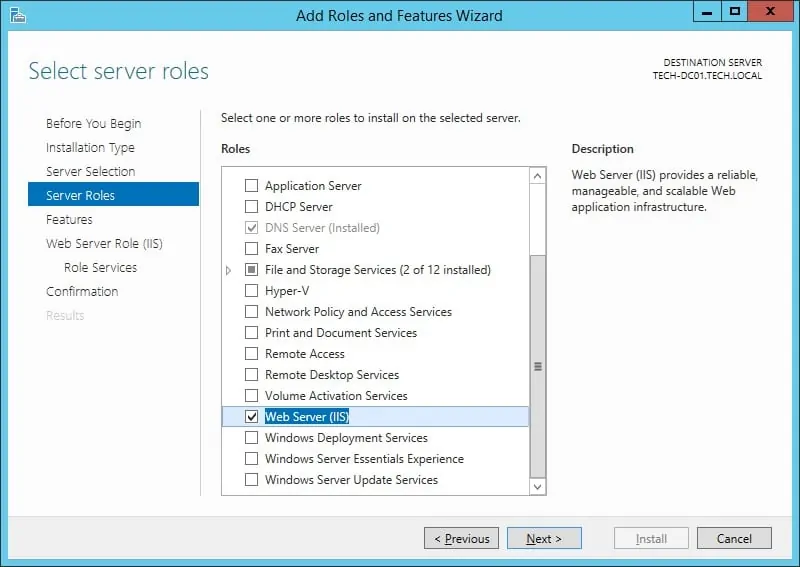
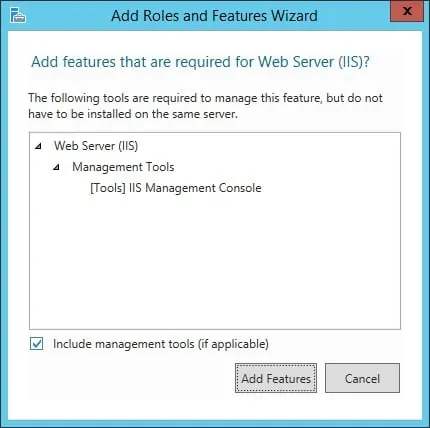
다음 화면에서 기능 추가 단추를 클릭합니다.
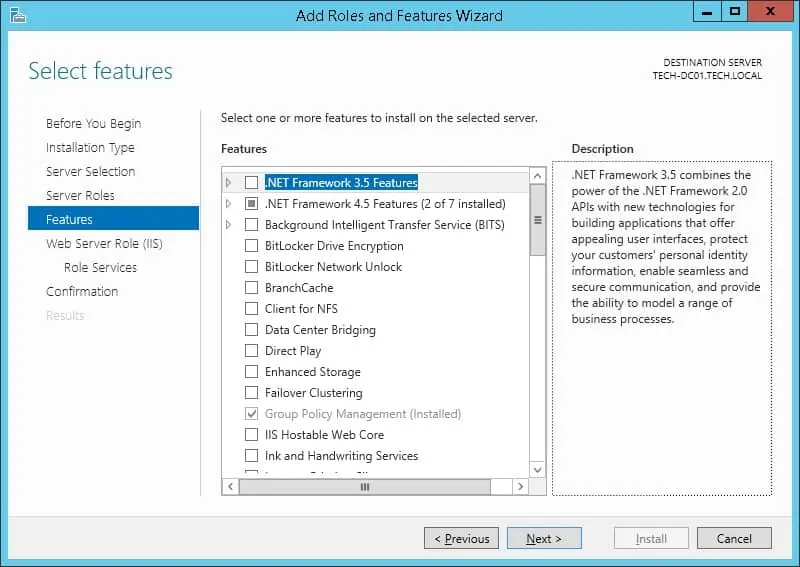
기능 화면에서 다음 단추를 클릭합니다.
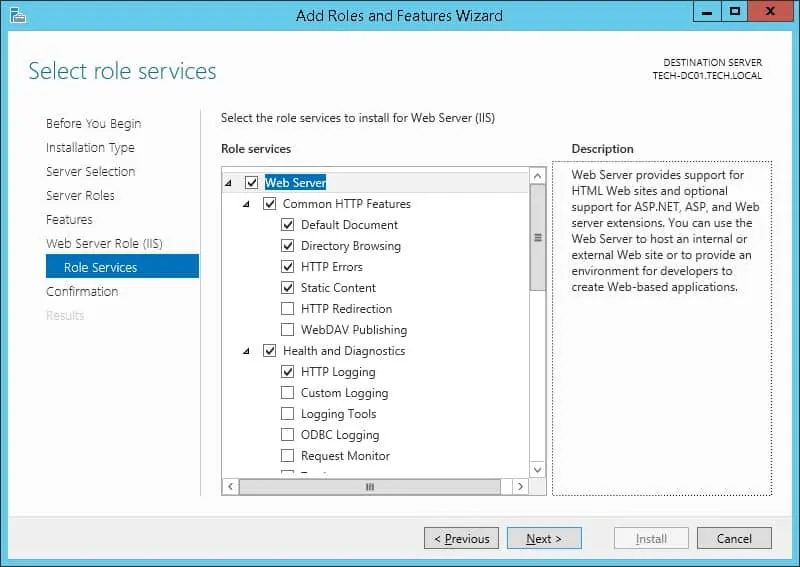
역할 서비스 화면에서 다음 단추를 클릭합니다.
요약 화면에서 설치 버튼을 클릭합니다.
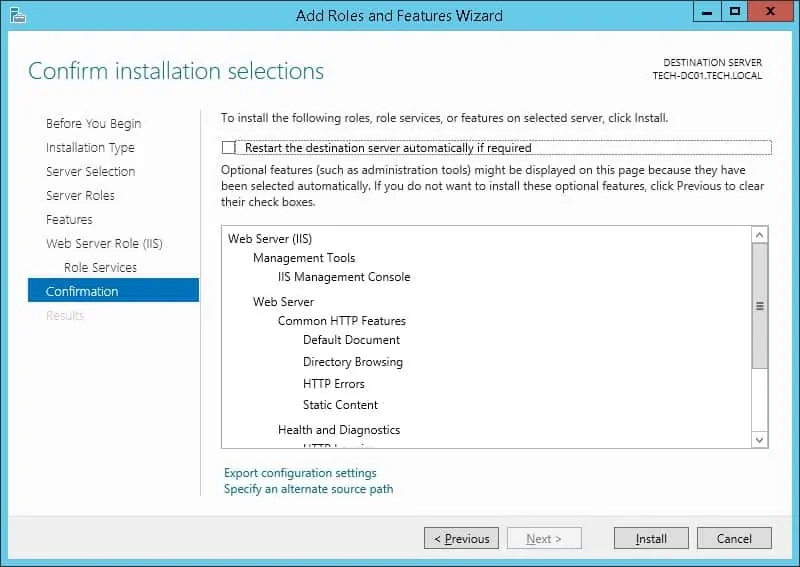
축! Windows 2012를 실행하는 컴퓨터에서 IIS 서비스 설치를 완료했습니다.
튜토리얼 IIS - HTTPS 를 활성화
IIS 관리자라는 응용 프로그램을 시작합니다.

IIS 관리자 응용 프로그램에서 IIS 서버 이름을 선택합니다.
화면의 오른쪽 부분에서 서버 인증서라는 옵션에 액세스합니다.
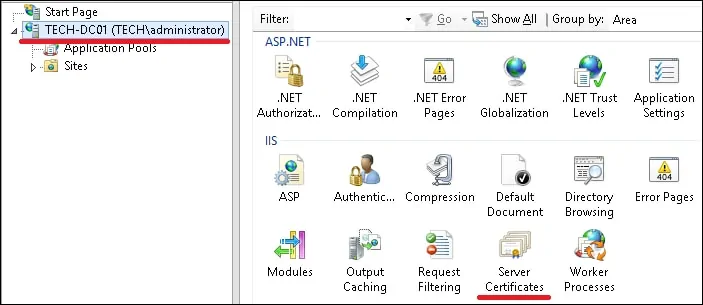
인증서가 이미 있는 경우 화면 오른쪽 상단에 있는 가져오기 옵션을 클릭합니다.
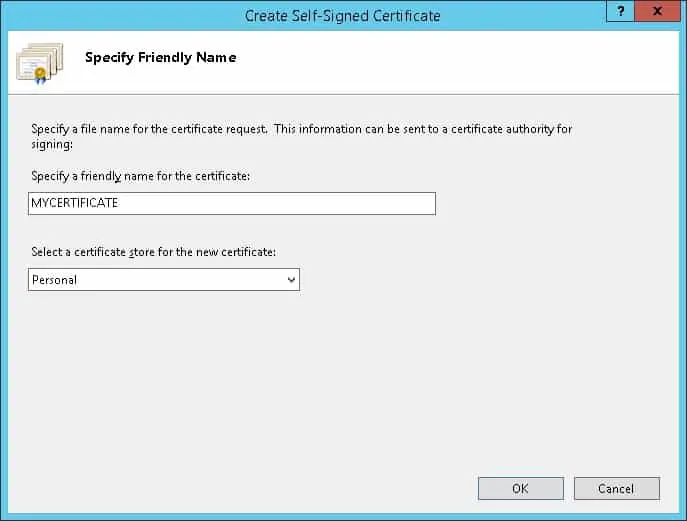
자체 서명된 인증서를 생성하려면 자체 서명된 인증서 만들기라는 옵션을 선택합니다.

인증서에 이름을 입력하고 확인 버튼을 클릭합니다.
원하는 웹 사이트를 마우스 오른쪽 단추로 클릭하고 바인딩 편집이라는 옵션을 선택합니다.
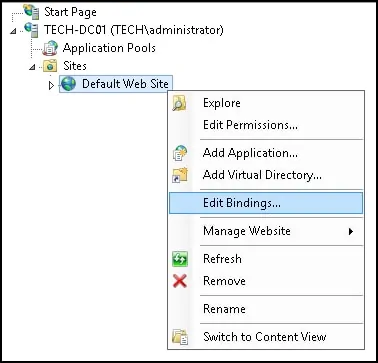
추가 버튼을 클릭합니다.
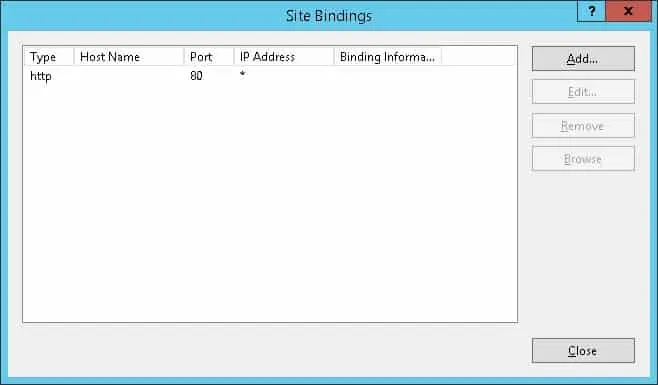
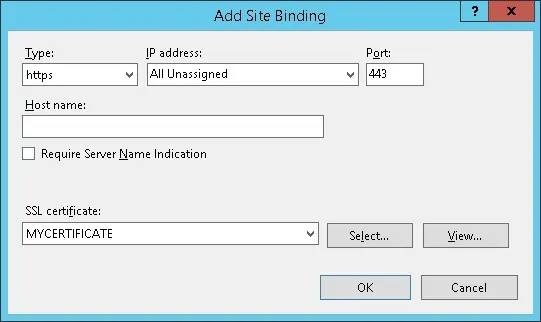
다음 구성을 수행합니다.
• 유형 - HTTPS
• IP 주소 - 모든 할당되지 않음
• 포트 - 443
• SSL 인증서 - 원하는 인증서 선택
확인 버튼을 클릭합니다.
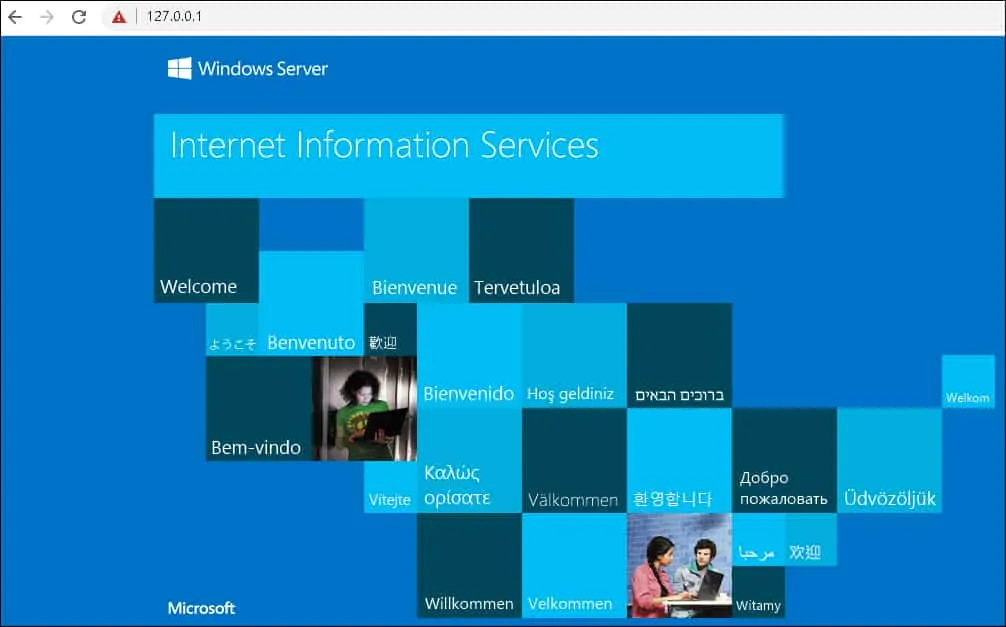
IIS 서버에서 브라우저를 열고 HTTPS 프로토콜을 사용하여 웹 서버의 IP 주소를 입력합니다.
이 예제에서는 브라우저에 다음 URL을 입력했습니다.
• https://127.0.0.1
HTTPS 페이지를 제시해야 합니다.
축! IIS 서버에서 HTTPS 기능을 성공적으로 구성했습니다.
