Would you like to learn how configure a TP-LINK WA701ND Access point? In this tutorial, we are going to show you how to do the initial IP address configuration on a TP-LINK TL-WA701ND access point and how to create your first wireless network.
Hardware List:
The following section presents the list of equipment used to create this Ubuntu Linux tutorial.
Every piece of hardware listed above can be found at Amazon website.
Ubuntu Playlist:
On this page, we offer quick access to a list of videos related to Ubuntu Linux.
Don't forget to subscribe to our youtube channel named FKIT.
TP-LINK Related Tutorial:
On this page, we offer quick access to a list of tutorials related to TP-Link.
Tutorial - TP-LINK WA701ND Initial Configuration
Connect your computer to the TP-LINK WA701ND using a crossover cable and configure the following network address on your computer:
• IP - 192.168.0.100
• MASK - 255.255.255.0
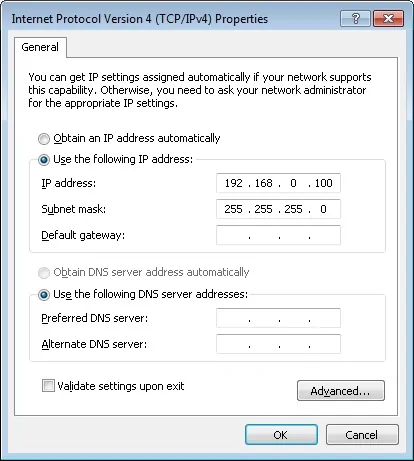
Turn on the TP-LINK WA701ND, wait 1 minute and press the reset button located on the back of your equipment for 10 seconds.
On your desktop, open a DOS prompt and try to ping the default IP address of the TP-LINK equipment.
• IP: 192.168.0.254
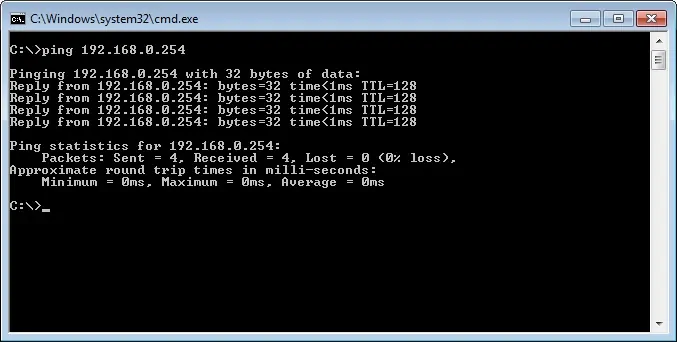
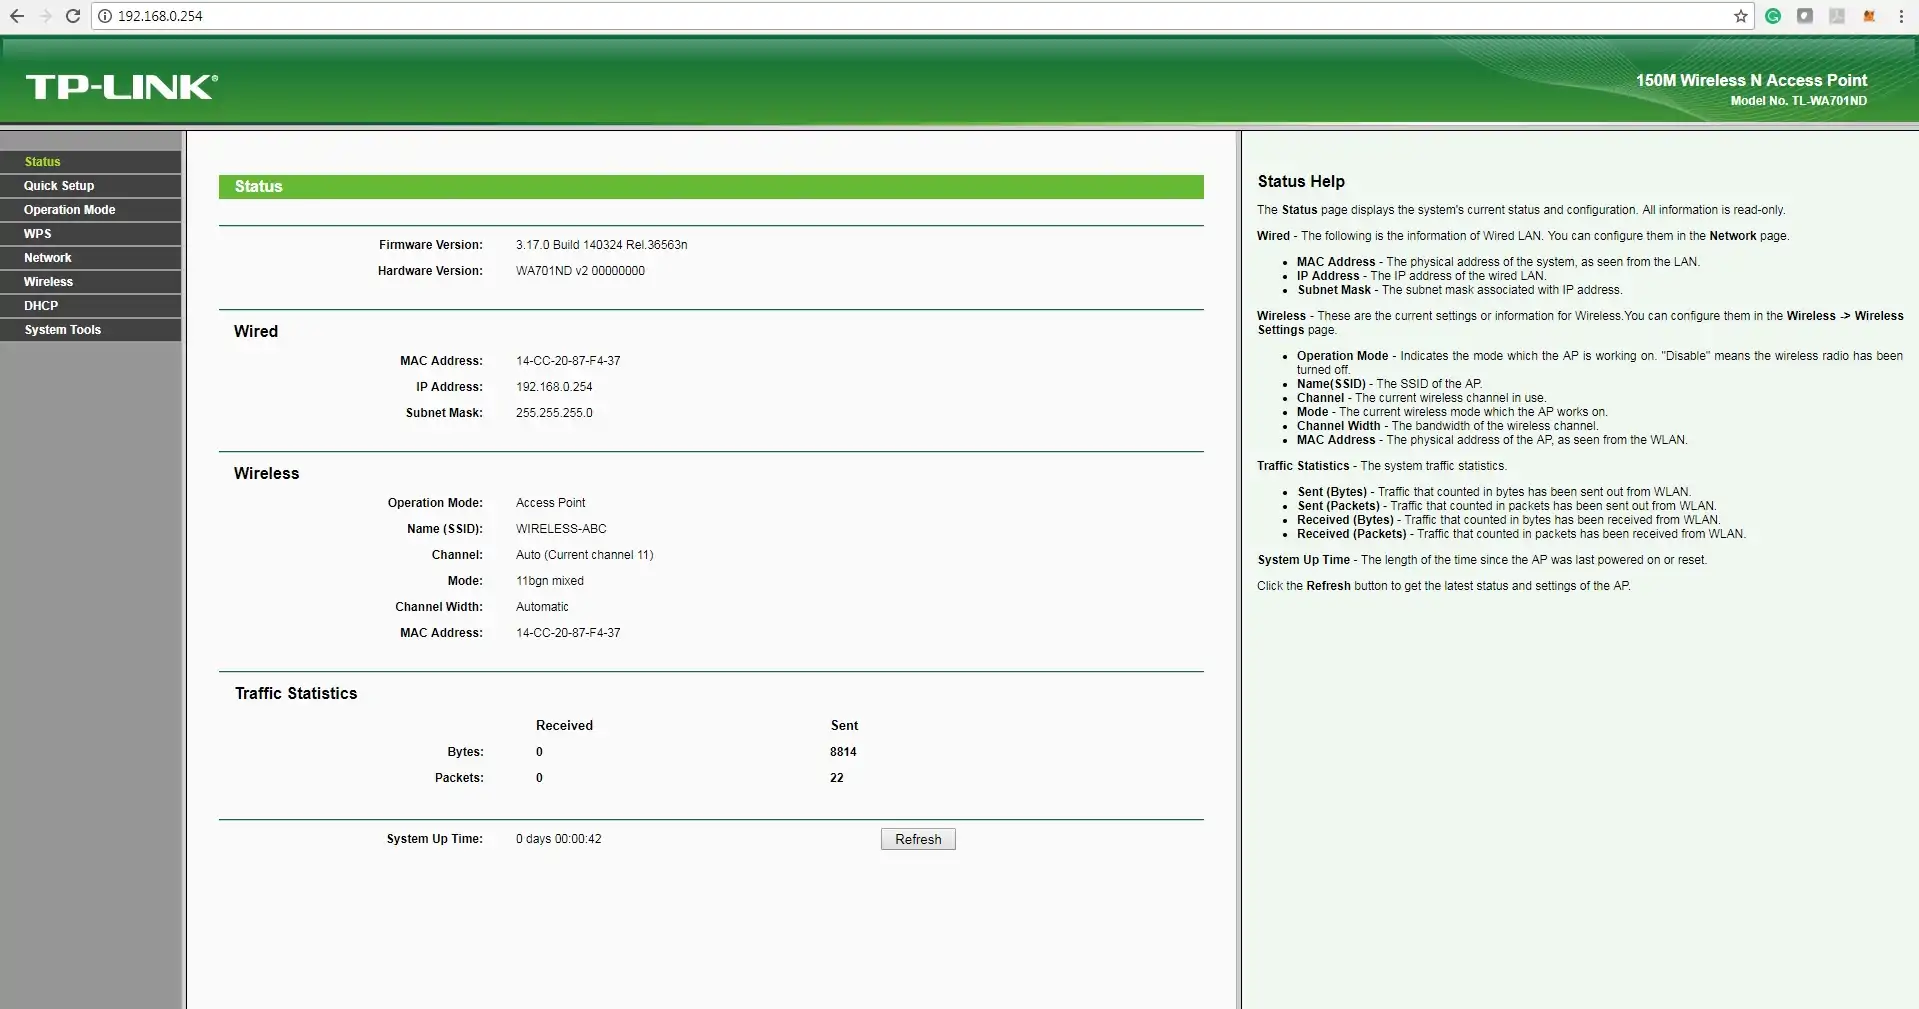
Open your browser, enter the IP address of the WA701ND equipment 192.168.0.254 and login using the default username and password.
When presented with the login prompt enter the following information:
• USERNAME: admin
• PASSWORD: admin

Here is the WA701ND TP-Link web interface.
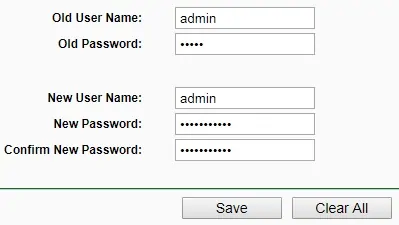
On the web interface, Access the System Tools menu and select the Password option.
Change the default password to keep your device safe.
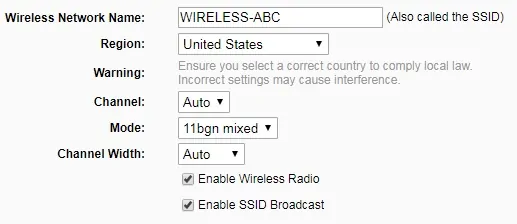
On the web interface, access the Wireless menu and select the Wireless Settings.
Change the Wireless network name.
On the web interface, access the Wireless menu and select the Wireless security option.
Change the wireless password.

Access the System tools menu and select the Reboot option.
Click on the Reboot button.

If you need to change the IP address of the device.
Access the Network menu and select the LAN option.
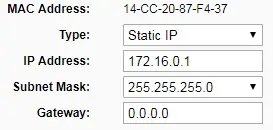
You will need to reboot the device.
This tutorial presented the initial IP configuration process of a TP-Link TL-WA701ND access point
