Would you like to learn how to create a bootable Linux USB Stick on Windows? In this tutorial, we are going to show you how to download a Linux ISO image and create a bootable flash drive on a computer running Microsoft Windows.
In our example, we are going to create a bootable USB stick containing the Ubuntu Linux installer.
Hardware List:
The following section presents the list of equipment used to create this Windows tutorial.
Every piece of hardware listed above can be found at Amazon website.
Windows Playlist:
On this page, we offer quick access to a list of videos related to Windows.
Don't forget to subscribe to our youtube channel named FKIT.
Windows Related Tutorial:
On this page, we offer quick access to a list of tutorials related to Windows.
Tutorial - Bootable Linux USB Stick on Windows
Open a browser, access the ubuntu.com website and download the ISO image of the Ubuntu Linux.
In our example, we used the Ubuntu Linux server version 17.10 but you can use any Linux distribution
Insert a USB Stick on the computer and format as FAT32 or NTFS.
In our example, we used a 30GB USB stick.
Open a browser, access the official website and download the RUFUS software.
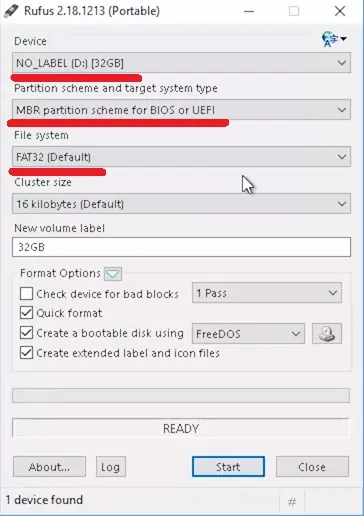
Open the Rufus software, select the following options:
• Device: The USB driver unity.
• Partition Scheme: MBR Partition Scheme for BIOS or UEFI.
• Filesystem: FAT32

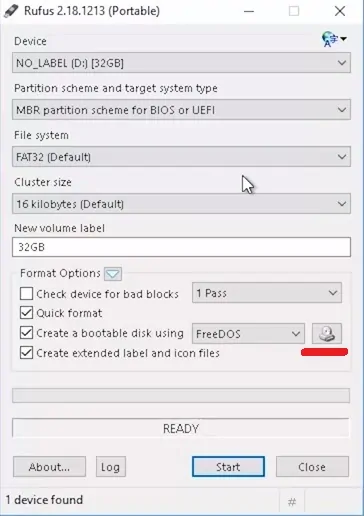
Select the image button and locate the Ubuntu Linux ISO image.
In our example, we selected the file: ubuntu-17.10.1-server-amd64.iso

Click on the Start button and wait for the process to finish
The system will start to create a bootable USB stick using the Ubuntu Linux image.
This process can take a while.
After the process is finished, you should remove the USB stick.
Now, you could try to boot another computer using your band new bootable Linux USB Stick.

