Would you like to learn how to change the RDP service TCP port on Windows? In this tutorial, we will show you how to configure the Remote Desktop service to use a different TCP port on a computer running Windows.
• Windows 2012 R2
• Windows 2016
• Windows 2019
• Windows 10
• Windows 7
In our example, the RDP service will be configured to use the TCP port 3333.
Equipment list
Here you can find the list of equipment used to create this tutorial.
This link will also show the software list used to create this tutorial.
Windows Related Tutorial:
On this page, we offer quick access to a list of tutorials related to Windows.
Tutorial RDP - Change the TCP port
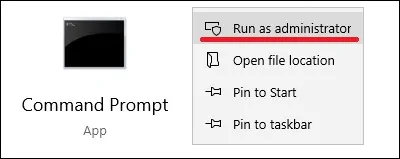
As an administrator, start an elevated command prompt.
Change the RDP service TCP port.
Create a Firewall rule to allow the input of packets on the new RDP port.
Restart the RDP service.
In our example, we configured the RDP service to use the TCP port number 3333.
In our example, we created a firewall rule to allow the input of packets on the new RDP service port.
Access the RDP service using a different TCP port.
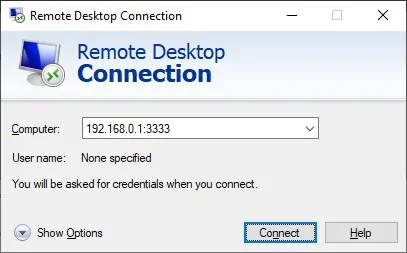
Optionally, use the command-line to access the RDP service using a different TCP port.
Congratulations! You have changed the Remote Desktop service TCP port.
Tutorial RDP - Configure the TCP port using REGEDIT
As an administrator, start the Windows Registry Editor application.
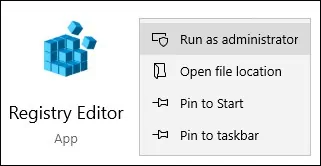
On the Registry editor screen, locate the following item.
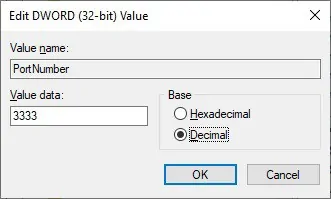
Edit the item named PORTNUMBER.
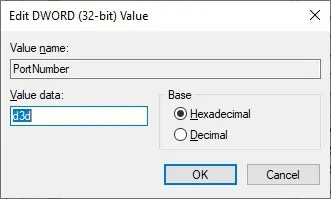
Select the Decimal option and change the RDP service TCP port.
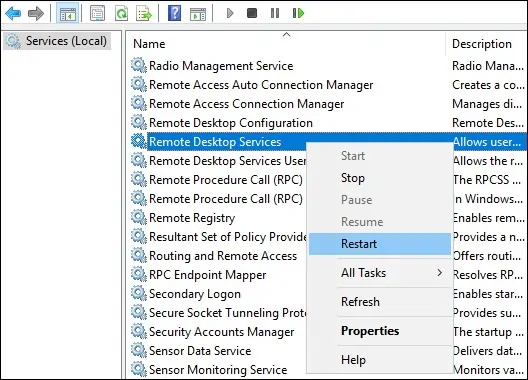
Restart the RDP service.
In our example, we configured the RDP service to use the TCP port number 3333.
Access the RDP service using a different TCP port.

Optionally, use the command-line to access the RDP service using a different TCP port.
Congratulations! You have changed the RDP port using the Windows Registry editor.
