Would you like to learn how to do a Cacti installation on Ubuntu Linux? In this tutorial, we are going to show you how to install, configure and access Cacti dashboards on a computer running Ubuntu Linux.
• Ubuntu version: 18.04
What is Cacti?
Cacti is an open-source platform for data monitoring that is completely PHP driven.
On the Web interface, users are able to use Cacti as a frontend to RRDtool, create Graphs and populate them with data stored in MySQL.
Cacti also has SNMP support for users to create graphs in order to perform network monitor.
Cacti Playlist:
On this page, we offer quick access to a list of videos related to Cacti installation.
Don't forget to subscribe to our youtube channel named FKIT.
Cacti Tutorial:
On this page, we offer quick access to a list of Cacti tutorials
Tutorial - Install Cacti Database
First, we are going to configure the system to use the correct date and time using NTP.
On the Linux console, use the following commands to set the correct timezone.
# dpkg-reconfigure tzdata
Install the Ntpdate package and set the correct date and time immediately.
# apt-get update
# apt-get install ntpdate
# ntpdate pool.ntp.br
The Ntpdate command was used to set the correct date and time using the server: pool.ntp.br
Let's install the NTP service.
# timedatectl set-ntp 0
# apt-get install ntp
NTP is the service that will keep our server updated.
Use the command date to check the date and time configured on your Ubuntu Linux.
# date
If the system shown the correct date and time, this means that you followed all the steps correctly.
Now, we can proceed to the installation of the database service.
On the Linux console, use the following commands to install the required packages.
# apt-get update
# apt-get install mysql-server mysql-client
Edit the MySQL server configuration file mysqld.cnf.
# vi /etc/mysql/mysql.conf.d/mysqld.cnf
Add the following options under the MYSQLD section.
Restart the MySQL service.
# service mysql restart
After finishing the installation, use the following command to access the MySQL database server.
To access the database server, enter the password set on the MySQL server installation wizard.
# mysql -u root -p
Use the following SQL command to create a database named cacti.
CREATE DATABASE cacti;
Use the following SQL command to create a database user named cacti.
CREATE USER 'cactiuser'@'%' IDENTIFIED BY 'kamisama123';
Give the SQL user named cactiuser permission over the database named cacti.
GRANT ALL PRIVILEGES ON cacti.* TO 'cactiuser'@'%';
quit;
On the Linux console, use the following commands to download the Cacti installation package.
# mkdir /downloads
# cd /downloads
# wget https://www.cacti.net/downloads/cacti-1.2.3.tar.gz
Now, we need to import Cacti database template inside MySQL.
Extract the Cacti installation package and import the database template inside MySQL.
The system will request the password of the MySQL cactiuser every time you try to import a file.
# tar -zxvf cacti-1.2.3.tar.gz
# cd cacti-1.2.3
# mysql -u cactiuser -p cacti < cacti.sql
Cacti require the configuration of the MySQL timezone database.
Import the MySQL database configuration using the MySQL root account.
# mysql_tzinfo_to_sql /usr/share/zoneinfo | mysql -u root -p mysql
Access the MySQL server.
On MySQL, grant Cacti access to the TimeZone database.
# mysql -u root -p
GRANT SELECT ON mysql.time_zone_name TO cactiuser@'%';
quit;
You have finished the database installation.
You have imported the Cacti database templates on the MySQL Server.
Tutorial - Install Cacti Apache Frontend
Next, we need to install the Apache web server and all the required software.
On the Linux console, use the following commands to install the required packages.
# apt-get install apache2 php libapache2-mod-php php-cli php-snmp
# apt-get install php-mysql php-mbstring php-gd php-xml
# apt-get install php-ldap php-gmp php-intl php-recode php-gettext
# apt-get install php-pear php-pspell php-memcache
Now, you should find the location of the php.ini file on your system.
After finding, you need to edit the php.ini file.
# updatedb
# locate php.ini
/etc/php/7.2/apache2/php.ini
/etc/php/7.2/cli/php.ini
Keep in mind that your PHP version and the location of the file may not be the same of mine.
You need both php.ini files.
First, let's edit the file: /etc/php/7.2/apache2/php.ini
# vi /etc/php/7.2/apache2/php.ini
Here is the new file with our configuration.
max_execution_time = 300
memory_limit = 500M
post_max_size = 32M
max_input_time = 300
date.timezone = America/Sao_Paulo
register_argc_argv = On
Now, let's edit the file: /etc/php/7.2/cli/php.ini
# vi /etc/php/7.2/cli/php.ini
Here is the new file with our configuration.
date.timezone = America/Sao_Paulo
Keep in mind that you have to set your PHP timezone.
In our example, we used the timezone America/Sao_Paulo
You should also restart apache manually and verify the service status.
# service apache2 restart
Here is an example of the Apache service status output.
● apache2.service - LSB: Apache2 web server
Loaded: loaded (/etc/init.d/apache2; bad; vendor preset: enabled)
Drop-In: /lib/systemd/system/apache2.service.d
└─apache2-systemd.conf
Active: active (running) since Mon 2018-04-23 00:02:09 -03; 1min 4s ago
Tutorial - Cacti Installation on Ubuntu
Now, we need to install the Cacti server on Ubuntu Linux.
On the Linux console, use the following commands to install the required packages.
# apt-get update
# apt-get install snmp snmpd rrdtool libmysql++-dev libsnmp-dev help2man
# apt-get install dos2unix autoconf dh-autoreconf libssl-dev librrds-perl
# apt-get install snmp-mibs-downloader
Reboot your computer.
# reboot
Use the following commands to download and install Spine.
# cd /downloads
# wget https://www.cacti.net/downloads/spine/cacti-spine-1.2.3.tar.gz
# tar -zxvf cacti-spine-1.2.3.tar.gz
# cd cacti-spine-1.2.3
# mkdir m4
# ./bootstrap
# ./configure
# make
# make install
# chown root:root /usr/local/spine/bin/spine
# chmod +s /usr/local/spine/bin/spine
Create and edit the Spine configuration file.
# cp /usr/local/spine/etc/spine.conf.dist /usr/local/spine/etc/spine.conf
# vi /usr/local/spine/etc/spine.conf
Here is the spine.conf file with our configuration.
On the Linux console, move the Cacti folder inside apache root folder.
# mv /downloads/cacti-1.2.3 /var/www/html/cacti
# touch /var/www/html/cacti/log/cacti.log
# touch /var/www/html/cacti/log/cacti_stderr.log
# chown www-data.www-data /var/www/html/cacti -R
Now, you need to edit the Cacti configuration file.
# vi /var/www/html/cacti/include/config.php
Here is the new file with our configuration.
Cacti Web Installer
Open your browser and enter the IP address of your web server plus /cacti.
In our example, the following URL was entered in the Browser:
• http://35.162.85.57/cacti
The Cacti web interface should be presented.
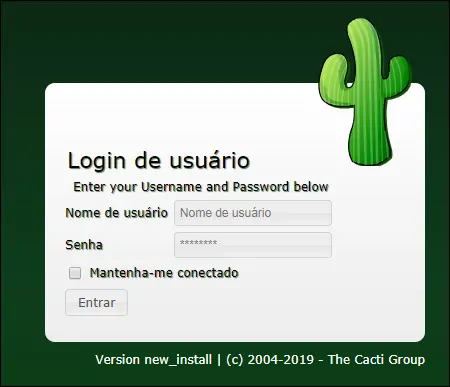
On the prompt screen, enter the Cacti Default Password login information.
• Username: admin
• Password: admin
The system will ask you to change the Cacti default password.
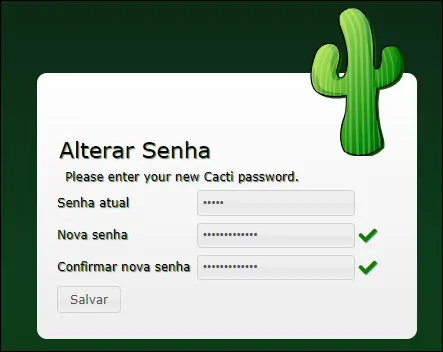
Accept Cacti Network monitor open source license agreement.

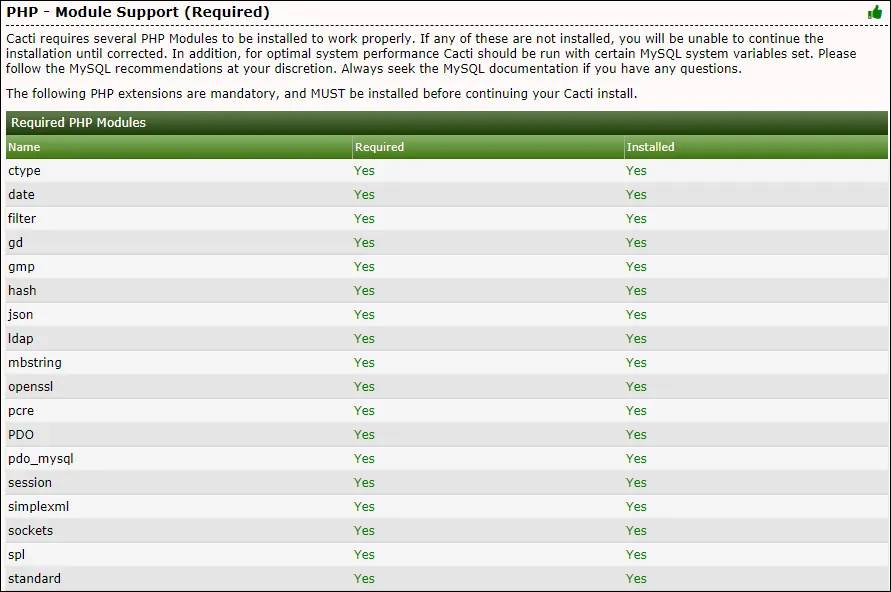
On the next screen, you will have to check if all the requirements were achieved.
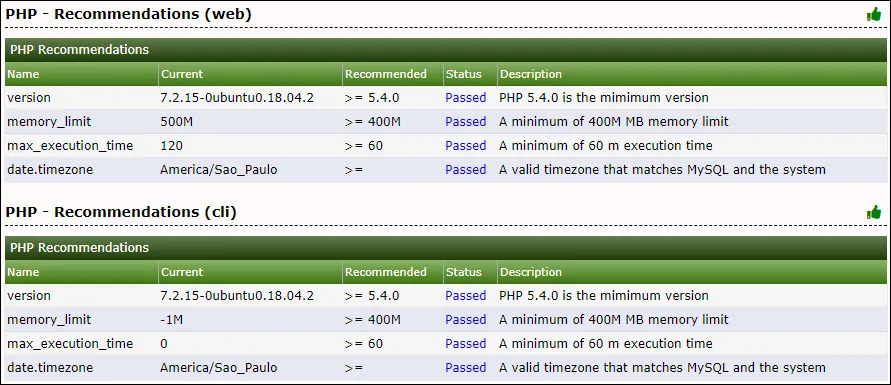
Check if all the PHP module requirements were achieved.
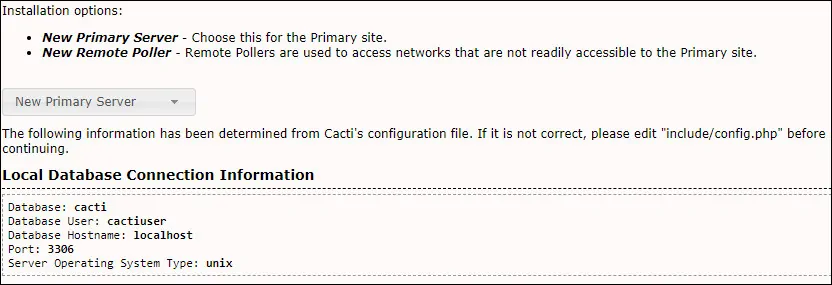
On the next screen, select the New Primary Server option.
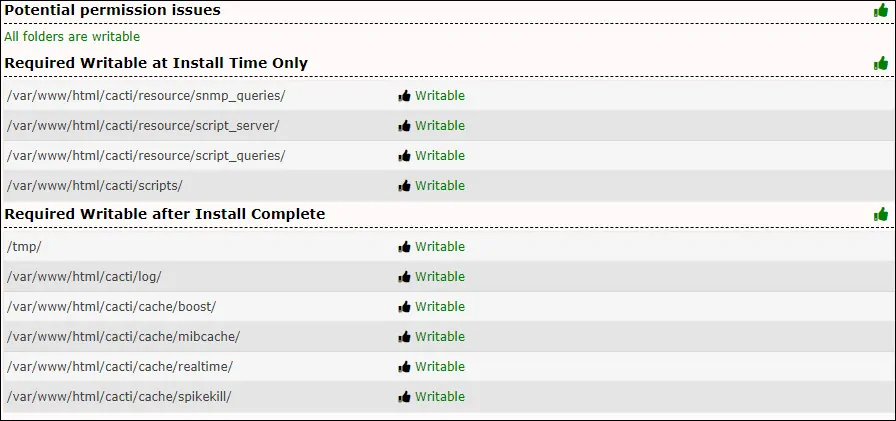
On the next screen, Cacti will check for file permission issues.
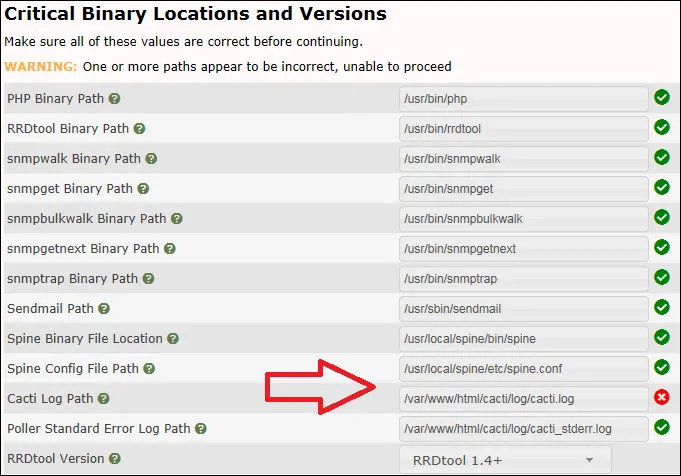
On the Next screen, perform the following configuration:
• Spine Config File Path: /usr/local/spine/etc/spine.conf
• Cacti Log Path: /var/www/html/cacti/log/cacti.log
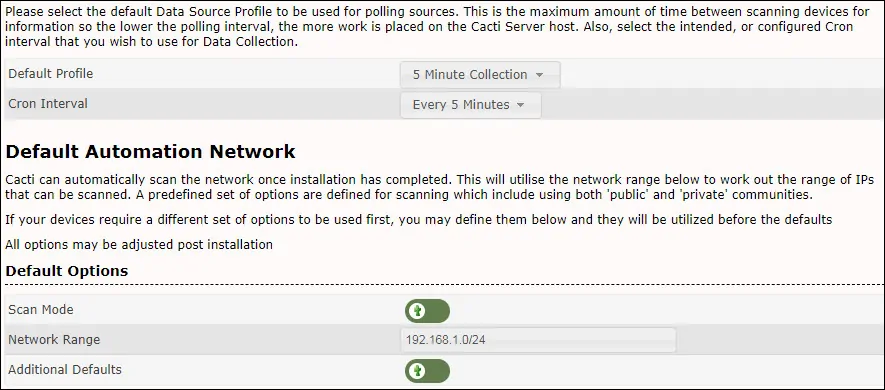
On the Next screen, disable the Scan mode and continue.
On the Next screen, Import Cacti templates.

Keep going.

Select the Confirm the installation checkbox and continue.

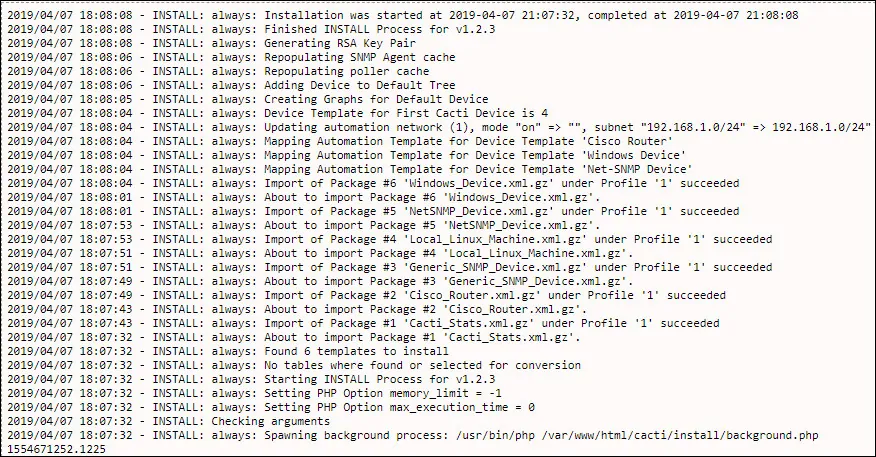
The Cacti installation will start.
Take a look at the Cacti installation log.
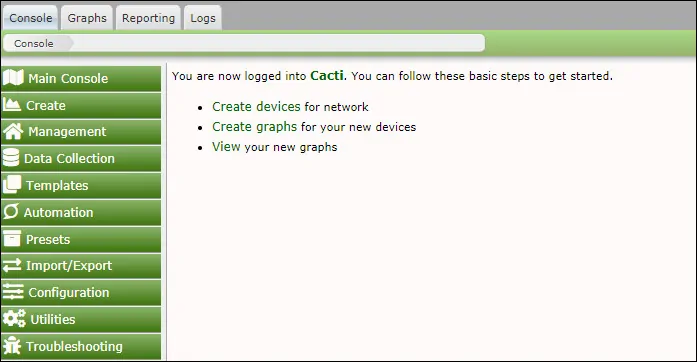
After finishing the installation, the Cacti Dashboard will be presented.
On the Cacti dashboard, access the Configuration menu and select the Settings option.
Access the Poller tab and configure the Poller type option from cmd.php to Spine.
Click on the Save button.

Create a scheduled task using Cron to run the poler.php file every 5 minutes as the user www-data.
# crontab -u www-data -e
Add the following configuration to Crontab:
*/5 * * * * /usr/bin/php /var/www/html/cacti/poller.php
Wait 15 minutes for the poller process to get some information.
Access the Graphics Menu and select your Linux computer to look at the graphics
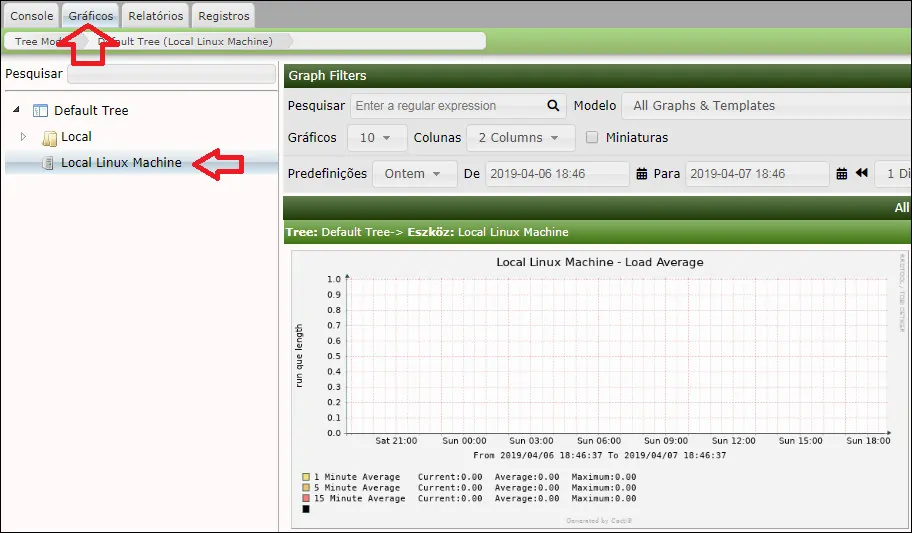
Congratulations! The Cacti server installation was finished successfully.

Leave A Comment
You must be logged in to post a comment.