Windows 2012 で Radius サーバーのインストールを実行する方法を学習しますか? このチュートリアルでは、インストールし、Windows サーバー上の Radius サービスを構成する方法を示します。
• Windows 2012 R2
• ネットワークポリシーとアクセスサービス
この例では、RADIUS サーバーは IP アドレス 192.168.0.50 を使用しています。
この例では、ネットワーク スイッチは IP アドレス 192.168.0.10 を使用しています。
この例では、Windows 10 を実行しているデスクトップで IP アドレス 192.168.0.20 が使用されています。
ネットワーク スイッチとデスクトップの両方が Radius データベースで認証を行う必要があります。
ウィンドウズプレイリスト:
このページでは、Windows のインストールに関連するビデオの一覧にすばやくアクセスできます。
FKITという名前の私たちのYouTubeチャンネルを購読することを忘れないでください。
ウィンドウズ関連のチュートリアル:
このページでは、Windows に関連するチュートリアルの一覧にすばやくアクセスできます。
チュートリアル - Windows 上の RADIUS サーバのインストール
サーバー マネージャー アプリケーションを開きます。
[管理] メニューにアクセスし、[ロールと機能の追加] をクリックします。

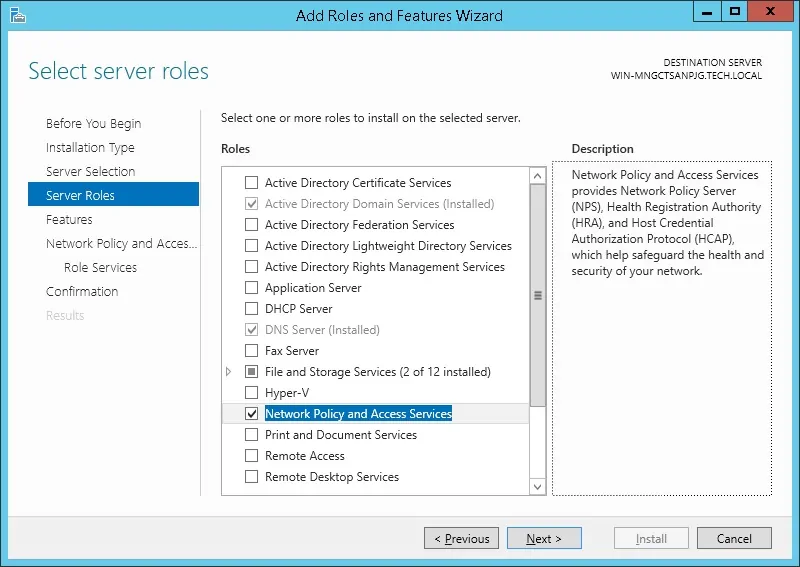
[サーバーロール] 画面にアクセスし、[ネットワーク ポリシーとアクセス サービス] オプションを選択します。
[次へ]ボタンをクリックします。
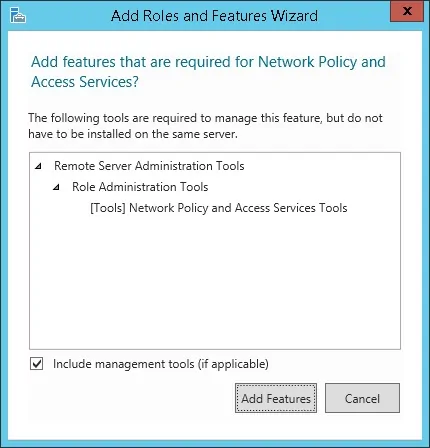
次の画面で、[機能の追加] ボタンをクリックします。
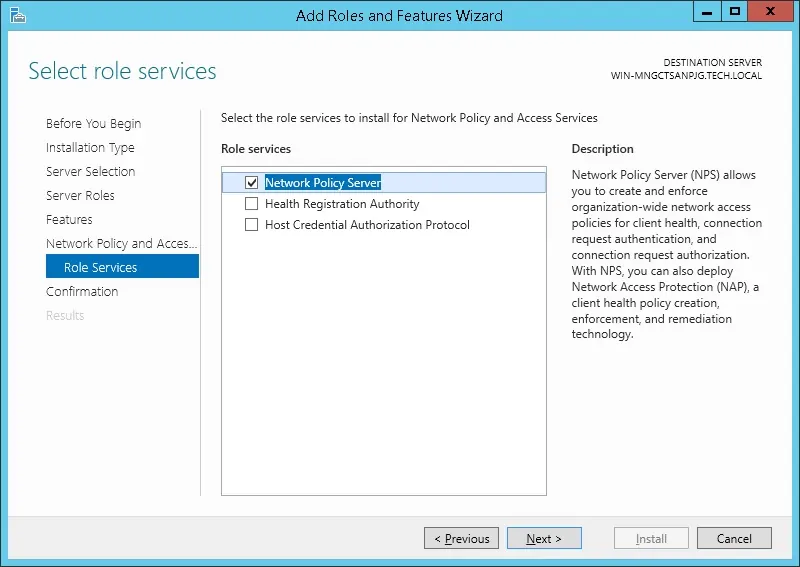
[役割サービス] 画面で、[次へ] ボタンをクリックします。
次の画面で、[インストール]ボタンをクリックします。
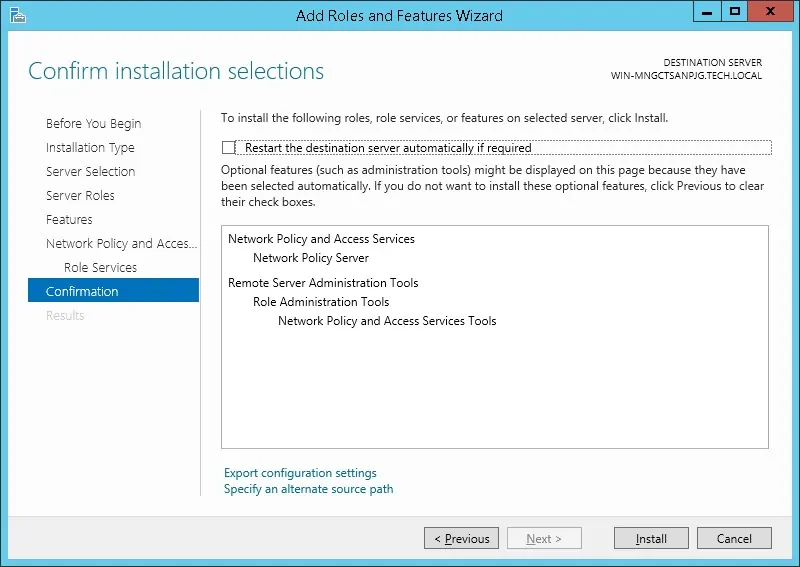
Windows 2012 での Radius サーバーのインストールが完了しました。
チュートリアル RADIUS サーバ - アクティブ ディレクトリ統合
次に、Radius を使用して認証を受ける許可ユーザーのグループを作成する必要があります。
RADIUS-USERS グループは RADIUS サーバーで認証を許可されているユーザー アカウントを一覧表示します。
ドメイン コントローラーで、次の名前のアプリケーションを開きます: Active Directory ユーザーとコンピューター
Users コンテナ内に新しいグループを作成します。
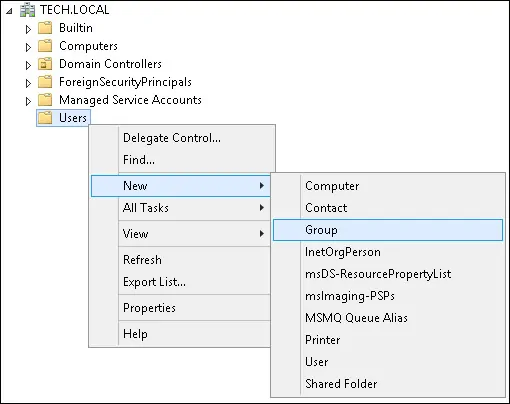
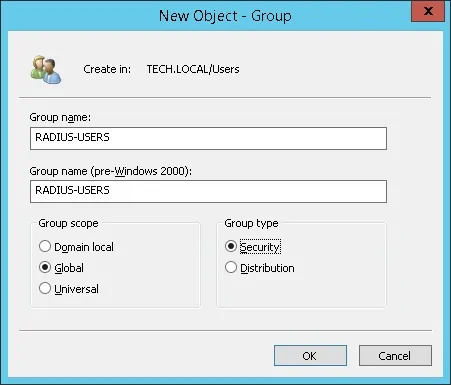
RADIUS-USERS という名前の新しいグループを作成します。
このグループのメンバは Radius サーバーで認証を受け入れられます。
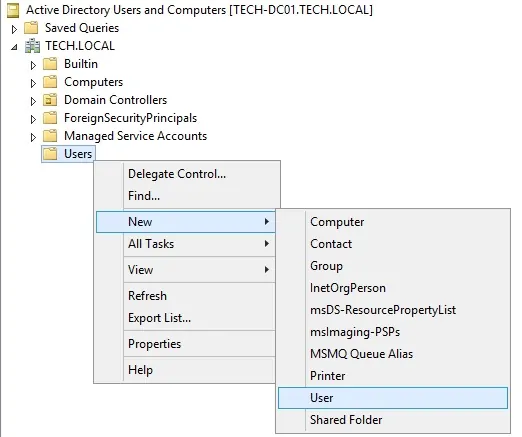
また、構成をテストするために 2 つのユーザー アカウントを作成します。
Users コンテナ内に新しいユーザーアカウントを作成します。
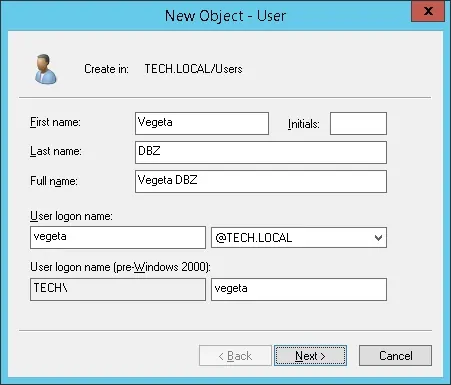
次の名前の新しいユーザー アカウントを作成します: VEGETA
Vegeta ユーザー アカウントは Radius サーバーで認証を行うことが許可されます。
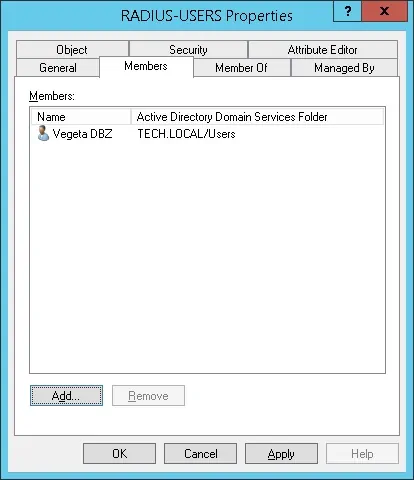
VEGETA ユーザー アカウントを RADIUS-USERS グループのメンバーとして設定します。
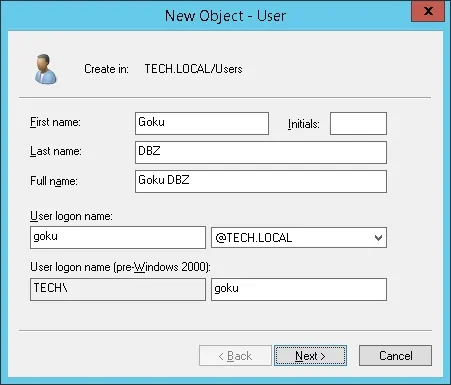
次に、GOKU という名前の新しいユーザー アカウントを作成します。
悟空ユーザー アカウントは、RADIUS-USERS グループのメンバではありません。
Goku ユーザー アカウントは Radius サーバーで認証を行うことが許可されません。
この例では、RADIUS-USERS のメンバーは RADIUS サーバーで認証を行うことが許可されています。
この例では、VEGETA ユーザー アカウントは RADIUS-USERS グループのメンバーです。
この例では、悟空ユーザー アカウントは RADIUS-USERS グループのメンバではありません。
必要なアクティブ ディレクトリ構成が完了しました。
チュートリアル RADIUS サーバ - クライアント デバイスの追加
Radius サーバで、次のアプリケーションを開きます。
アクティブ ディレクトリ データベースで Radius サーバを認証する必要があります。
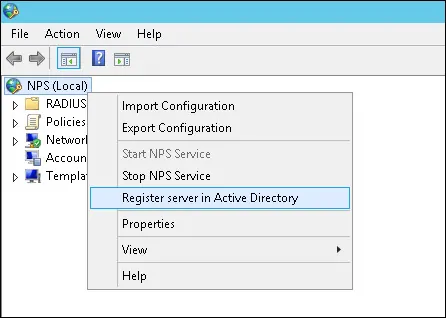
NPS(ローカル) を右クリックし、アクティブ ディレクトリにサーバーを登録する] オプションを選択します。
確認画面で、[OK]ボタンをクリックします。
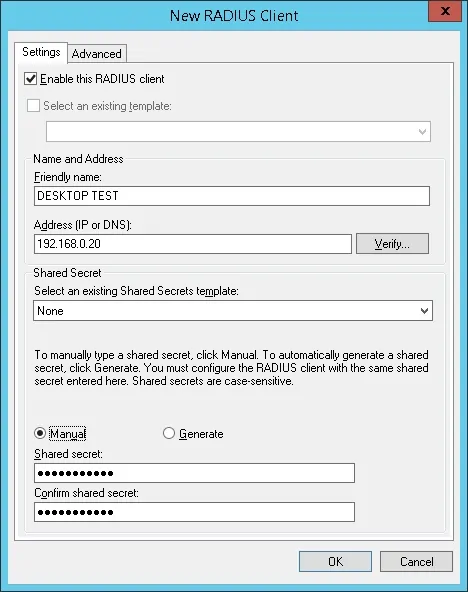
次に、Radius クライアントを構成する必要があります。
Radius クライアントは、Radius サーバからの認証を要求できるデバイスです。
大事な! Radius クライアントと Radius ユーザを混同しないでください。
[Radiusクライアント]フォルダを右クリックし、[新規]オプションを選択します。
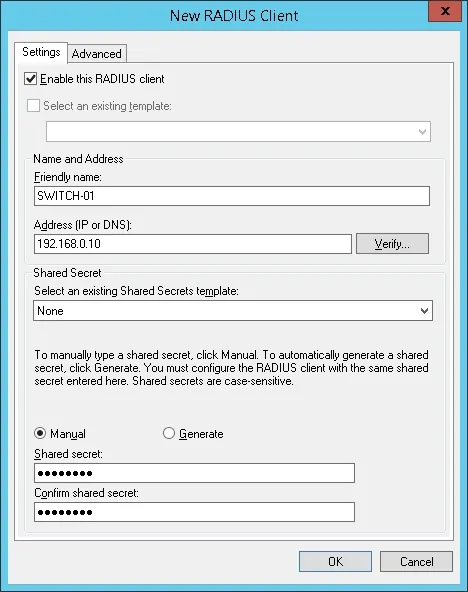
シスコ スイッチが Radius サーバに接続できるように設定されたクライアントの例を次に示します。
次の構成を設定する必要があります。
• デバイスのフレンドリ名。
• デバイス IP アドレス
• デバイス共有シークレット。
共有シークレットは、デバイスが Radius サーバを使用することを承認するために使用されます。
別のクライアントデバイスを追加し、デスクトップのIPアドレスと共有秘密のkamisma123を設定します。
Radius クライアントの構成が完了しました。
チュートリアル RADIUS サーバ - ネットワーク ポリシーの設定
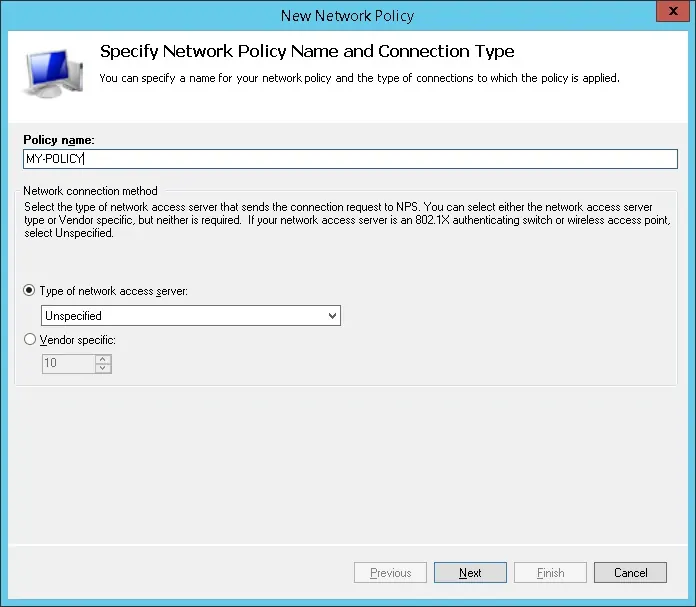
ここで、認証を許可するネットワークポリティを作成する必要があります。
[ネットワーク ポリシー] フォルダを右クリックし、[新規] オプションを選択します。
ネットワーク ポリシーの名前を入力し、[次へ] をクリックします。
[条件の追加] ボタンをクリックします。
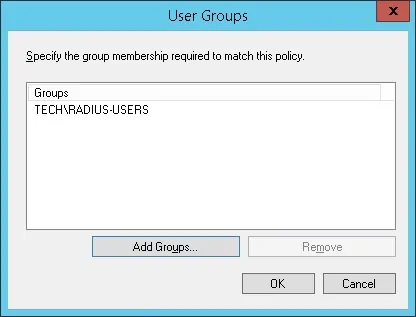
RADIUS-SERS グループのメンバが認証を受けることを許可します。
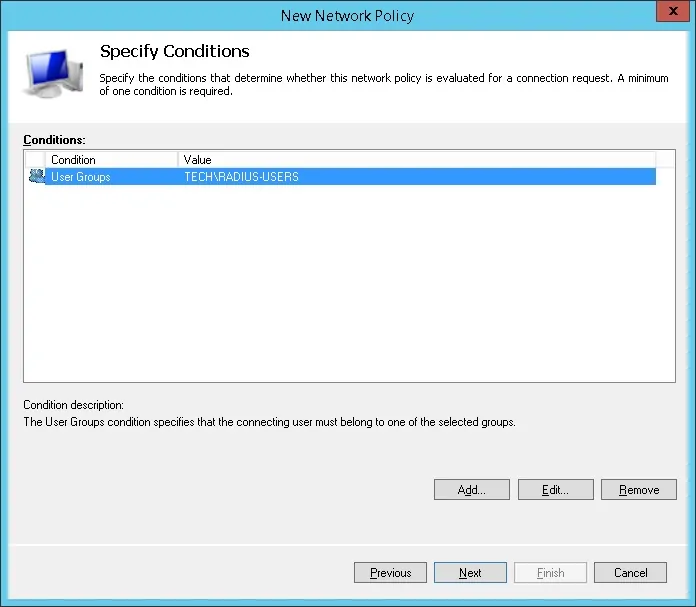
[ユーザー グループ] オプションを選択し、[追加] ボタンをクリックします。
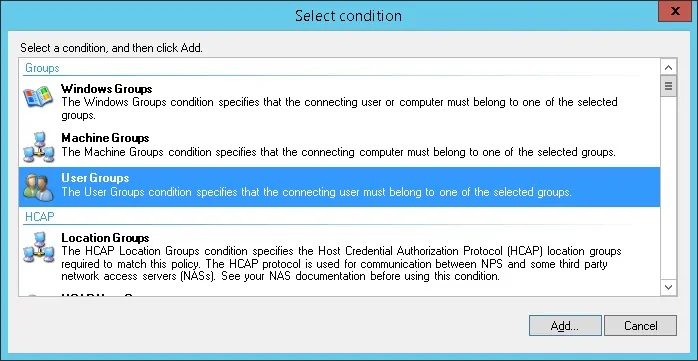
[グループの追加] ボタンをクリックし、RADIUS-USERS グループを見つけます。
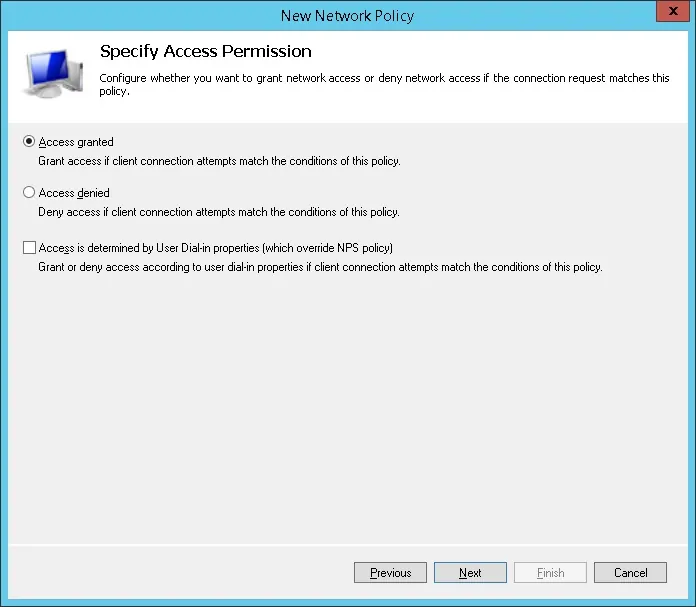
[アクセス許可] オプションを選択し、[次へ] ボタンをクリックします。
これにより、RADIUS-USERS グループのメンバは RADIUS サーバーで認証を受けます。
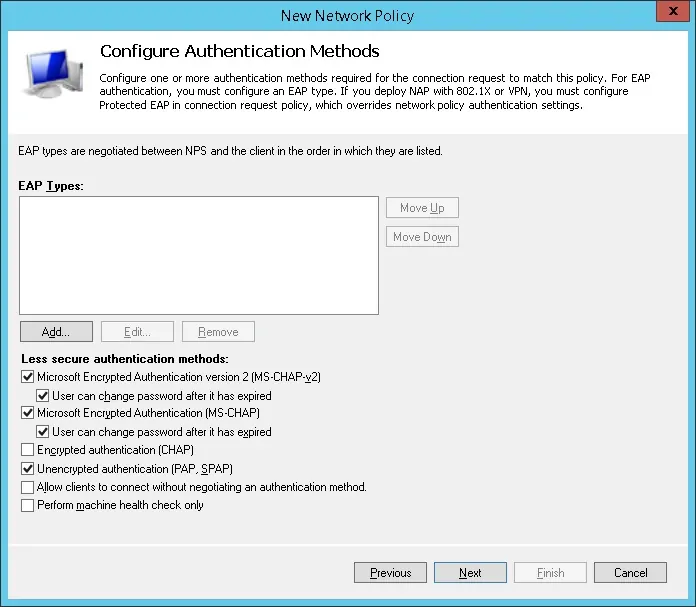
[認証方法] 画面で、[暗号化されていない認証 (PAP、SPAP)] オプションを選択します。
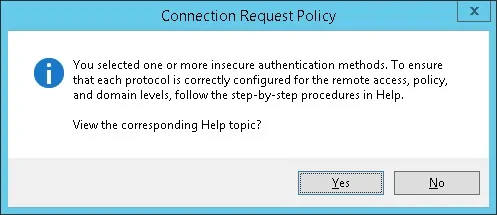
次の警告が表示された場合は、[いいえ]ボタンをクリックします。
[Radiusサーバの設定]の概要を確認し、[完了]ボタンをクリックします。
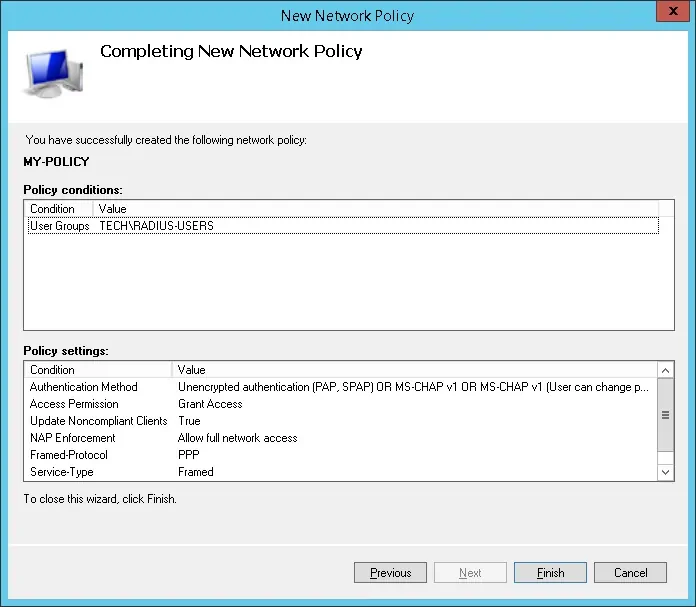
おめでとう! Radius サーバの設定が完了しました。
チュートリアル RADIUS サーバ - 認証テスト
NTRadPing ソフトウェアを使用して、デスクトップ上で RADIUS 認証をテストします。
NTRadPing ソフトウェアを実行するデバイスは、RADIUS サーバー上 の Radius クライアントとして構成されている必要があります 。
Radius 認証テストの例を次に示します。
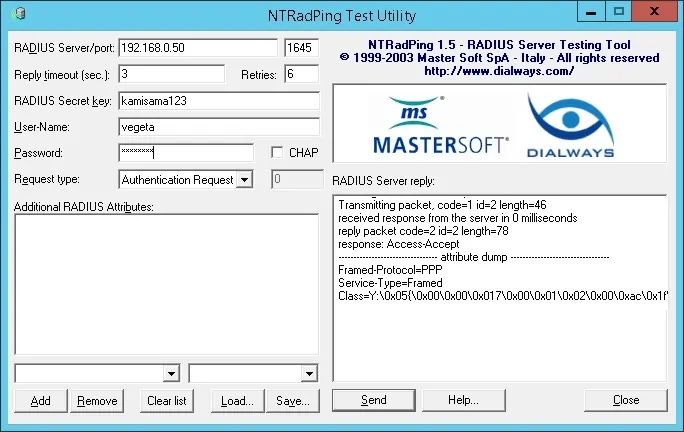
この例では、Radius クライアント デバイスとしてデスクトップを使用しました。
この例では、Vegeta ユーザー アカウントは Radius サーバーで認証を行うことができました。
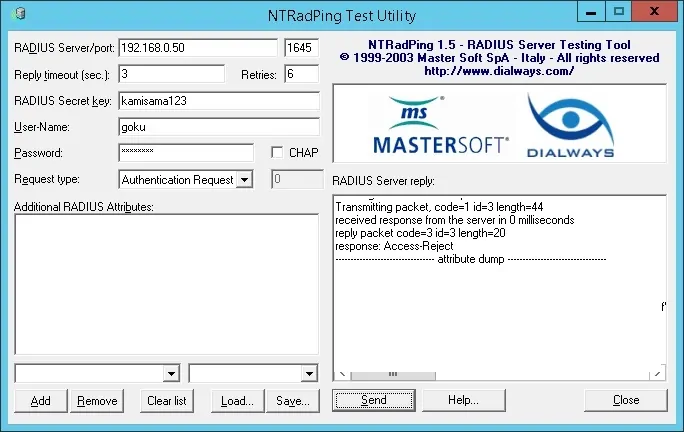
この例では、Goku ユーザー アカウントは Radius サーバーで認証できませんでした。
悟空ユーザー アカウントは、アクティブ ディレクトリの RADIUS-USERS グループのメンバではありません。

Leave A Comment
You must be logged in to post a comment.