Would you like to learn how to do a Jira installation on Ubuntu Linux? In this tutorial, we are going to show you how to download and install Jira on a computer running Ubuntu Linux.
• Ubuntu 18.04
• Ubuntu 19.04
• Ubuntu 19.10
• Jira 8.5.0
• Openjdk version 11.0.4
Hardware List:
The following section presents the list of equipment used to create this Jira tutorial.
Every piece of hardware listed above can be found at Amazon website.
Jira Related Tutorial:
On this page, we offer quick access to a list of tutorials related to Jira.
Tutorial Jira - Java Installation on Ubuntu Linux
Install the Java JDK package.
Use the following command to find the Java JDK installation directory.
This command output should show you the Java installation directory.
In our example, our Java JDK is installed under the folder: /usr/lib/jvm/java-11-openjdk-amd64
Now, you need to create an environment variable named JAVA_HOME.
Let’s create a file to automate the required environment variables configuration
Here is the java.sh file content.
Reboot the computer.
Use the following command to verify if the JAVA_HOME variable was created.
Here is the command output:
Use the following command to test the Java installation.
Here is the command output:
You have finished the Java installation required by Jira.
Tutorial Jira - MySQL Installation on Ubuntu Linux
Install the MySQL database service.
Download the MySQL Java connector.
Edit the mysqld.cnf configuration file.
Insert the required configuration inside the [mysqld] area.
Restart the MySQL service.
Access the MySQL service command-line.
Create a database named jira.
Create a database user account named jira.
In our example, the password kamisma123 was set to the user named jira.
Give the MySQL user named jira permission over the database named jira.
You have finished the MySQL installation required by Jira.
Tutorial Jira - Installation on Ubuntu Linux
Download the Jira installation package from the official website.
Extract and install the Jira software.
Copy the MySQL Java connector to the Jira's LIB directory.
Set the proper file permission.
You need to create an environment variable named JIRA_HOME.
Let’s create a file to automate the required environment variables configuration
Here is the jira.sh file content.
Reboot the computer.
Start the Jira server.
Jira may take a long time to start.
Here is the comand output:
Use the NETSTAT command to verify if the service is running on port 8080.
In our example, the Jira service is running on port 8080.
Optinally, you may take a look at Jira log file.
Open your browser and enter the IP address of your web server plus :8080
In our example, the following URL was entered in the Browser:
• http://192.168.15.10:8080
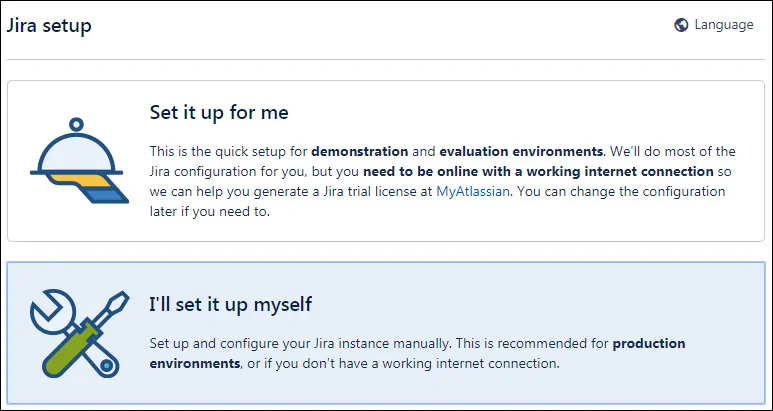
The Jira web installation interface should be presented.
Select the option: I will set it up myself
Click on the Next button.
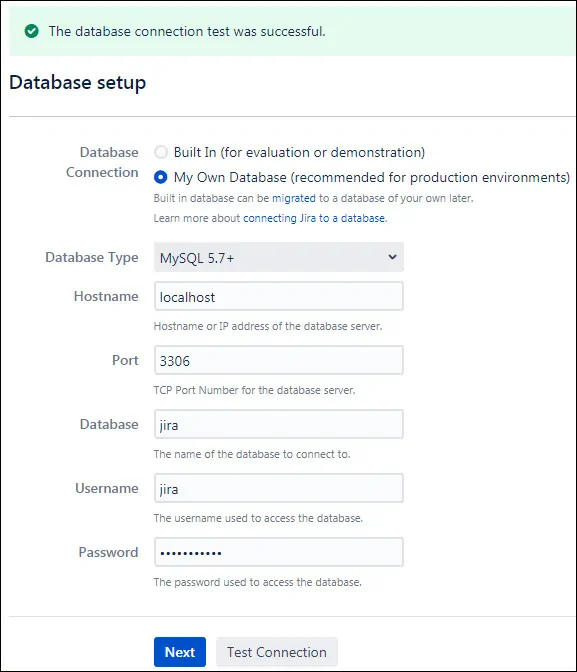
Enter the Database information required to connect to the Jira database.
• Database Type: MySQl 5.7+
• Hostname: localhost
• Port: 3306
• Database: jira
• Username: jira
• Password: kamisama123
Click on the Test Connection button.
After a successful test, click on the Next button
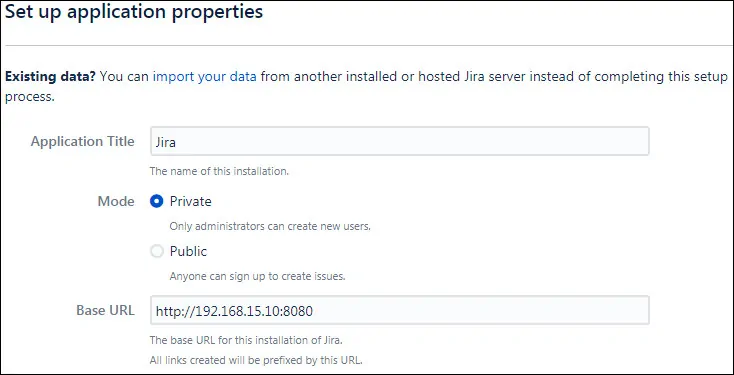
Wait while the Jira database is set up.
Set the Aplication name, the desired URL and click on the Next button.
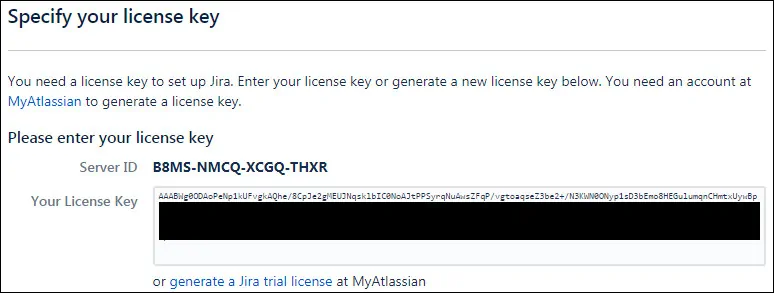
Install the required license or generate a trial license.
Set an administrator account.
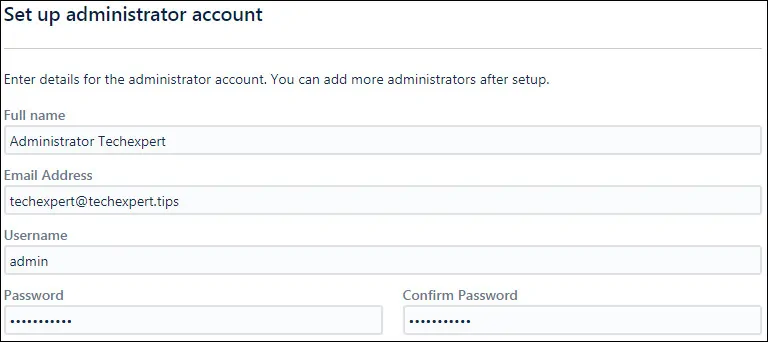
Select the later option and click on the Next button.

Select the desired language for the Jira web interface.
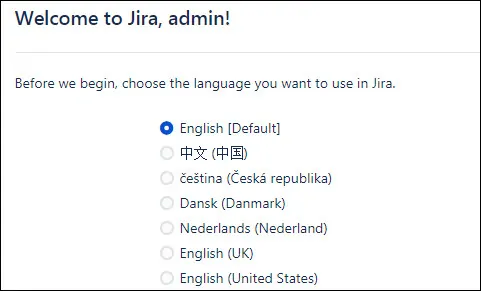
Set an avatar to identify yourself.
You will be sent to the Jira Dashboard.

Congratulations! The Jira installation was successfully completed.
