Would you like to learn how to use configure Cacti Email Notification Setup? In this tutorial, we are going to show you how to configure Cacti to send e-mails when an alert trigger is activated.
In our example, we are going to use Google Gmail as SMTP server.
• Ubuntu 19.04
• Cacti 1.2.3
What is Cacti?
Cacti is an open-source platform for data monitoring that is completely PHP driven.
On the Web interface, users are able to use Cacti as a frontend to RRDtool, create Graphs and populate them with data stored in MySQL.
Cacti also has SNMP support for users to create graphs in order to perform network monitor.
Cacti Playlist:
On this page, we offer quick access to a list of videos related to Cacti installation.
Don't forget to subscribe to our youtube channel named FKIT.
Cacti Tutorial:
On this page, we offer quick access to a list of Cacti tutorials
Tutorial - Gmail Integration
First, we need to enable your Gmail account to receive connections from external programs.
Open your browser and access your Gmail account.
In our example, the following URL was entered in the Browser:
On the login screen, enter your Gmail username and password.
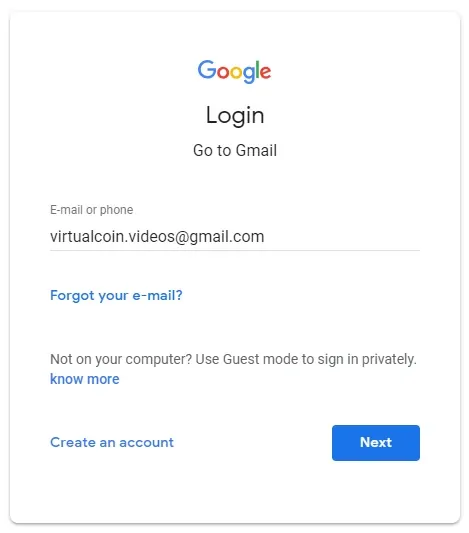
After the login, you need to access the following URL:
• https://myaccount.google.com/lesssecureapps
Select the option to enable the use of less secure applications.
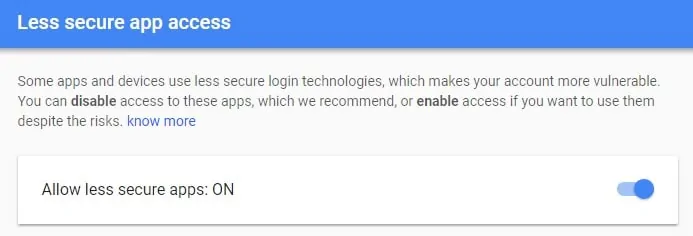
Now, we need to test if we can use the Linux command-line to send an email using Gmail.
Use the following command to install the required packages.
# sudo apt-get update
# sudo apt-get install ssmtp
Edit the ssmtp.conf file to connect to our Gmail account.
# vi /etc/ssmtp/ssmtp.conf
root=virtualcoin.videos@gmail.com
mailhub=smtp.gmail.com:587
FromLineOverride=YES
AuthUser=virtualcoin.videos@gmail.com
AuthPass=kamisama123
UseTLS=YES
UseSTARTTLS=YES
In our example, we are using the Gmail account virtualcoin.videos@gmail.com.
In our example, the Gmail account virtualcoin.videos@gmail.com is using the password kamisama123.
You need to change the Gmail account and password to reflect your account.
Use the following command to send an email using the command-line.
# echo "E-Mail using the command-line" | ssmtp virtualcoin.videos@gmail.com
Check your Gmail inbox for the test message that you just sent.

If the test was successful you may advance to the next section of this tutorial.
If the test was unsuccessful, the following message may be presented.
• ssmtp: Authorization failed (534 5.7.14 https://support.google.com/mail/answer/78754 v24-v6sm2921112pfl.31 - gsmtp)
To solve this problem, you need to access the following URL .
• https://accounts.google.com/DisplayUnlockCaptcha
Select the option to unblock your account.

Try again to send the email using the command-line.
If the test was successful you may advance to the next section of this tutorial.
Tutorial - Cacti Email Notification Setup
Now, we need to access the Cacti server dashboard and add the Linux computer as a Host.
Open your browser and enter the IP address of your web server plus /cacti.
In our example, the following URL was entered in the Browser:
• http://10.0.129.100/cacti
On the login screen, use the default username and default password.
• Default Username: admin
• Default Password: admin
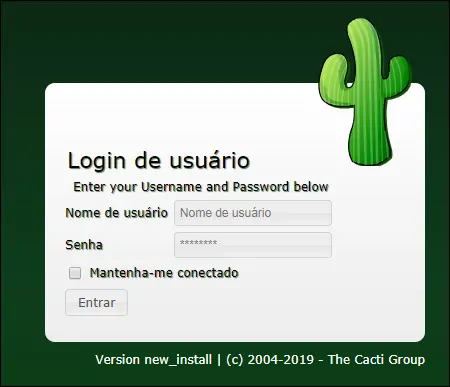
After a successful login, you will be sent to the Cacti Dashboard.
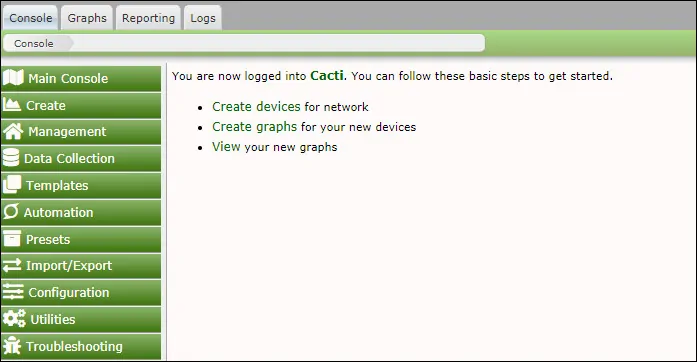
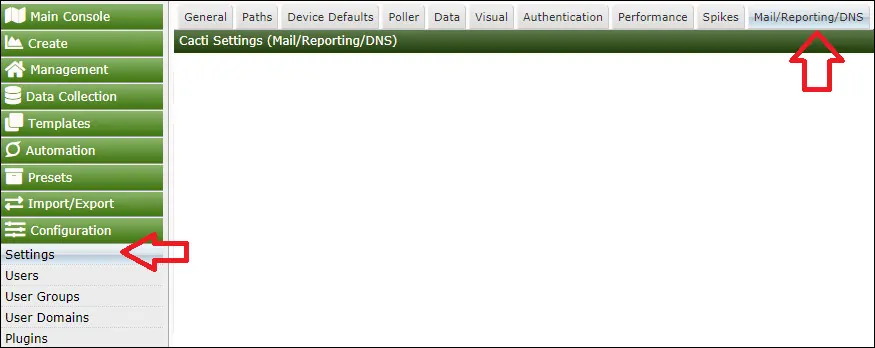
On the Cacti dashboard screen, access the Configuration menu and select the Settings option.
On the Settings screen, you need to access the Mail/Reporting/DNS tab.
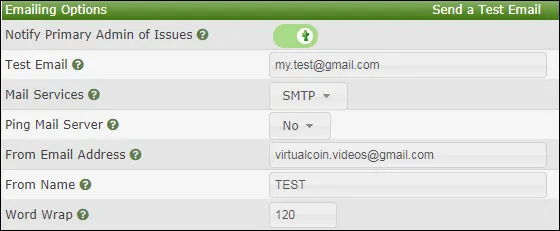
On the Emailing Options, perform the following configuration and click on the Save button.
• Notify Primary Admin of Issues - Yes
• Test Email - An email address to test if the Cacti email feature is working.
• Mail Services - SMTP
• Ping Mail Server - No
• From Email Address - Your Gmail address
• From Name - A name or a description.
• Word Wrap - 120
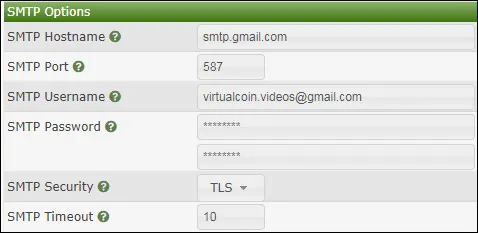
On the SMTP Options area, perform the following configuration and click on the Save button.
• SMTP Hostname - smtp.gmail.com
• SMTP Port - 587
• SMTP Username - The username of the e-mail account that will send Cacti notifications.
• SMTP Password - The password of the e-mail account that will send Cacti notifications.
• SMTP Security - TLS
• SMTP Timeout - 10
On the Emailing Options, click on the Send a Test email option.
Cacti will now try to send a test message.
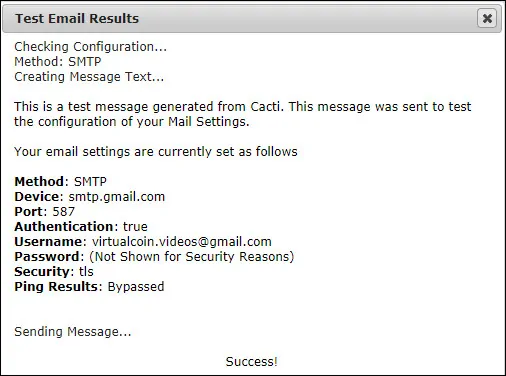
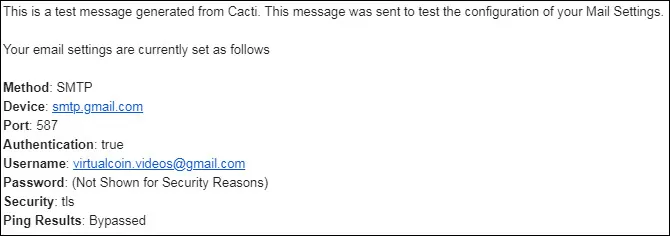
Here is an example of the message sent by Cacti.
Congratulations! You have configured the Cacti server e-mail notification
Cacti - Configure the User e-mail Address
On the Cacti Dashboard, access the Configuration menu and select the Users option.
Now, you need to configure the Admin user e-mail address and click on the Save button.

Configure the email address to all user accounts that you want to send e-mail notifications.
Congratulations! You have finished the e-mail configuration on Cacti.
Cacti Threshold Plugin Installation
The Cacti Threshold Plugin enables the Cacti alert message feature.
First, we need to install the Cacti Threshold Plugin using the command-line.
On the Linux console, use the following commands to download and install the Threshold Plugin.
# mkdir /downloads
# cd /downloads
# wget https://github.com/Cacti/plugin_thold/archive/v1.0.6.tar.gz
# tar -zxvf v1.0.6.tar.gz
# cp plugin_thold-1.0.6 /var/www/html/cacti/plugins/thold -R
# chown www-data.www-data /var/www/html/cacti/plugins -R
On the Cacti Dashboard, access the Configuration menu and select the Plugins option.
On the Actions column, click on the option to install the Cacti Threshold Plugin.
On the Actions column, click on the option to enable the Cacti Threshold Plugin.

After finishing the Cacti plugin installation, access the Configuration menu and select the Settings option.
On the Settings screen, you need to access the Thresholds tab.
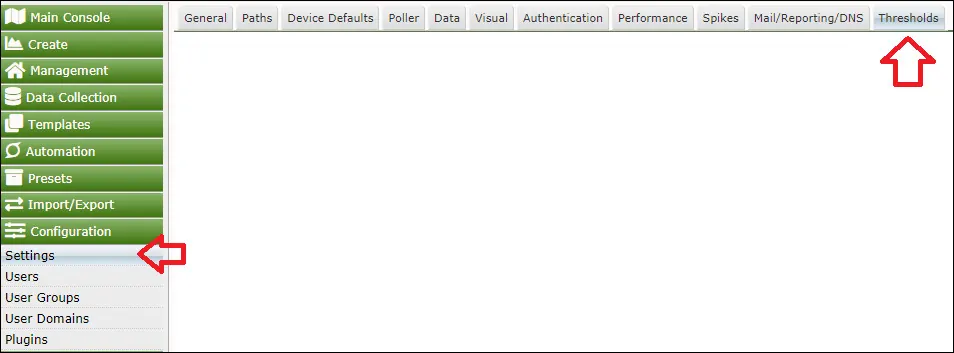
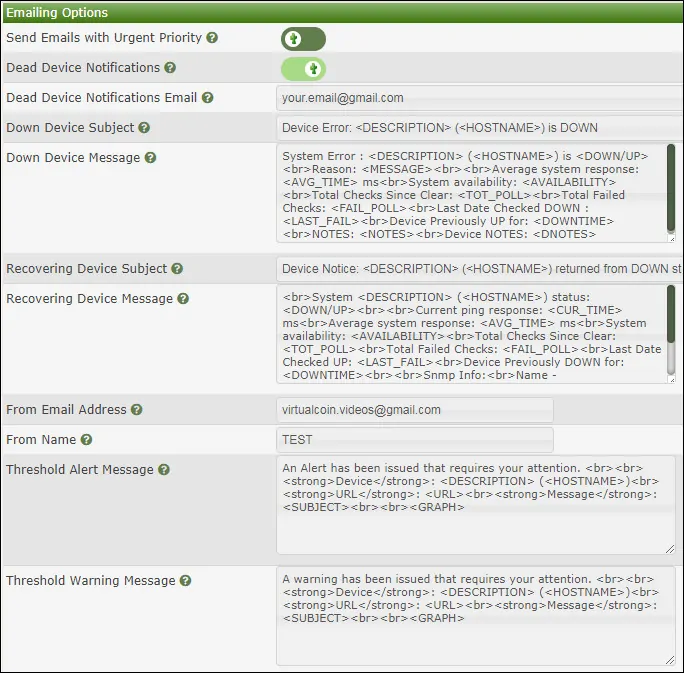
On the Emailing Options, perform the following configuration and click on the Save button.
• Dead Device Notifications - Yes
• Dead Device Notifications Email - Your email address
• From Email Address - Your Gmail address
• From Name - A name or a description.
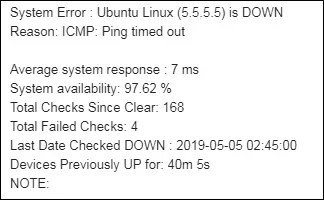
Now, if a device is unreachable you will receive the following message:
Next, we are going to configure thresholds.
Cacti - Threshold Configuration
You may want to create a specific threshold to send Cacti alert messages.
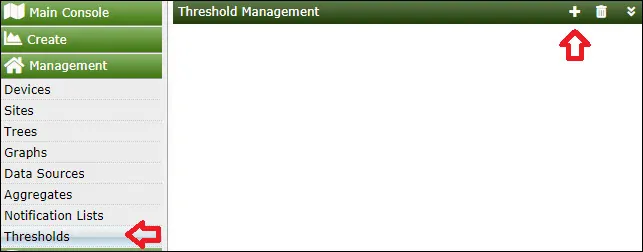
On the Cacti Dashboard, access the Management menu and select the Thresholds option.
Click on the plus sign on the top right part of the screen to add a new threshold.
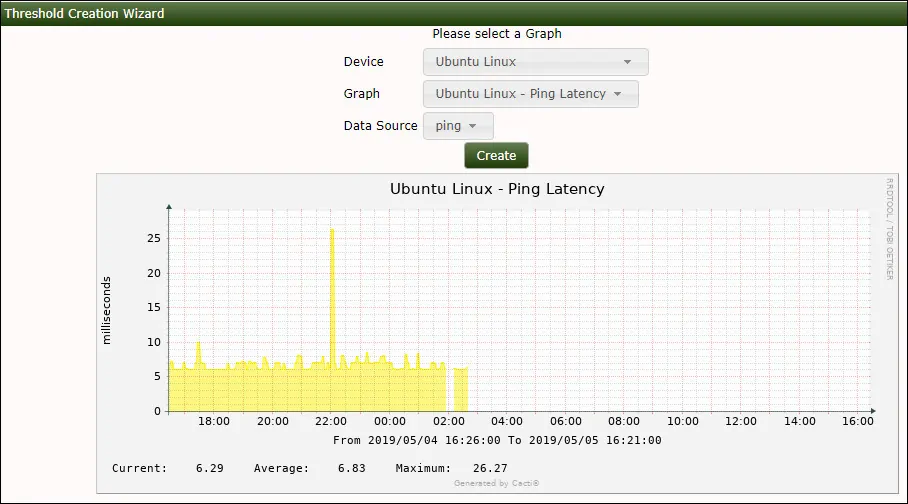
Select the device and the graph that you want to configure a threshold.
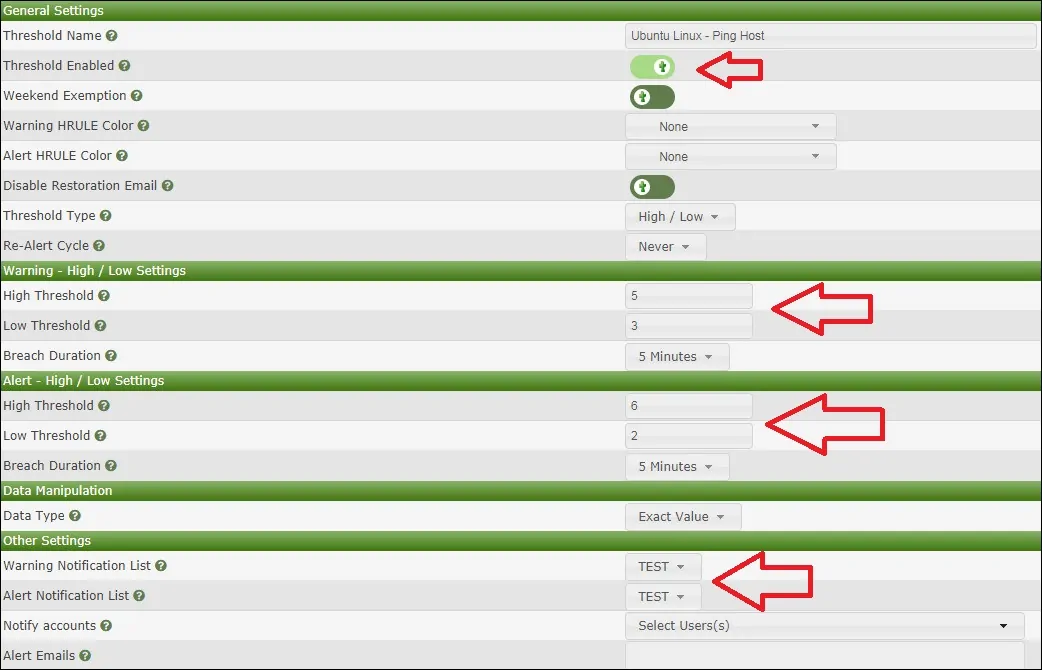
On the Cacti threshold setup screen, perform the following configuration:
• Threshold Enabled - Yes
• Warning - High / Low Settings - Set the desired values
• Alert - High / Low Settings - Set the desired values
• Warning Notification List - Select the desired notification list
• Alert Notification List - Select the desired notification list
After finishing your configuration, click on the Save button.
If you want to configure a notification group, access the Management menu and select the Notification list option.
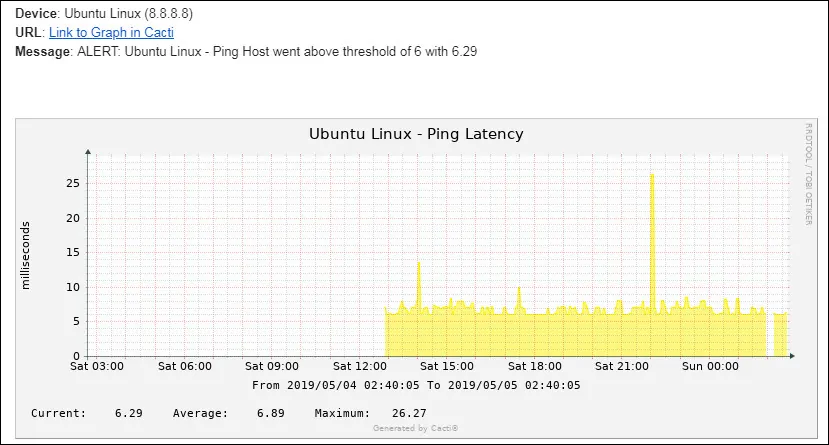
Here is an example of the Cacti email alert message.
Congratulations! You have finished the Cacti email alert configuration.
