This tutorial will show you how to create a GPO on Windows server to lock Windows computer screen after 10 minutes of IDLE time.
The domain controller is running Windows 2008 R2.
The domain computers are running Windows 7 and Windows 10.
Equipment list
Here you can find the list of equipment used to create this tutorial.
This link will also show the software list used to create this tutorial.
Windows Playlist:
On this page, we offer quick access to a list of videos related to Windows.
Don't forget to subscribe to our youtube channel named FKIT.
Windows Related Tutorial:
On this page, we offer quick access to a list of tutorials related to Windows.
• List of Tutorials
• GPO - Lock computer screen after inactivity
• GPO - Force the USB drive encryption
• GPO - Turn off Wifi if ethernet is connected
• GPO - Traffic shaper
• GPO - Map network drive
• GPO - Application Locker
• GPO - Lock user account after 3 fails
• GPO - Add local administrators
• GPO - Rename administrator account
• GPO - Proxy configuration
• GPO - Prevent proxy configuration changes
• GPO - Proxy auto-configuration script
• GPO - Google Chrome configuration
• GPO - Google Chrome proxy configuration
• GPO - Disable the installation of Chrome extensions
• GPO - Disable the Chrome password manager
• GPO - Mozilla Firefox configuration
• GPO - Disable the installation of Firefox extensions
• GPO - Disable the Firefox password manager
• GPO - Disable autorun and autoplay
• GPO - Disable SMBv1
• GPO - Disable guest account
• GPO - Rename guest account
• GPO - Configure the Firewall
• GPO - Install an MSI package
• GPO - Configure the Wallpaper
• GPO - NTP client
• GPO - NTP server
• GPO - Press CTRL + ALT + DEL before login
• GPO - Change RDP port
• GPO - Windows Defender cloud-based protection
• GPO - Message after login
• GPO - Logoff RDP session after inactivity
• GPO - Disconnect RDP session after inactivity
• GPO - Prevent control panel access
• GPO - Limit control panel options
Tutorial - Creating a GPO to Lock Windows Computer
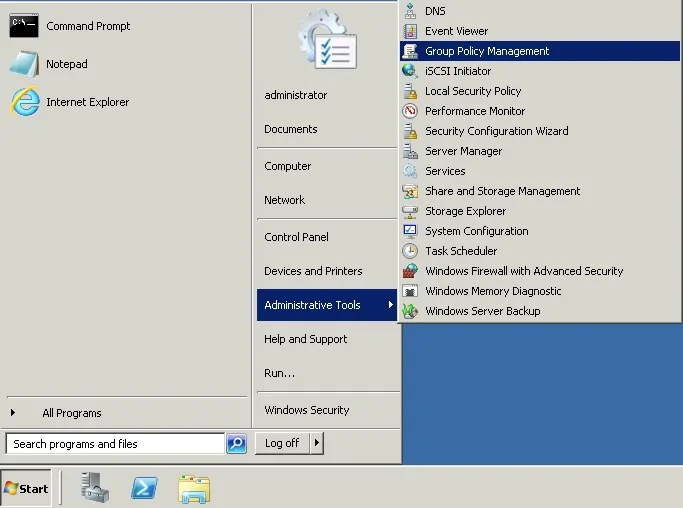
Click on the Start menu, locate and open the Group Policy Management tool.
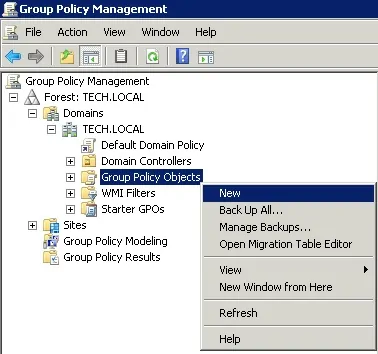
On the Group Policy Management screen, locate the folder named Group Policy Objects.
Right-click the Group Policy Objects folder and select the New option.
Enter a name for your new policy.
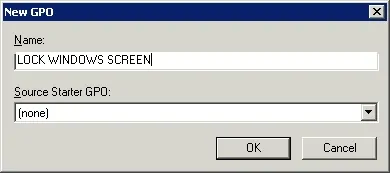
In our example, the new GPO was named: LOCK WINDOWS SCREEN.
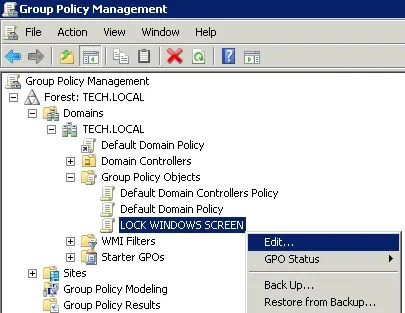
On the Group Policy Management screen, expand the folder named Group Policy Objects.
Right-click your new Group Policy Object and select the Edit option.
On the group policy editor screen, you will be presented to User configurations and Computer configurations.
We will change the User configurations to automatically lock the screen after 600 seconds of IDLE time.
We don't need to change any computer configuration.

On the group policy editor screen, expand the User configuration folder and locate the following item.
Access the folder named Personalization.
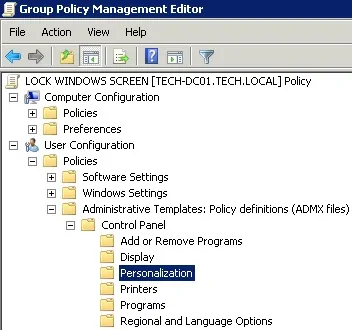
On the right, the configuration items available for the control panel personalization will be presented.
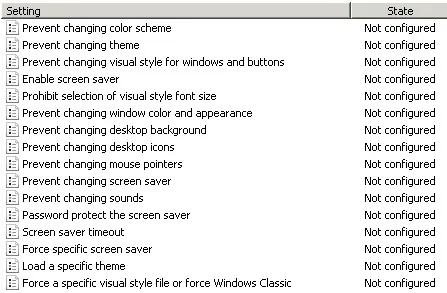
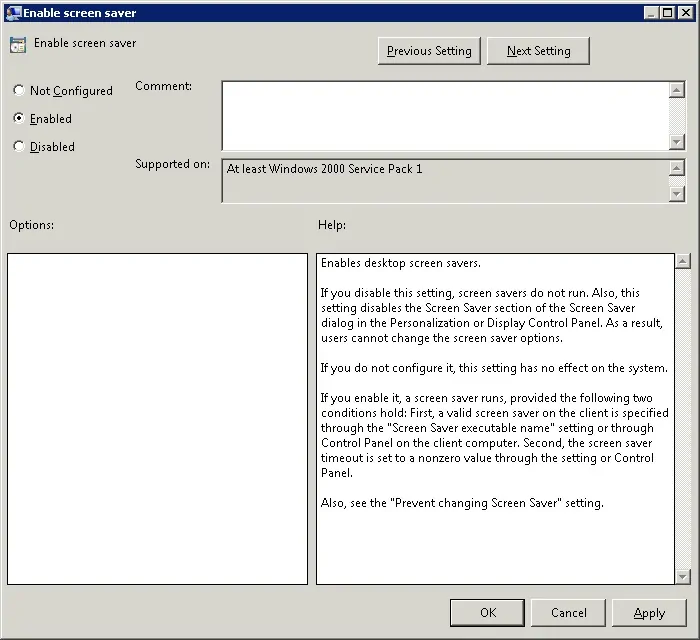
Double click the configuration item named Enable Screen Saver.
On the configuration item screen, you need to select the Enabled option.
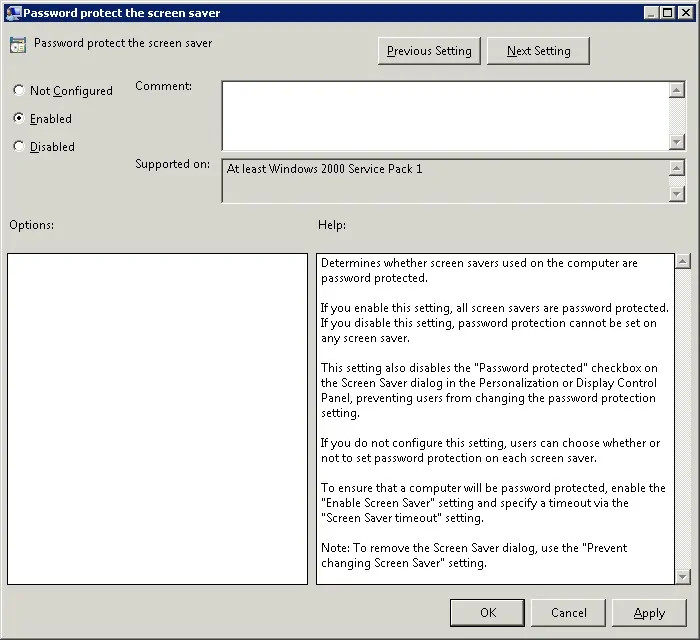
Double click the configuration item named Password protect the screen saver.
On the configuration item screen, you need to select the Enabled option.
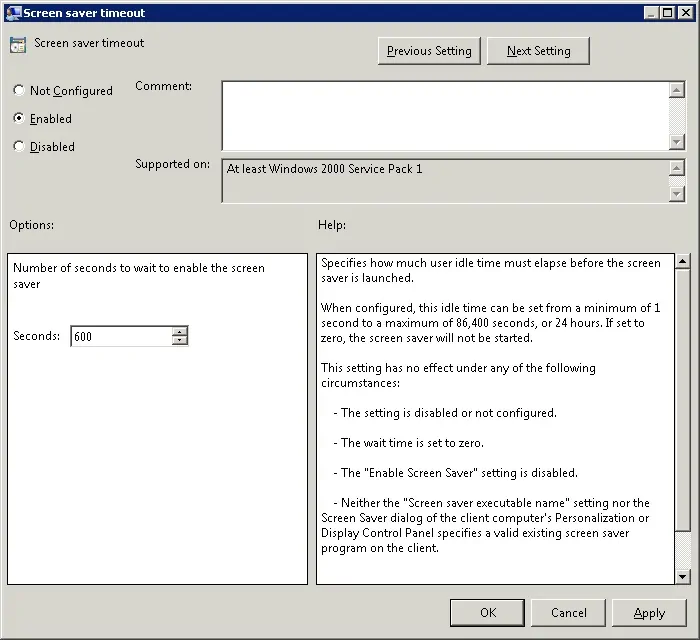
Double click the configuration item named Screen saver timeout.
On the configuration item screen, you need to select the Enabled option.
Set the amount of IDLE time that you want to wait before locking the computer screen.
In our example, we set a limit of 600 seconds.
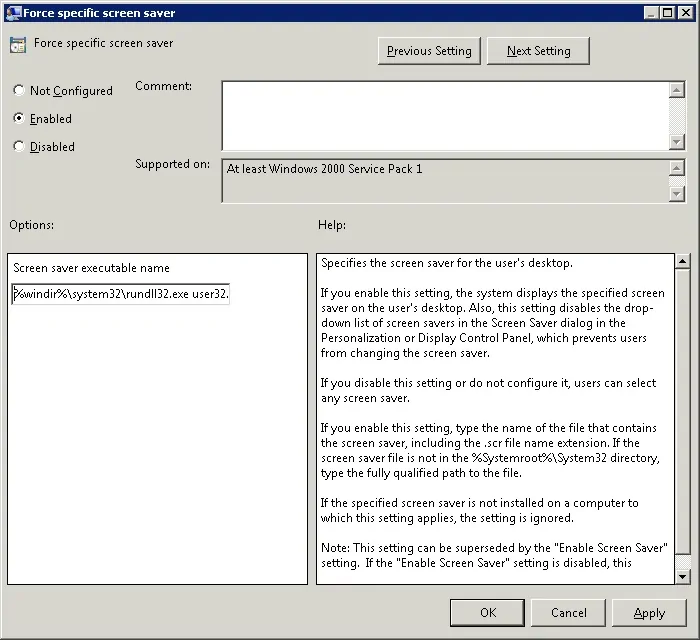
Double click the configuration item named Force specific screen saver.
On the configuration item screen, you need to set the following specific screensaver:
This command will lock the computer screen immediately instead of showing a screensaver.
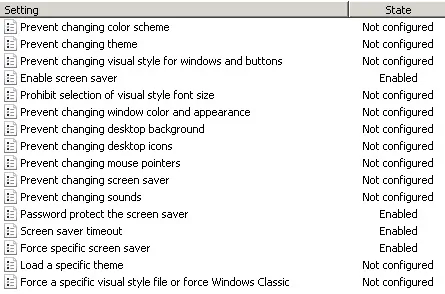
Here is a quick summary of our configuration:
To finish the group policy creation you need to close the Group policy editor window.
Only when you close the group policy window, the system will save your configuration.
Tutorial - Applying the GPO to Lock Windows Computer
You have finished the creation of the require GPO to lock the screen of windows computers.
But, you still need to enable the use of your new Group Policy.
On the Group policy management screen, you need to right-click the Organizational Unit desired and select the option to link an existent GPO.
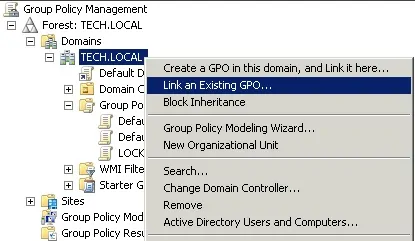
In our example, we are going to link the group policy named LOCK WINDOWS SCREEN to the root of our domain named TECH.LOCAL.
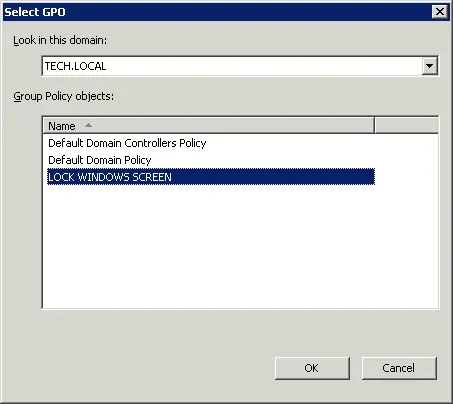
After applying the GPO you need to wait for 10 or 20 minutes.
During this time the GPO will be replicated to other domain controllers that you might have.
After waiting 20 minutes, you should reboot a user's computer.
During the boot, the computer will get and apply a copy of the new group policy.
To test the configuration, you need to login on a domain computer and do nothing for 600 seconds.
Your computer screen should automatically lock itself after 600 seconds.
