Would you like to learn how to install the SSH client on Windows? In this tutorial, we are going to show you how to install the OpenSSH client on a computer running Windows.
• Windows 10
• Windows 2019
• Openssh
Equipment list
Here you can find the list of equipment used to create this tutorial.
This link will also show the software list used to create this tutorial.
Windows - Related Tutorial:
On this page, we offer quick access to a list of tutorials related to Windows.
Tutorial Windows - Installing the SSH client
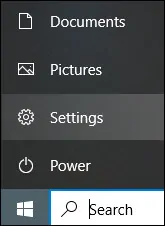
As an administrator, open the Start menu and access the Settings option.
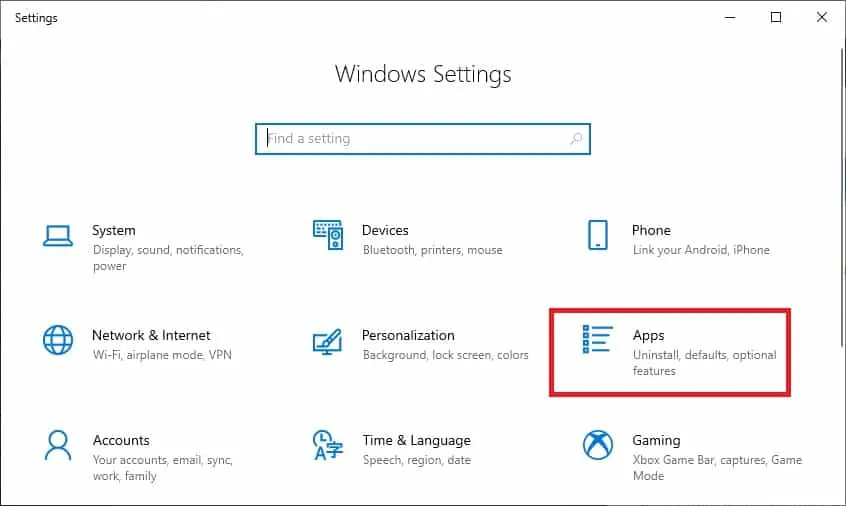
Access the Apps settings.
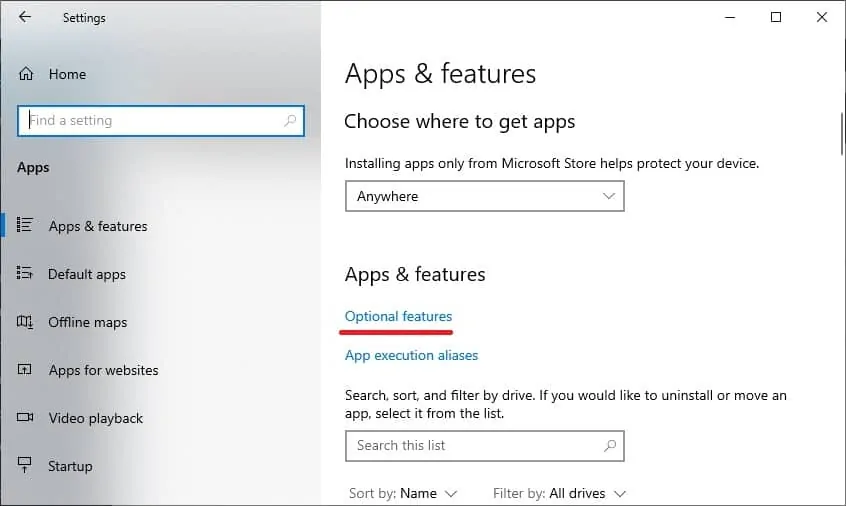
Access the optional features screen.
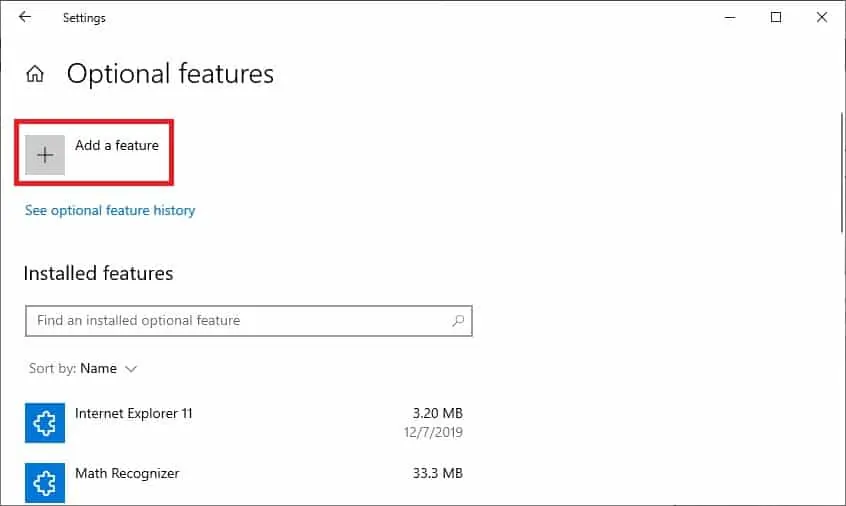
Select the option to Add a feature.
Select the SSH client package and click on the Install button.
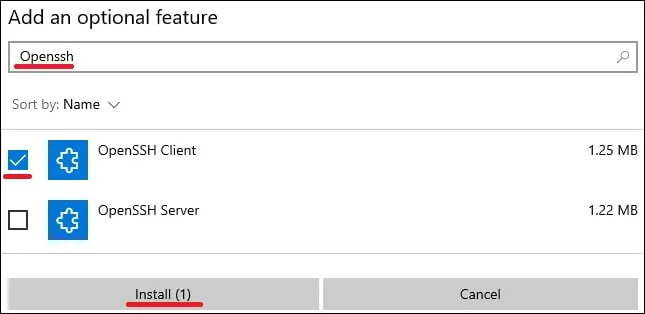
Wait for the Openssh client installation to finish.
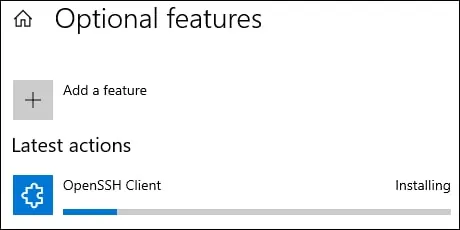
Congratulations! You have finished the installation of the SSH client on Windows.
Tutorial Powershell - Installing the SSH client
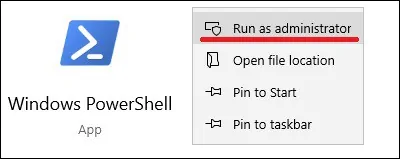
As an Administrator, start an elevated version of the Powershell command-line.
Verify if the SSH client is already installed.
Here is the command output.
Optionally, filter the output of the Powershell command to a simpler version.
Here is the command output.
Install the OpenSSH client using Powershell.
Here is the command output.
Congratulations! You have finished the OpenSSH client installation on Windows using Powershell.
Tutorial Windows - Accessing a remote device using SSH
Access the command-line.

Access a remote device using the SSH command.
In our example, we are accessing 192.168.0.200 as the user named Gohan.
After a successful login, you will have access to the command-line.
Congratulations! You are able to access SSH devices using the Windows command-line.
