Would you like to learn how to configure Grafana HTTP authentication on Apache? In this tutorial, we are going to show you how to authenticate Grafana users using the Apache Native HTTP authentication.
• Ubuntu 18
• Ubuntu 19
• Grafana 6.4.4
Grafana Tutorial:
On this page, we offer quick access to a list of Grafana tutorials.
Tutorial - Grafana Installation
On the Linux console, use the following commands to install the MySQL database service.
Access the MySQL command-line.
Create a database named grafana.
Create a database user account named grafana.
Give the SQL user named grafana permission over the database named grafana.
On the Linux console, use the following commands to configure the Grafana APT repository.
Use the following command to install Grafana.
Edit the Grafana configuration file grafana.ini.
Perform the following configuration under the [Database] and [Session] sections.
Keep in mind that you need to change the MySQL username and password to reflect your environment.
Use the following command to start the Grafana service.
The Grafana service will start listening on TCP port 3000.
To test your Grafana installation, open your browser and enter the IP address of your server plus :3000.
In our example, the following URL was entered in the Browser:
• http://192.168.15.11:3000
The Grafana web interface should be presented.

On the prompt screen, enter the Grafana Default Password login information.
• Username: admin
• Password: admin
The system will ask you to change the Grafana default password.
Congratulations! You have finished the Grafana basic installation.
Tutorial Grafana - Apache Proxy Installation
Now, we need to install the Apache webserver and configure it to work as a Proxy to the Grafana service.
Install the Apache web server and the required packages.
Enable the required Apache modules.
Create the Apache password file and the first account named admin.
The system will ask you to enter the admin account password twice.
Now, let's test the admin account password.
Enter the admin account password.
Use the following commands to add accounts to the Apache password file.
In our example, we add an account named benjamin.
Now, we need to configure Apache port 80 as a proxy to the Grafana service port 3000.
We also need to configure Apache to request authentication to users trying to acess Grafana.
Edit the Apache 000-default.conf configuration file.
Here is the 000-default.conf file before our configuration.
Here is the 000-default.conf file after our configuration.
Restart the Apache service.
Edit the Grafana configuration file grafana.ini.
Perform the following configuration under the [auth.proxy] area.
Restart the Grafana service.
The Apache service will listen on TCP port 80, authenticate and redirect users to the Grafana service on port 3000.
To test your Apache proxy installation, open your browser and enter the IP address of your server.
In our example, the following URL was entered in the Browser:
• http://192.168.15.11
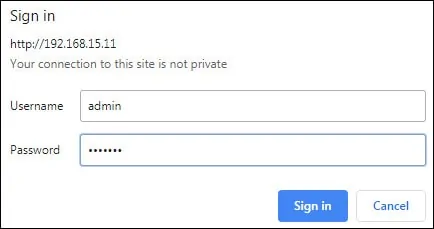
The Apache proxy will request you to authenticate yourself before forwarding you to the Grafana service.

On the login screen, use the admin user and the password from the Apache htpasswd file.
• Username: admin
• Password: Enter the Admin htpasswd password.
After a successfull login, you will be sent directly to the Grafana dashboard.

Congratulations! You have configured the Apache Proxy authentication to Access the Grafana serice.
