Would you like to learn how to install Zabbix 5 on Ubuntu Linux? In this tutorial, we are going to show you how to install, configure, and access a Zabbix5 on a computer running Ubuntu Linux.
• Ubuntu 18.04
• Ubuntu 19.04
• Ubuntu 20.04
• Zabbix 5.0.0
In our example, we are going to use TimescaleDB as the database.
Zabbix Playlist:
On this page, we offer quick access to a list of videos related to Zabbix installation.
Don't forget to subscribe to our youtube channel named FKIT.
Zabbix Related Tutorial:
On this page, we offer quick access to a list of tutorials related to Zabbix installation.
Tutorial Zabbix 5 - TimeScaleDB Database Installation
Add the PostgreSQL repository to Ubuntu Linux.
Add the TimescaleDB repository to Ubuntu Linux.
Install PostgreSQL with TimescaleDB support.
Enable the TimescaleDB extension on PostgreSQL.
You should answer yes for all the questions.
Restart the PostgreSQL service.
Create a Linux account to the Zabbix user
Create a PostgreSQL user account named Zabbix.
In our example, the password kamisma123 was set to the user named zabbix.
Create a PostgreSQL database named Zabbix and set the owner as the Zabbix user.
Download the Zabbix 5 installation package.
Import Zabbix database template inside PostgreSQL.
Enable TimescaleDB on the Zabbix database.
Run the timescaledb.sql script.
Restart the PostgreSQL service.
You have finished the Zabbix TimescaleDB database installation.
Tutorial Zabbix 5 - Installing the Web server
Install the Apache web server and all the required packages.
Find the location of the php.ini file on your system.
Edit the php.ini file.
Keep in mind that your PHP version and the location of the file may not be the same of mine.
Set the following items on the php.ini file:
Set the correct timezone to your location.
Restart the apache service.
You have finished the Apache web server installation with PHP support.
Tutorial Zabbix Server - Installation on Ubuntu
Download and install the GOLANG package.
The GOLANG software was installed under the /usr/local folder.
In order to work properly, the GO software expect the system to have a set of environment variables.
Let's create a file to automate the required environment variables configuration.
Here is the file content.
Reboot your computer.
Verify if the required environment variables were created automatically.
Here is the correct output:
Install the required packages.
Compile and install the Zabbix server.
Find the location of the zabbix_server.conf file.
Here is the original file, before our configuration.
Here is the new file with our configuration.
Start the Zabbix server.
Now, you need to choose which version of Zabbix agent you want to use.
Use the following command to start the default Zabbix Agent.
Or use the following command to start the new Zabbix Agent2.
Zabbix agent 2 appears to run in the foreground.
Move all the Zabbix frontend files to the root directory of your Apache installation.
Set the correct file permission.
Restart the Apache service.
Tutorial Zabbix 5 - Web interface installation
Open your browser and enter the IP address of your web server plus /zabbix.
In our example, the following URL was entered in the Browser:
• http://192.168.100.10/zabbix
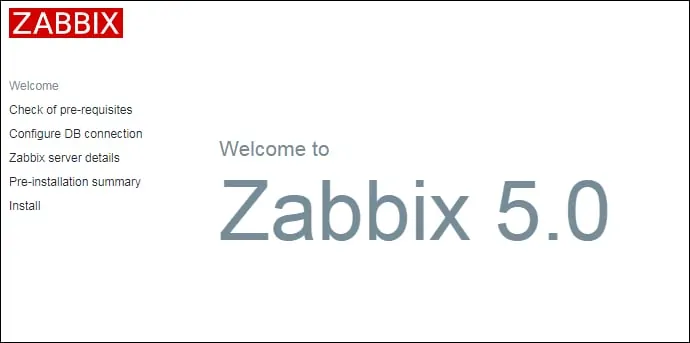
The Zabbix web installation interface should be presented.
Click on the Next button.
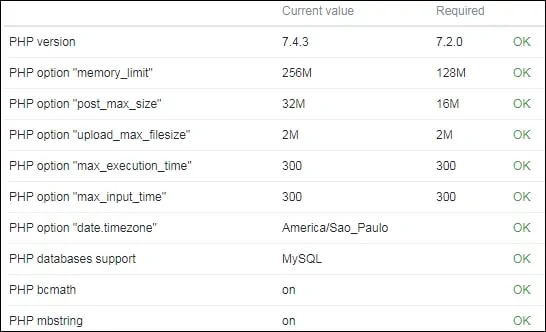
On the next screen, you will have to check if all the requirements were achieved.
Click on the Next button.
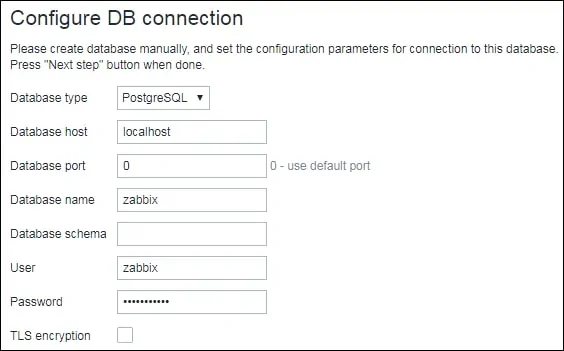
Enter the Database information required to connect to the Zabbix database.
• Host: localhost
• Database Username: zabbix
• Database Password: kamisama123
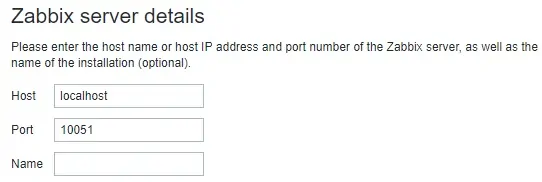
On the next screen, you just have to click on the Next button.
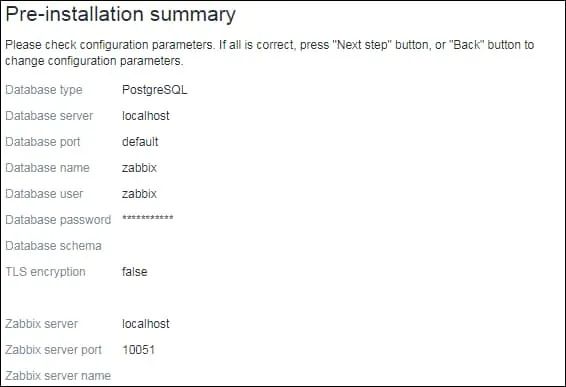
Now, take a look on the configuration summary.
Click on the Next button.
On the next screen, you will have to click on the Finish button.

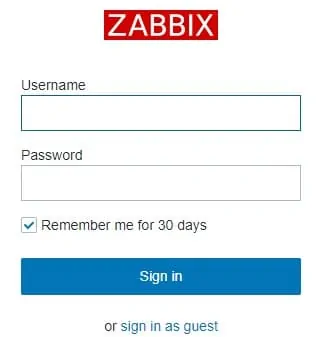
Finally, you will be presented with the Zabbix login screen.
• Zabbix default username: Admin
• Zabbix default Password: zabbix
After a successful login, you will be sent to the new Zabbix Dashboard.

Congratulations! The Zabbix 5 installation was finished successfully.
