Would you like to learn how to move your WordPress website from HTTP to HTTPS? In this tutorial, we are going to show you all the steps required to move your WordPress website to HTTPS using Ubuntu Linux.
• Ubuntu version: 18.04
Hardware List:
The following section presents the list of equipment used to create this WordPress tutorial.
Every piece of hardware listed above can be found at Amazon website.
WordPress Playlist:
On this page, we offer quick access to a list of videos related to WordPress installation.
Don't forget to subscribe to our youtube channel named FKIT.
WordPress Related Tutorial:
On this page, we offer quick access to a list of tutorials related to WordPress installation.
Tutorial - GoDaddy Account
First, you need to access the GODADDY WEBSITE and create an account.
This account will be used to create your HTTPS certificate.
Tutorial - HTTPS Certificate Creation
On the Linux console, use the following command to install the required packages.
# apt-get update
# apt-get install openssl
Use the following command to generate your KEY file and your CSR file.
# mkdir -p /downloads/certificate
# cd /downloads/certificate
# openssl req -new -newkey rsa:2048 -nodes -keyout techexpert.key -out techexpert.csr
The system will ask some questions to fulfill your certificate request.
• Country Name - Enter the 2 letter code for your country
• State or Province Name - Enter the name of your State or Province.
• Locality Name - Enter the name of your City
• Organization Name - Enter your organization name or your personal name.
• Organizational Unit Name - Optional
• Common Name - Enter your website hostname
• Email Address - Optional
• A challenge password - Optional.
• An optional company name - optional.
In our example, we are creating a certificate request for the website techexpert.tips.
Generating a 2048 bit RSA private key
...................+++
...................+++
writing new private key to 'techexpert.key'
-----
You are about to be asked to enter information that will be incorporated
into your certificate request.
What you are about to enter is what is called a Distinguished Name or a DN.
There are quite a few fields but you can leave some blank
For some fields there will be a default value,
If you enter '.', the field will be left blank.
-----
Country Name (2 letter code) [AU]:BR
State or Province Name (full name) [Some-State]:Rio de Janeiro
Locality Name (eg, city) []:Rio de Janeiro
Organization Name (eg, company) [Internet Widgits Pty Ltd]:Jonas Smith
Organizational Unit Name (eg, section) []:
Common Name (e.g. server FQDN or YOUR name) []:techexpert.tips
Email Address []:
Please enter the following 'extra' attributes
to be sent with your certificate request
A challenge password []:
An optional company name []:
The CSR contains your Certificate Sign Request and will be sent to GoDaddy to create your Public certificate.
Here is the content of the CSR file:
-----BEGIN CERTIFICATE REQUEST-----
MIICtDCCAZwCAQAwbzELMAkGA1UEBhMCQlIxFzAVBgNVBAgMDlJpbyBkZSBKYW5l
aXJvMRcwFQYDVQQHDA5SaW8gZGUgSmFuZWlybzEUMBIGA1UECgwLSm9uYXMgU21p
dGgxGDAWBgNVBAMMD3RlY2hleHBlcnQudGlwczCCASIwDQYJKoZIhvcNAQEBBQAD
ggEPADCCAQoCggEBALAZgXHiRxCZgLmAl+2eNmFY1VmQgvvBIxMW0V8hjfs81tU1
4nXUei51fwdai63ypc7EG8cTyhS3Os7/3npwJU2x1j55dlVXBSGN5JFP3Afa9SHe
9XDqaLRNHLUpkkaj6EV5RLvMZvT8jBUyh+wQTesAzWz1Gg07MfpD9Ls6JcUfg6GN
s5Fy/SYEEONtSAgH48+hJ0KP3zIeNk2/JUS9T3FktBnEN8Uwmv2U0A5HQAg5oAuR
doy7XMLn4bVnbH5b3FIjgkx6CIqgeEj9e3cDeULJPzUYZzdGuaWKCFllWy2vQUrh
ei1wl7lguwGfXEi6TJStackcZHPwyYLbpKFhEssCAwEAAaAAMA0GCSqGSIb3DQEB
CwUAA4IBAQCBKsz7z95s251RaZ/x+URiIvtMFl+JheLt8PSJB8CC+SltA245kYg4
CbWc5blXckwcM+2LQ0Dd4YcWfKGunlee/Agju74gbqybV77cpA14w8wRK3tasv24
8/VD+94WvMME+WlBpuTPGIEqgAIt653Fn/E+MLD42ICRGkL+HZITAYltn+4uNtO7
S35jJ5OIVJ5WdTLWfrakCqEtPXVOpyYalwVF5MrmYzJhfeIGuLQge62uP+EFHrWI
W3+ATnPFpq0/slsxu24s00GBkj56cO2JNnmhVpSjQkmd2Jmsz42+Myh/dGTrFnd5
fQcXU9D/+qELbzFtWyVeU1SK0mufavGw
-----END CERTIFICATE REQUEST-----
The KEY file contains your Certificate private key and must be kept in a safe place all the time.
Here is the content of the KEY file:
-----BEGIN PRIVATE KEY-----
MIIEvgIBADANBgkqhkiG9w0BAQEFAASCBKgwggSkAgEAAoIBAQCwGYFx4kcQmYC5
gJftnjZhWNVZkIL7wSMTFtFfIY37PNbVNeJ11HoudX8HWout8qXOxBvHE8oUtzrO
/956cCVNsdY+eXZVVwUhjeSRT9wH2vUh3vVw6mi0TRy1KZJGo+hFeUS7zGb0/IwV
MofsEE3rAM1s9RoNOzH6Q/S7OiXFH4OhjbORcv0mBBDjbUgIB+PPoSdCj98yHjZN
vyVEvU9xZLQZxDfFMJr9lNAOR0AIOaALkXaMu1zC5+G1Z2x+W9xSI4JMegiKoHhI
/Xt3A3lCyT81GGc3RrmlighZZVstr0FK4XotcJe5YLsBn1xIukyUrWnJHGRz8MmC
26ShYRLLAgMBAAECggEAdpK19ljGQQcbBczwf67oLuQBxCzqBVomo9PZZpTRZTmx
7h46Pdyz6FR1FB6DrryTqIWjrohEqW42yuq+gvLAK3BzMd3XL99INS+1l6KOJTvp
ksTtvvoXRlAl5FX5iFcVLrJY9ZrMOGlUaXF81BamYHZJ2/OtdvtEy562Str8U52m
GTkgfpWnaLc66T05zViNwiAb5yg0v9Xb9YOEgLY8VdqYppUnJNzYs7utiDGbOjPa
OCZ5oLTl1b9l6sNw7RhhOmq/jPOur4Keg124fyleULi2Uln52waLWeI8fWI/AHmP
UQQkC3athEOKr0f1Zk9ZRxYJq5FYGPTElqQdbltEAQKBgQDiqSp4XM0tfFJwZIkH
ooEcPw+to4T0333K4mipx+YxlELCHvIXW2xIxlejyhgnVIQWX6qS0F7VUGnVuSKz
hB0zfcd89MYcqGyQSEdc9kZB+Twb9Hzd3fTXu7hKjXoz9+UKfcOXfQdILGnDqyG8
zCF//aNocRvxaO9E1cZ+1irlcQKBgQDG5OZUr8kMYI8Tl0GcmWZSFZfMYBYT3CAq
YPHmNQcHhENGz6v9jBZjkeZJBLMRZLlRWjcrWhKbEEHsjZJYiJP4u2n6n57Il9h9
OVqfK7RR3k1r9bMKzhYRnu1FsEPpMKKUrLPDChthxduXEPPZgoKGSYmhLAiYqyPg
USOyZzFt+wKBgQCmfjSgLSrZ2pSD0pWFciz8nqXZml+zr+cq/Jx8+kVw7cML7MdP
uOwVmPwPaAfN/Br6hFM7fKvsbSEQyOlgjA8XH7FFbFeJ/X2hjjY9Zvm8xGMO9cwy
/TM4tL9uo/W77r/jsPXXdRPARD98Z1xk3l1NMvaxZURtU/NN0On5iUABQQKBgGIu
FiER0R3iAF68WLAT7TVx4UgK2nsdO2eQCXkJDhpAyPEIjK8RWu/10oaS4k4guXYW
IYut3+dZpCFAVVCMwvaSlSMZbkk4464VBM3zxgRvxyoW1DXuO2ihWiD/fNZ8opTf
l7EcqR2fjOFKhgUF7qaZYG4GDYxHVuNhSkzDsdvHAoGBAIfDk7fLsG/BYROxJpzN
b1CoG8DE+DKYTWwMWW45rDF0ImbC6H3fg876CeZ3YKGWqt9qkha7gnGGVRRufP15
O7ZEXebZXeDYafXSNcnqSe7FSNtVr1eFlTWmL8OiWQuaqxjs/VogdWfhkEGPISVF
AOM3I6XSGx4NxW2RgYmvQZ4O
-----END PRIVATE KEY-----
Go back to the GODADDY WEBSITE and purchase the SSL certificate.
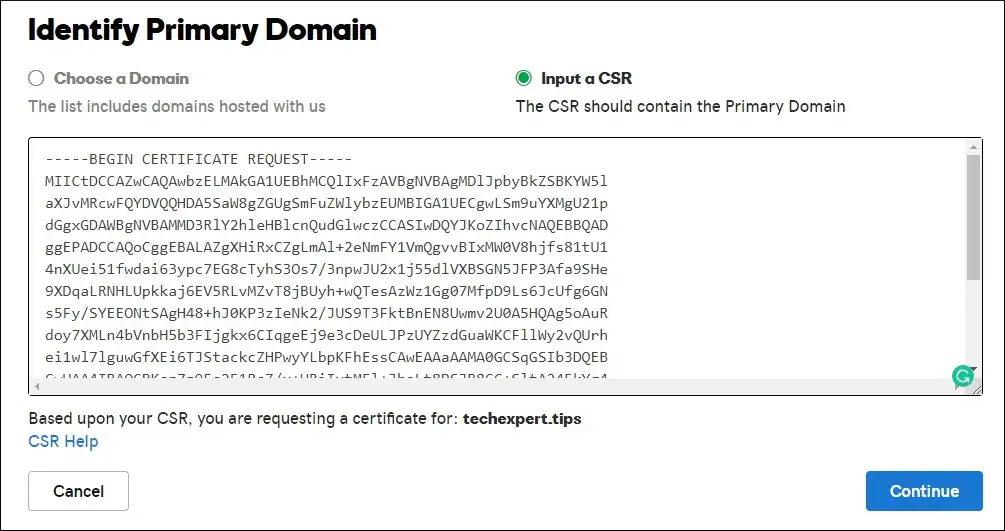
You will be required to paste the content of the CSR file on the website.
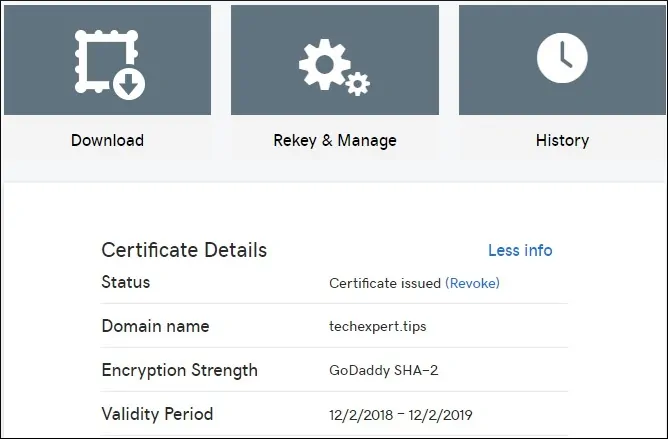
After 10 minutes, GoDaddy will finish the creation of your certificate and allow you to download a ZIP file.
In our example, the ZIP file was named: techexpert.tips.zip
Copy the ZIP file to your Linux server.
In our example, I will assume that you did copy the ZIP file to the following directory: /downloads/certificate
# cd /downloads/certificate
# unzip techexpert.tips.zip
Archive: techexpert.tips.zip
inflating: gd_bundle-g2-g1.crt
inflating: 1c9ad5b95b2ac0fb.crt
Let's list the files available inside the certificate directory.
• 1c9ad5b95b2ac0fb.crt
• gd_bundle-g2-g1.crt
• techexpert.csr
• techexpert.key
• techexpert.tips.zip
You should have similar files inside your certificate directory.
Optional. If you want to look inside the certificate files sent from Godady, use the following commands.
# openssl x509 -in gd_bundle-g2-g1.crt -text -noout
# openssl x509 -in ab0562011b4bb0c7.crt -text -noout
Don't forget to change the file names to reflect your environment.
Tutorial - Redirect HTTP to HTTPS on Apache
Enable the Apache SSL module and the Apache REWRITE module.
# a2enmod rewrite
# a2enmod ssl
# service apache2 restart
Edit your Apache VIRTUALHOST configuration file to also offer your website over HTTPS:
# vi /etc/apache2/sites-available/techexpert.conf
Keep in mind that your VIRTUALHOST file name and location may not be the same of mine.
Here is our website original file, before our configuration.
<VirtualHost *:80>
ServerAdmin nobody@care.com
DocumentRoot /websites/techexpert/www
ServerName techexpert.tips
<Directory /websites/techexpert/www/>
Options Indexes FollowSymLinks
AllowOverride All
Require all granted
</Directory>
ErrorLog /websites/techexpert/logs/error.log
CustomLog /websites/techexpert/logs/access.log combined
LogLevel error
</VirtualHost>
Here is the new file with the HTTPS VIRTUALHOST enabled.
This file was also configured to redirect any HTTP connection to the HTTPS website.
<VirtualHost *:80>
ServerAdmin nobody@care.com
ServerName techexpert.tips
Redirect permanent / https://techexpert.tips/
</virtualhost>
<VirtualHost *:443>
ServerAdmin nobody@care.com
DocumentRoot /websites/techexpert/www
ServerName techexpert.tips
<Directory /websites/techexpert/www/>
Options Indexes FollowSymLinks
AllowOverride All
Require all granted
</Directory>
SSLCertificateFile /downloads/certificate/1c9ad5b95b2ac0fb.crt
SSLCertificateKeyFile /downloads/certificate/techexpert.key
SSLCertificateChainFile /downloads/certificate/gd_bundle-g2-g1.crt
ErrorLog /websites/techexpert/logs/error.log
CustomLog /websites/techexpert/logs/access.log combined
LogLevel error
</VirtualHost>
Set the correct file permission on all certificate and key files.
# chown www-data.www-data /downloads/certificate/* -R
You should also restart apache manually and verify the service status.
# service apache2 stop
# service apache2 start
# service apache2 status
Here is an example of the Apache service status output.
● apache2.service - LSB: Apache2 web server
Loaded: loaded (/etc/init.d/apache2; bad; vendor preset: enabled)
Drop-In: /lib/systemd/system/apache2.service.d
└─apache2-systemd.conf
Active: active (running) since Mon 2018-04-23 00:02:09 -03; 1min 4s ago
Tutorial - Configure WordPress to HTTPS
Now, we need to configure WordPress to use the HTTPS.
Open your browser and access the WordPress Dashboard.
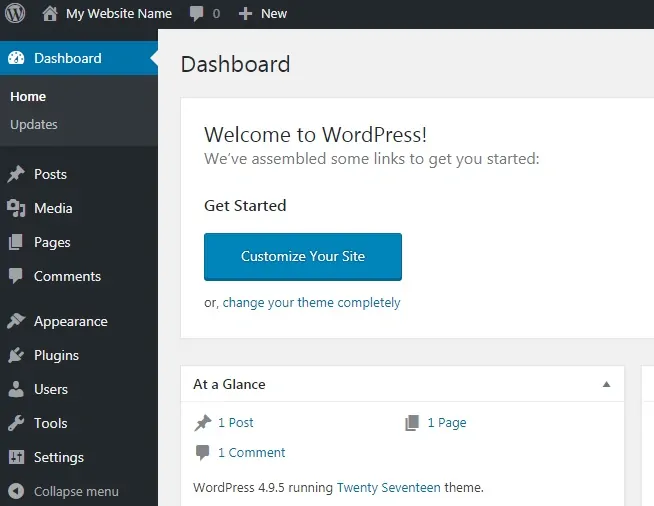
On the WordPress dashboard, access the Settings menu and select the General option.
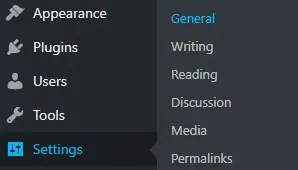
Change the WordPress Address (URL) and the Site Address (URL) configuration from HTTP to HTTPS.

On the WordPress dashboard, access the Settings menu and select the Permalinks option.
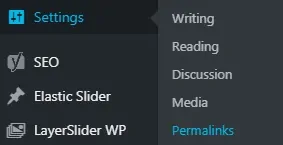
Click on the Save changes button to update your Permanent link configuration.
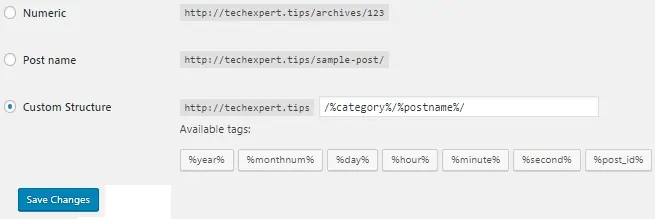
You have finished the configuration of your website.
Open your browser and try to access the HTTPS version of your website.
If you try to open your website HTTP URL the Apache web server should automatically redirect you to the HTTPS version.
Make sure that everything is working.
Tutorial - WordPress Sitemap
If your Wordpress website offers a Sitemap, you need to generate the Sitemap again.
Usually, people use the Yoast SEO plugin to create the Sitemap dynamically.
Deactivate the YOAST SEO plugin and activate YOAST SEO plugin.
This will recreate the WordPress Sitemap.

Tutorial - Update WordPress MySQL Database Links
now, we need to edit the WordPress database and change every HTTP URL entry to HTTPS.
You must backup your database before proceeding.
After finishing the WordPress database backup, we need to download the WP-CLI software.
# mkdir /downloads/wp-cli
# cd /downloads/wp-cli
# wget https://raw.github.com/wp-cli/builds/gh-pages/phar/wp-cli.phar
# php wp-cli.phar --info
# chmod +x wp-cli.phar
# cp wp-cli.phar /usr/local/bin/wp
Access your WordPress installation directory and test the WP-CLI command.
# cd /var/www/html/wordpress
# wp --info
OS: Linux 4.15.0-1021-aws #21-Ubuntu SMP Tue Aug 28 10:23:07 UTC 2018 x86_64
Shell: /bin/bash
PHP binary: /usr/bin/php7.2
PHP version: 7.2.10-0ubuntu0.18.04.1
php.ini used: /etc/php/7.2/cli/php.ini
WP-CLI root dir: phar://wp-cli.phar/vendor/wp-cli/wp-cli
WP-CLI vendor dir: phar://wp-cli.phar/vendor
WP_CLI phar path: /downloads/wp-cli
WP-CLI packages dir:
WP-CLI global config:
WP-CLI project config:
WP-CLI version: 2.0.1
Now, let's test the command that will replace HTTP links to the HTTPS version on the database.
This command will not perform any change in the database.
# wp search-replace 'http://techexpert.tips' 'https://techexpert.tips' --all-tables --skip-columns=guid --dry-run --allow-root
Warning: Skipping an uninitialized class "DUP_Package", replacements might not be complete.
Success: 18925 replacements to be made.
The test was performed successfully.
Now, let's run the command that will replace HTTP links to the HTTPS version on the database.
This command will perform changes in the database.
# wp search-replace 'http://techexpert.tips' 'https://techexpert.tips' --all-tables --skip-columns=guid --allow-root
Warning: Skipping an uninitialized class "DUP_Package", replacements might not be complete.
Success: 18925 replacements were made.
You have finished the Mysql database configuration.
Optional - Google Search Console
If you are using Google Search Console, you need to add another website using your HTTPS URL.
Unfortunately, Google search console does not offer the option to rename your HTTP website to HTTPS.
You will need to configure the HTTPS version as a new website.
Optional - Google Analytics
If you are using Google Analytics, you need to change your website properties to reflect the HTTP url.
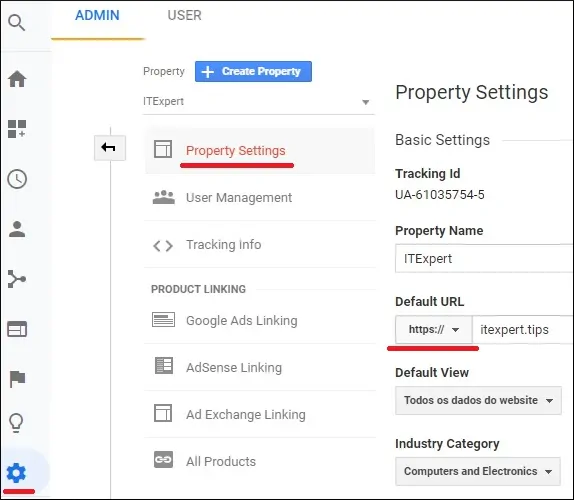
Access Google analytics administrator menu and select the Property Settings option.
Change the Default URL configuration from HTTP to HTTPS.
