Would you like to learn how to use Zabbix Json monitoring feature? In this tutorial, we are going to show you all the steps required to use Zabbix JSON feature to monitor the weather of a specific city.
In our example, we are going to monitor the temperature of the city of Rio de Janeiro, in Brazil.
• Zabbix version: 4.2.6
We are going to use Zabbix to monitor the JSON output of the API from the Website Openweathermap .
Hardware List:
The following section presents the list of equipment used to create this Zabbix tutorial.
Every piece of hardware listed above can be found at Amazon website.
Zabbix Playlist:
On this page, we offer quick access to a list of videos related to Zabbix installation.
Don't forget to subscribe to our youtube channel named FKIT.
Zabbix Related Tutorial:
On this page, we offer quick access to a list of tutorials related to Zabbix installation.
Tutorial - Zabbix Create JSON API
Some websites require you to create a JSON API to authenticate your JSN requests.
Access the OpenWeather website and create you free JSON API.
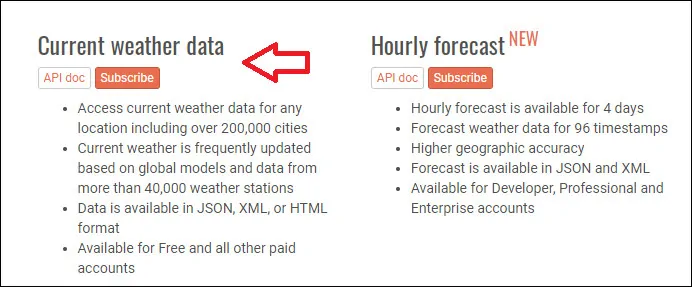
Create a Free API to consult the current weather.

After finishing the subscriptions process, you will receive your API.
In our example we are going to use the API: a7dc1436999b2a1434f614d93f6b79f9
Do not use this API, create your own API.
It might take 2 hours or more for the website to enable your API to perform queries related to the weather.
Tutorial - Finding your City Code on OpenWeatherMap
Next, you need to find the code of the City that you want to monitor on the OpenWeather website.
On the website, access the Weather menu and search for the City that you want to monitor.
In our example, we are goig to monitor the city of Rio de Janeiro.
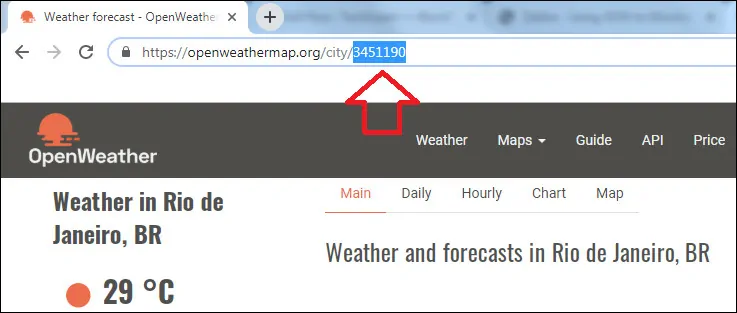
You may get the city identification number from the address bar.
In our example, the city of Rio de Janeiro uses the following identification number: 3451190
Tutorial Zabbix JSON - Monitoring the Weather Temperature
Open your browser and enter the IP address of your web server plus /zabbix.
In our example, the following URL was entered in the Browser:
• http://35.162.85.57/zabbix
On the login screen, use the default username and default password.
• Default Username: Admin
• Default Password: zabbix
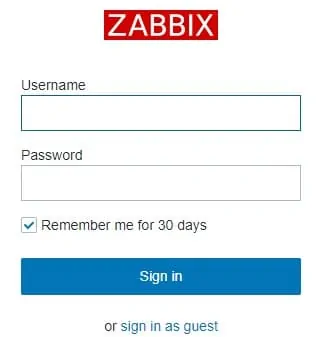
After a successful login, you will be sent to the Zabbix Dashboard.
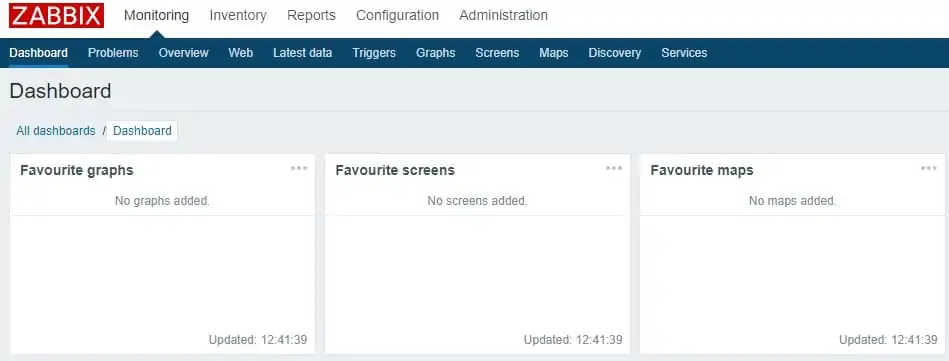
On the dashboard screen, access the Configuration menu and select the Hosts option.

Locate and click on the hostname of your Zabbix server.
In our example, we selected the hostname: Zabbix server.
On the Host properties screen, access the Applications tab.
On the top right part of the screen, click on the Create application button.
On the Host applications screen, create a new application named: OPENWEATHERMAP

After finishing the Application creation, access the Items tab.
On the top right part of the screen, click on the Create item button.
On the Item creation screen, you need to configure the following items:
• Name: JSON Rio de Janeiro
• Type: HTTP AGENT
• Key: json.monitor.rio
URL: http://api.openweathermap.org/data/2.5/weather?id=3451190&units=metric&APPID=a7dc1436999b2a1434f614d93f6b79f9
You need to replace the city ID with your City ID.
You need to replace my API with your API key.
Now, you must click on the Parse button.

After clicking on the Parse button, Zabbix will clean the URL and create the required variables.

On the Item creation screen, you still need to configure the following items:
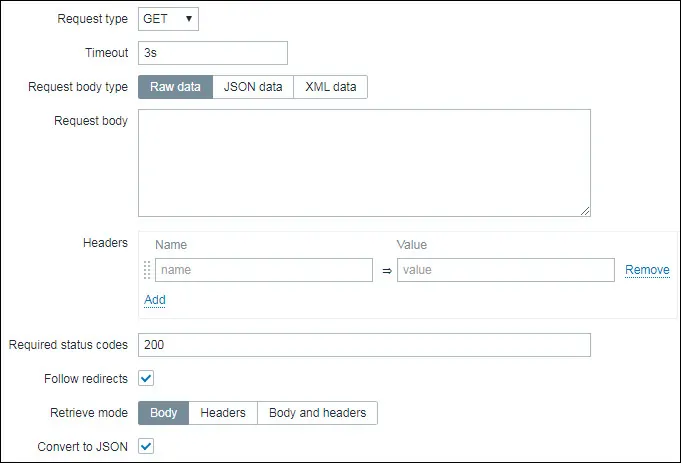
• Request type: GET
• Timeout: 3s
• Request body type: Raw data
• Required status codes: 200
• Follow redirects: Yes
• Retrieve mode: Body
• Convert to JSON: YES
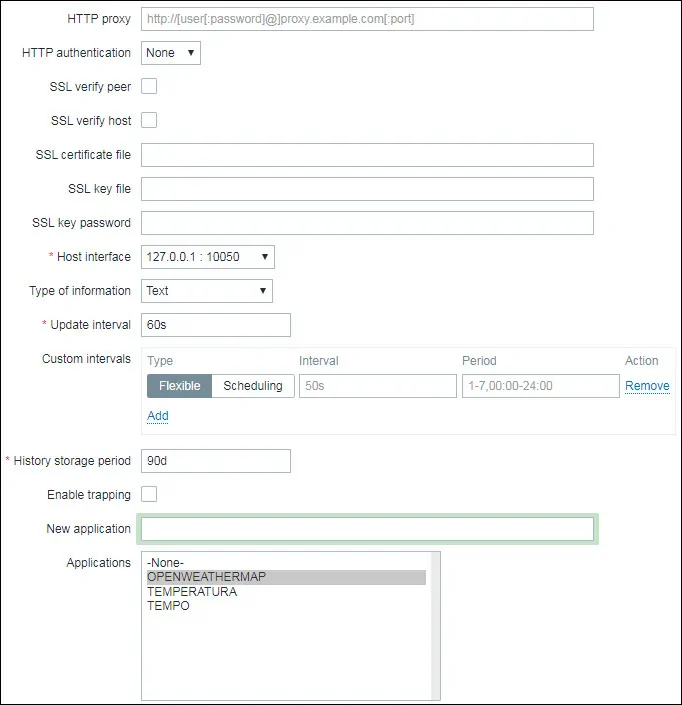
• Type of Information: TEXT
• Update interval: 60s
• Applications: Select OPENWEATHERMAP
• Enabled: Yes
Here is our configuration:
Click on the Add button to finish the Item creation and wait 5 minutes.
In order to test your configuration, access the Monitoring menu and click on the Latest data option.

Use the filter configuration to select the desired hostname and click on the Apply button.
In our example, we selected the hostname: Zabbix server and the application OPENWEATHERMAP

You should see a result similar to mine.

Congratulations! You have finished the configuration of the first item.
Tutorial - Zabbix JSON Monitoring Weather
Now, we need to access the Zabbix server's Item tab and create a new item.
On the top right part of the screen, click on the Create item button.
On the Item creation screen, you need to configure the following items:
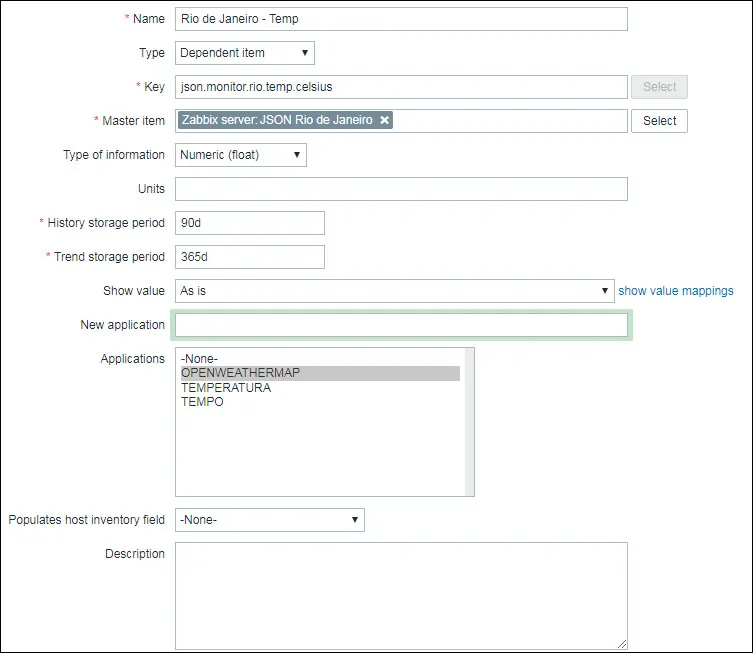
• Name: Rio de Janeiro - Temp
• Type: Dependent Item
• Key: json.monitor.rio.temp.celsius
• Master item: Zabbix server: JSON Rio de Janeiro
• Type of Information: Numeric float
• Application: OPENWEATHERMAP
Here is our configuration:
Now, you need to access the Preprocessing tab and click on the Add option.
• Name: JSONPath
• Parameter: $.body.main.temp
Click on the Add option and then on the Add button.
Here is our configuration.

Wait 5 minutes.
In order to test your configuration, access the Monitoring menu and click on the Latest data option.

Use the filter configuration to select the desired hostname and click on the Apply button.
In our example, we selected the hostname: Zabbix server and the application OPENWEATHERMAP

The item named Rio de Janeiro - Temp will show the temperature of the city of Rio de Janeiro.
You should see a result similar to mine.

Here you can see the city temperature moving on a Zabbix graphic.

Congratulations! You are now able to monitor the weather temperature using Zabbix.
