Would you like to learn how to do a ElasticSearch and Kibana installation on Ubuntu Linux? In this tutorial, we are going to show you how to install Kibana on a computer running Ubuntu Linux and ElasticSearh.
• Ubuntu version: 18
• Ubuntu version: 19
• ElasticSearch version: 7.4.0
• Kibana version: 7.4.0
Hardware List:
The following section presents the list of equipment used to create this ElasticSearch tutorial.
Every piece of hardware listed above can be found at Amazon website.
ElasticSearch Related Tutorial:
On this page, we offer quick access to a list of tutorials related to ElasticSearch installation.
Tutorial ElasticSearch - Installation on Ubuntu Linux
Use apt-get to install the required packages.
Download and install the ElasticSearch repository key.
Add the official ElasticSearch repository to your APT database
Update the APT-GET database and install the ElasticSearch package.
Edit the ElasticSearch configuration file named: elasticsearch.yml
Add the following lines at the end of the file.
Here is the complete elasticsearch.yml file with our configuration:
In our example, we allow the ElasticSearch service only on the server IP address: 192.168.15.15
Start the ElasticSearch service.
The ElasticSearch log should show the following information:
Use the NETSTAT command to verify if the service is running.
In our example, the ElasticSearch service is running on ports 9200 and 9300.
Use the following comand to test your ElasticSearch installation.
The ElasticSearch service should reply your request.
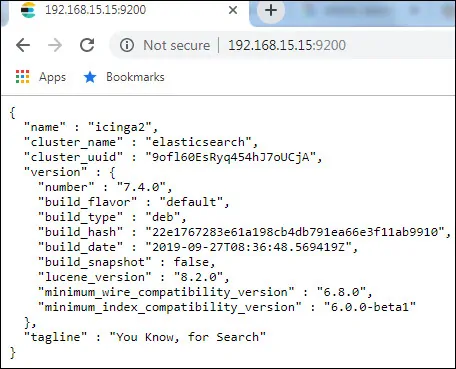
Another way to test your Elasticsearch installation is to use your browser.
Open your browser and enter the IP address of your ElasticSearch server plus :9200.
In our example, the following URL was entered in the Browser:
• http://192.168.15.15:9200
The ElasticSearch rest interface should answer your request:

Configure the ElasticSearch service to start during boot time.
Congratulations! You have finished the ElasticSearch installation on Ubuntu Linux.
Tutorial Kibana - Installation on Ubuntu Linux
After finishing the ElasticSearch installation, we can proceed to the Kibana installation.
Use the following command to install the Kibana package.
Edit the Kibana configuration file named: kibana.yml
Add the following lines at the end of the file.
Here is the complete kibana.yml file with our configuration:
Edit the sysctl.conf configuration file.
Add the following lines at the end of the sysctl.conf file.
Force the system to read the sysctl.conf file.
In our example, we allow Kibana service only on the server IP address: 192.168.15.15
Kibana will connect to the ElasticSearch server using the IP address 192.168.15.15.
Start the Kibana service.
Use the NETSTAT command to verify if the Kibana service is running.
In our example, the Kibana service is running on port 5601.
Configure the Kibana service to start during boot time.
Congratulations! You have finished the Kibana installation on Ubuntu Linux.
Tutorial Kibana - Web Interface
Now, we need to access the Kibana dashboard.
Open your browser and enter the IP address of your web server plus :5601.
In our example, the following URL was entered in the Browser:
• http://192.168.15.15:5601
Select an answer to the question below.

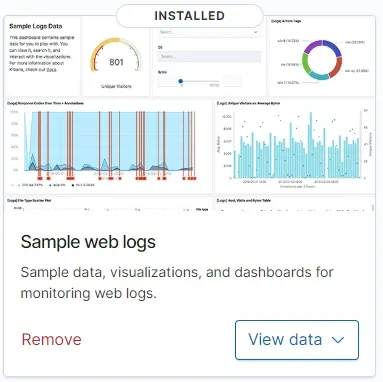
In our example, we are going to import sample data offered by the Kibana installation.

Access the Kibana sampla data.

Here is a Kibana dashboard example.

Congratulations! You have access to the Kibana web interface.
