Would you like to learn how to install the Letsencrypt certificate on the Nginx server of a computer running Ubuntu Linux? In this tutorial, we are going to show you how to install the Letsencrypt client and configure an HTTPS website on the Nginx server.
Nginx calls Virtualhosts the SERVER BLOCKS feature.
• Ubuntu 18
• Ubuntu 19
• Ubuntu 20
• Nginx 1.18.0
In our example, the IP address of the Nginx server is 36.160.86.106.
In our example, the Nginx server is hosting the website WWW.GAMEKING.TIPS.
Equipment list
The following section presents the list of equipment used to create this tutorial.
As an Amazon Associate, I earn from qualifying purchases.
Nginx - Related Tutorial:
On this page, we offer quick access to a list of tutorials related to Nginx.
Nginx Virtualhost - DNS configuration
Access the GODADDY website and purchase a DNS domain.
In our example, we purchased a domain named:
You can use any website to purchase a DNS domain, GoDaddy is just my personal choice.
Create a DNS entry pointing your website to the computer running Nginx.
In our example, we created a DNS entry pointing WWW.GAMEKING.TIPS to 35.160.86.106.

Use the NSLOOKUP command to test your DNS configuration.
Here is the command output.
Congratulations! You have finished the required DNS configuration.
Tutorial Letsencrypt - Nginx installation
Install the Nginx server.
Create a directory to store the new website files.
The website files will be stored inside the following directory:
Create an Nginx configuration file for the new website.
Here is the file with our configuration.
Create a symbolic link to enable the Nginx virtual host configuration.
Restart the Nginx service.
Create a test page inside the new website directory.
Here is the file content.
Open your browser and try to access the virtual website.
In our example, the following URL was entered in the Browser:
• http://www.gameking.tips

Congratulation! You finished the Server Blocks configuration of Nginx.
Nginx Letsencrypt - Installing the Certificate
We need to install the free HTTPS certificate.
We also need to redirect all HTTP traffic to the HTTPS version of the website automatically.
Install the list of required packages.
Install the Nginx free HTTPS certificate
• Press (A) to Agree with the Terms of Service.
• Press (Y) to share your e-mail and receive Newsletters.
• Press (2) to automatically redirect your HTTP website to the HTTPS versions.
The system will automatically install a free certificate.
It will also configure the Nginx server to redirect all HTTP access to the HTTPS version of your website.
In our example, the system changed our virtual host configuration file.
Here is the file content.
The KEY file contains your Certificate private key and must be kept in a safe place all the time.
In our example, the KEY file was stored at :
The system automatically modifies the original Nginx virtual host configuration file.
It will automatically redirect all HTTP requests to the HTTPS version of your website.
Open your browser and enter the DNS address of the new website using the HTTPS protocol.
In our example, the following URL was entered in the Browser:
• https://www.gameking.tips/
The HTTPS page should be presented.

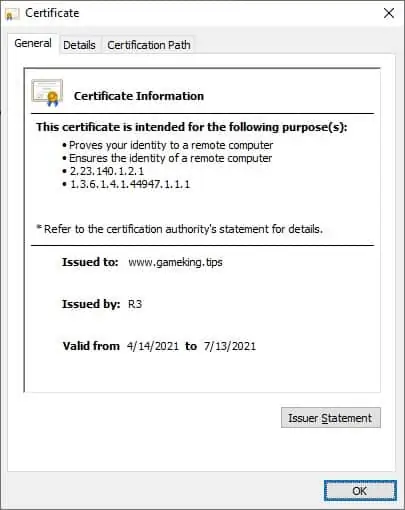
Verify the certificate properties.

You have installed a Let's Encrypt certificate on the Nginx server.
Nginx Letsencrypt - Certificate Renew
The free certificate installed is valid for 90 days.
The System creates a scheduled task to automatically renew any certificate within thirty days of expiration.
The scheduled task name is CERTBOT and it is located inside the following directory:
Here is the file content.
Use the following command to simulate the process of certificate renew.
Here is the command output.
Congratulations! You have configured the Let's Encrypt automatic certificate renew.
