Would you like to learn how to configure a static IP address on a network interface of Windows using Powershell? In this tutorial, we are going to show you how to use Powershell to configure a static IP address on a network interface of a computer running Windows.
• Windows 2012 R2
• Windows 2016
• Windows 2019
• Windows 10
• Windows 7
Equipment list
The following section presents the list of equipment used to create this tutorial.
As an Amazon Associate, I earn from qualifying purchases.
Related tutorial - PowerShell
On this page, we offer quick access to a list of tutorials related to PowerShell.
Tutorial Powershell - Configure a static IP address
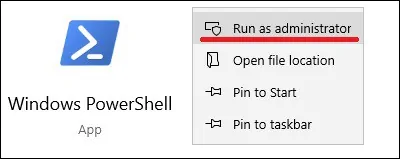
As an Administrator, start an elevated Powershell command-line.

List all network adapters available.
Here is the command output.
Take note of the desired network interface index.
Remove any IP address configuration from the network adapter.
Remove any DNS configuration from the network adapter.
Configure a static IP address on a network interface.
Here is the command output.
Configure the DNS servers of a network adapter.
Verify the DNS servers configured on a network interface.
Here is the command output.
Verify the configuration of a network interface.
Here is the command output.
In our example, the network adapter selected has index number 22.
In our example, we configured the IP address 10.10.10.2 on the network interface.
In our example, we configured the default gateway IP address 10.10.10.1.
In our example, we configured the DNS addresses 8.8.8.8 and 8.8.4.4 on the network interface.
Congratulations! You are able to configure a static IP address on a network interface using Powershell.
