Would you like to learn how to create a VPN connection using Powershell? In this tutorial, we are going to show you how to use Powershell to create a VPN connection on a computer running Windows.
• Windows 2012 R2
• Windows 2016
• Windows 2019
• Windows 10
Equipment list
Here you can find the list of equipment used to create this tutorial.
This link will also show the software list used to create this tutorial.
Related tutorial - PowerShell
On this page, we offer quick access to a list of tutorials related to PowerShell.
Tutorial Powershell - Creating a VPN connection
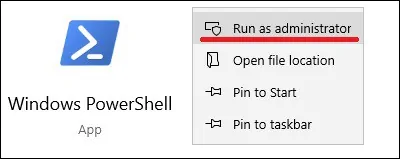
As an Administrator, start an elevated Powershell command-line.

Create a VPN using Powershell.
Create a PPTP VPN with optional encryption and PAP authentication.
Create a PPTP VPN with encryption and MSCHAPV2 authentication.
Optionally, use your current credential and remember the login information.
Create an L2TP-IPSEC VPN with a shared key and MSCHAPV2 authentication.
List the VPN connections.
Here is the command output:
Start a VPN connection.
Check the VPN connection status.
Here is the command output:
Remove a VPN connection using Powershell.
Congratulations! You are able to configure a VPN connection using Powershell.
