Would you like to learn how to install a Certification Authority on Windows Server? In this tutorial, we are going to show you how to install and configure a Certification Authority on a computer running Windows server.
• Windows 2012 R2
Hardware List:
The following section presents the list of equipment used to create this Windows tutorial.
Every piece of hardware listed above can be found at Amazon website.
Windows Playlist:
On this page, we offer quick access to a list of videos related to Windows installation.
Don't forget to subscribe to our youtube channel named FKIT.
Windows Related Tutorial:
On this page, we offer quick access to a list of tutorials related to Windows installation.
Tutorial - Certification Authority Installation on Windows
Open the Server Manager application.
Access the Manage menu and click on Add roles and features.

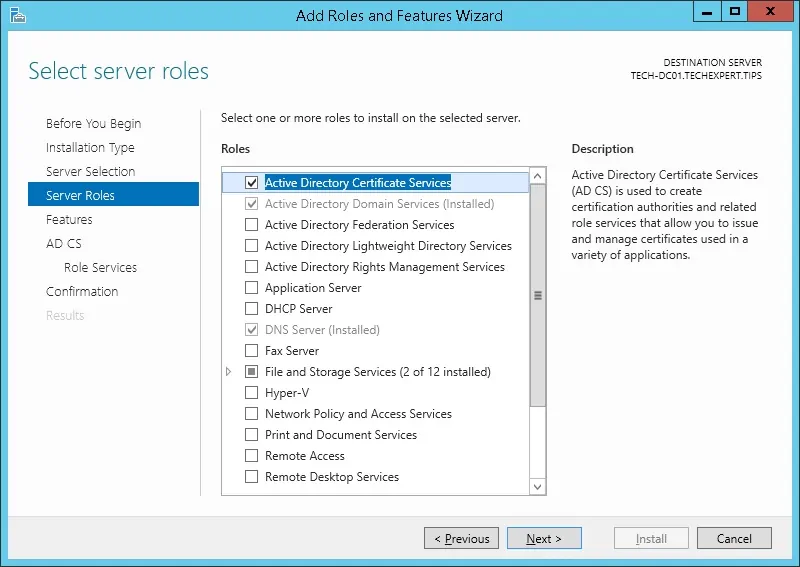
Access the Server role screen, select the Active Directory Certificate Services and click on the Next button.
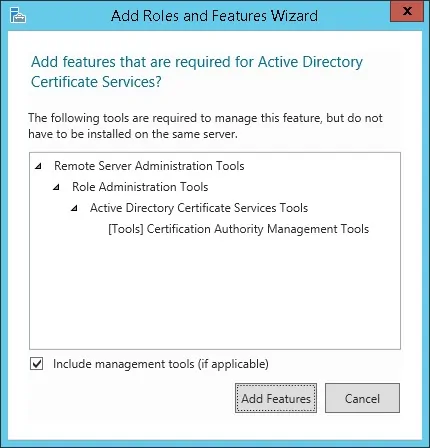
On the following screen, click on the Add features button.
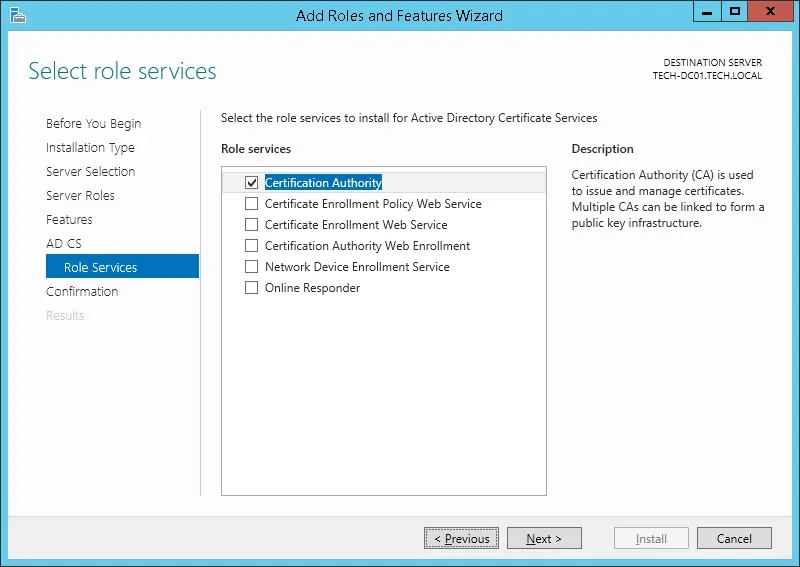
Keep clicking on the Next button until you reach the role service screen.
Enable the option named Certification Authority and click on the Next button.
On the confirmation screen, click on the Install button.
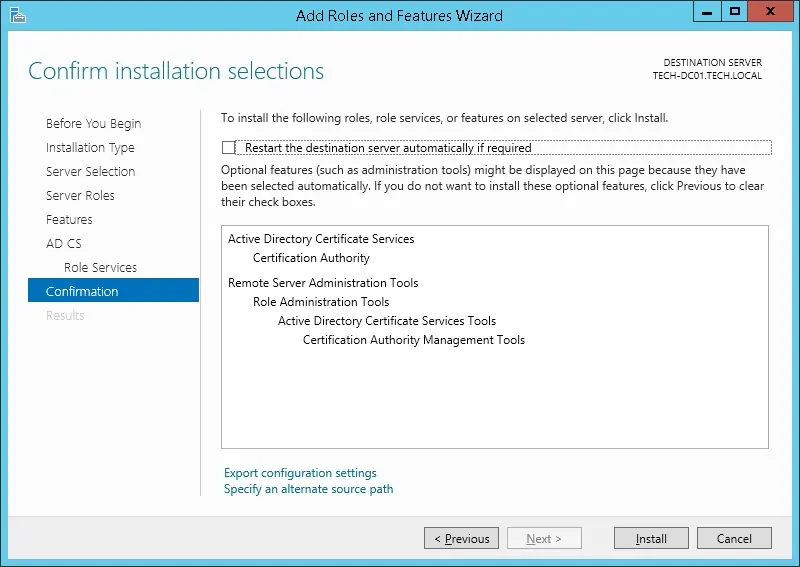
Wait the Certification Authority installation to finish.
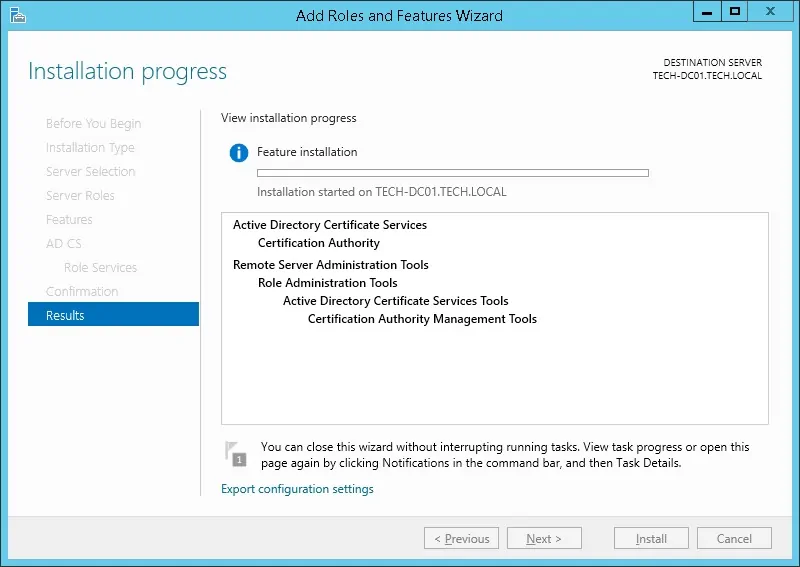
You have finished the Active directory Certification Authority installation on Windows server.
Tutorial - Active Directory Certification Authority Configuration
Open the Server Manager application.
Click on the yellow flag menu and select the option: Configure Active Directory Certificate Services

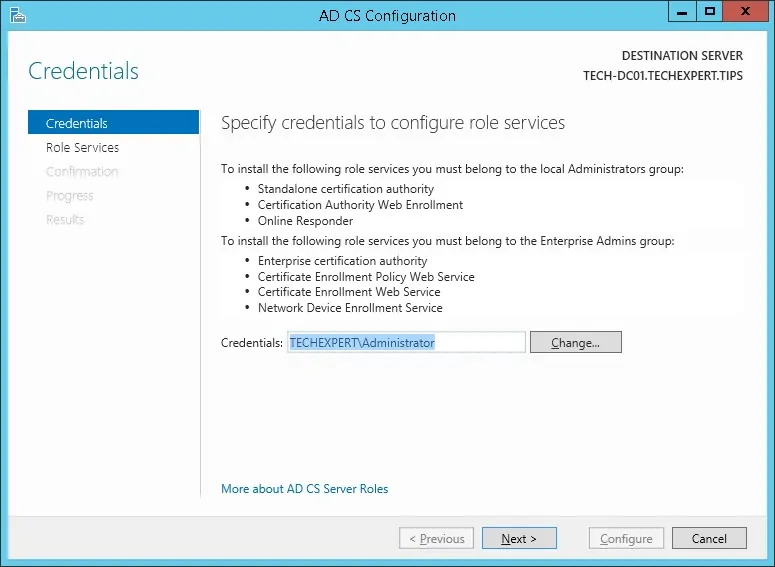
On the credentials screen, click on the Next button.
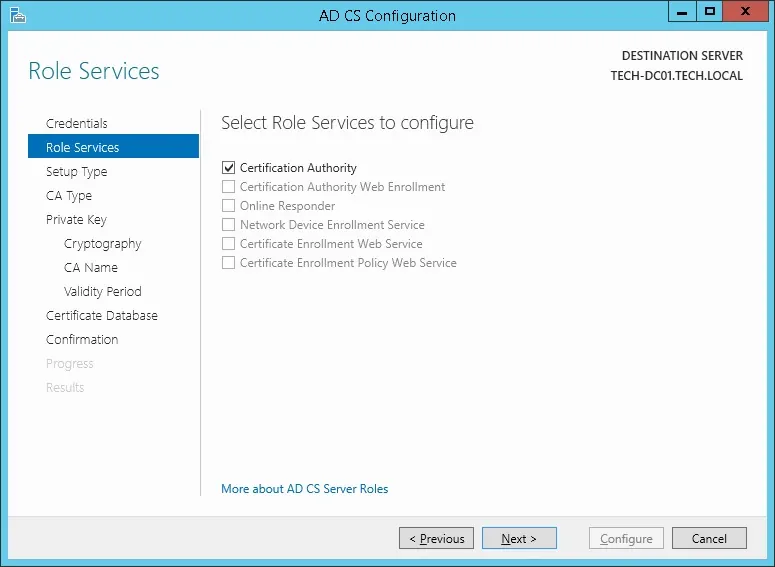
Select the Certification Authority option and click on the Next button.
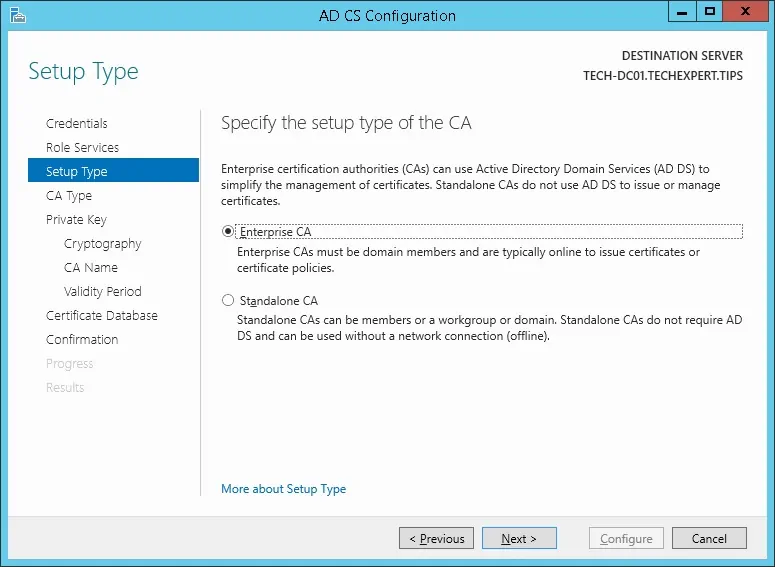
Select the Enterprise CA option and click on the Next button.
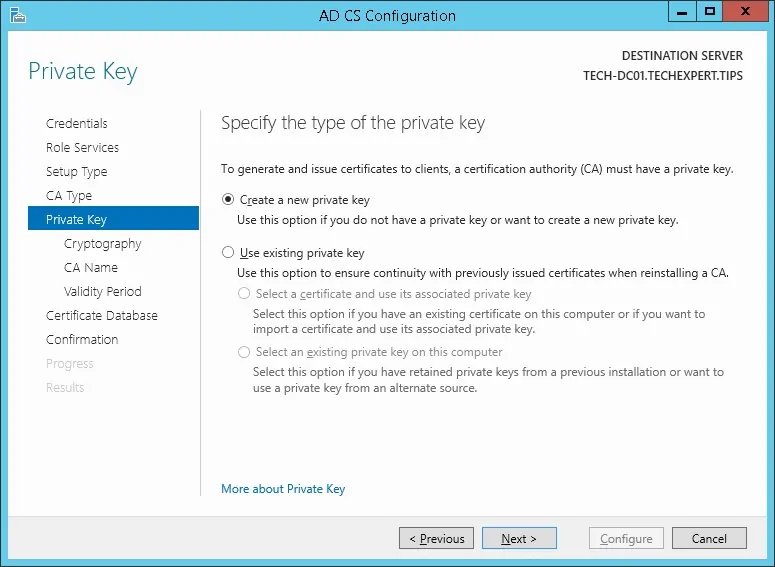
Select the Create a new private key option and click on the Next button.
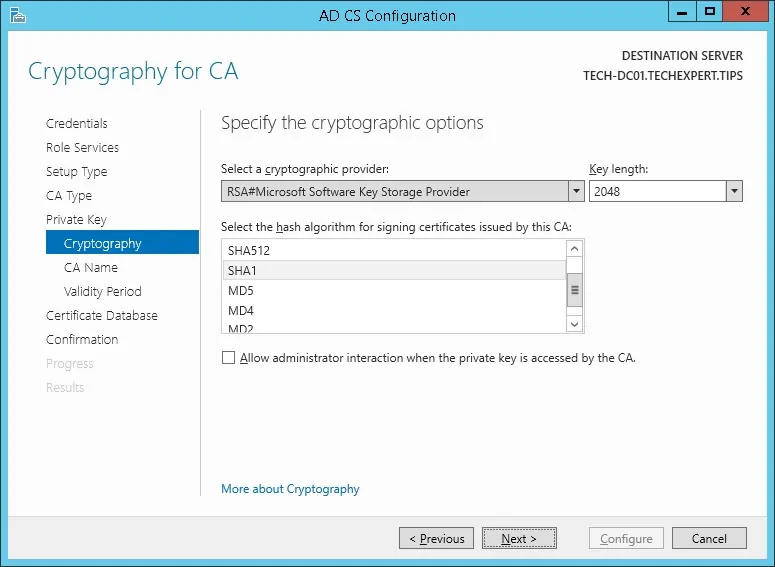
Keep the default cryptography configuration and click on the Next button.
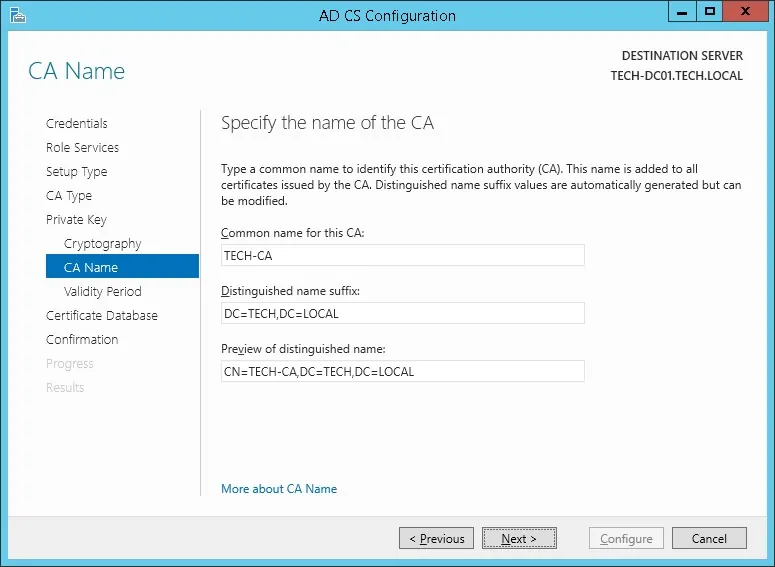
Set a common name to the Certification authority and click on the Next button.
In our example, we set the common name: TECH-CA
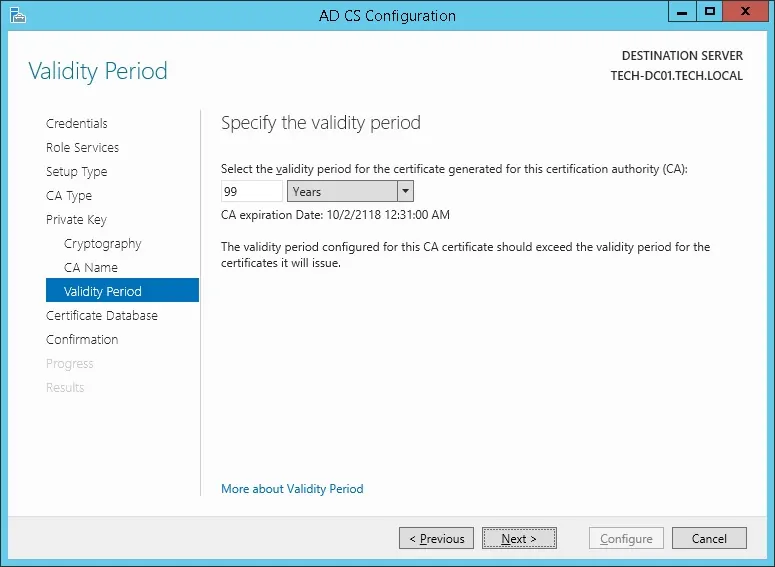
Set the Windows Certification authority validity period.
Keep the default Windows Certification authority database location.
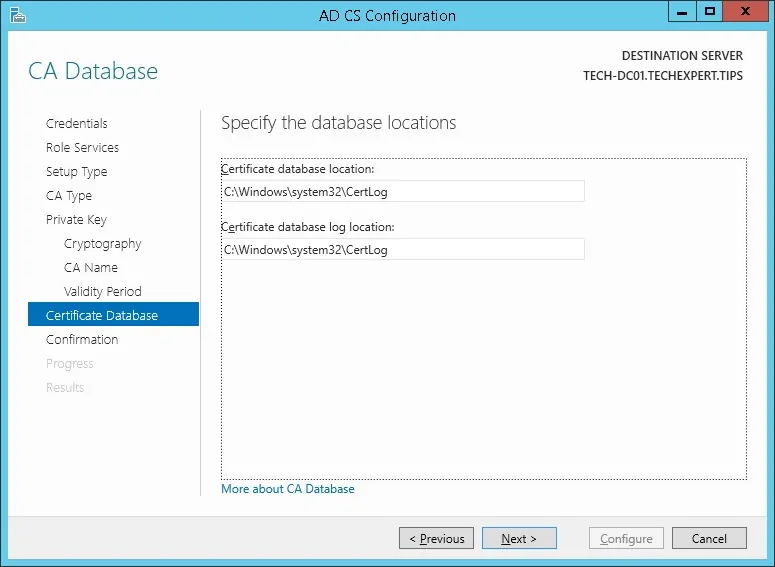
Verify the summary and click on the Configure button.
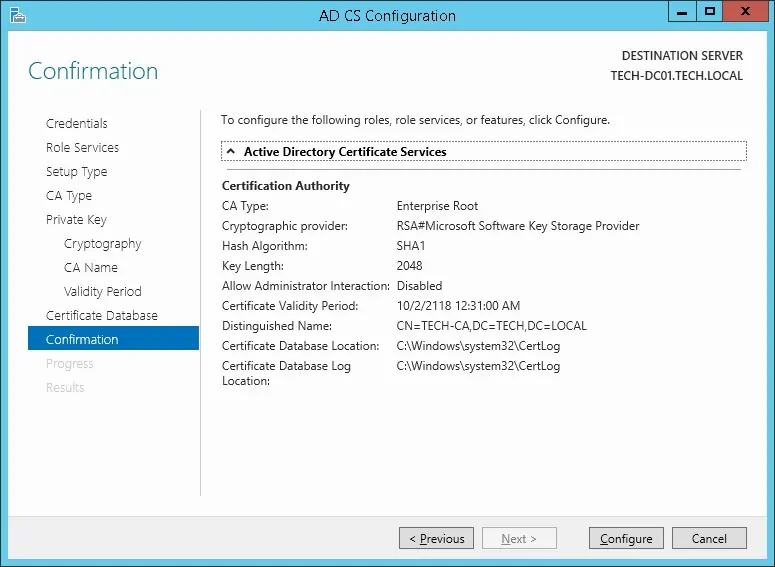
Wait for the Windows server certification authority installation to finish.
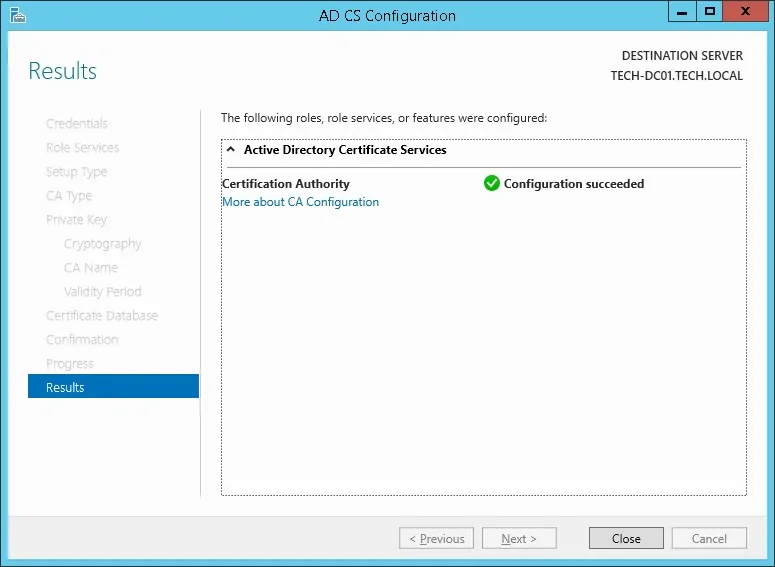
After finishing the certification authority installation, reboot your computer.
You have finished the Windows Certification authority installation.
