Would you like to learn how to enable the HSTS feature on the IIS of a Windows server? In this tutorial, we are going to show you how to enable on IIS the feature called HTTP Strict Transport Security.
• Windows 2012 R2
• Windows 2016
• Windows 2019
• Windows 2022
• Windows 10
• Windows 11
Hardware List:
The following section presents the list of equipment used to create this tutorial.
Every piece of hardware listed above can be found at Amazon website.
Windows Tutorial:
On this page, we offer quick access to a list of Windows tutorials.
Tutorial IIS - Enable HTTP Strict Transport Security
Start the application named: IIS Manager.

On the IIS Manager application, select your website.
On the right part of the screen, access the option named: HTTP Response Headers.

On the top right part of the screen, click on the Add option.

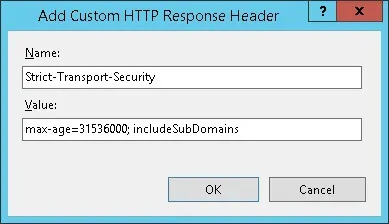
To enable the HSTS feature, enter the following configuration:
• NAME: Strict-Transport-Security
• VALUE: max-age=31536000; includeSubDomains
Click on the OK button.

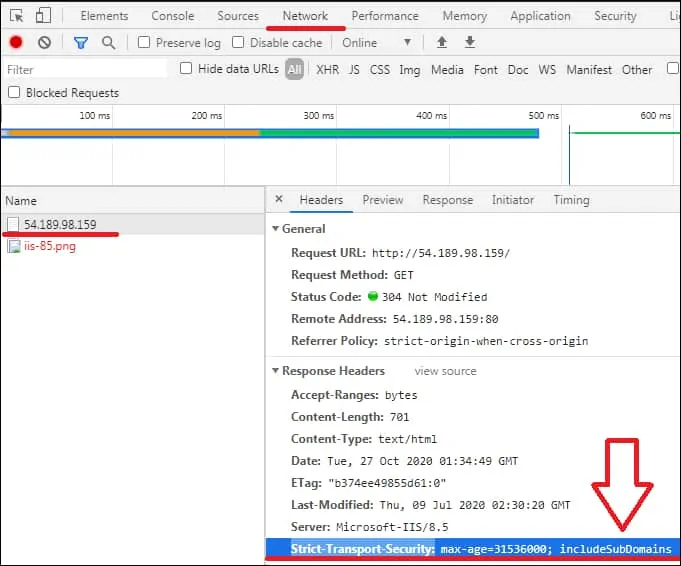
To test the installation, open the Chrome browser on a remote computer and enter the IP address of your web server using the HTTP protocol.
In our example, the following URL was entered in the Browser:
• http://54.189.98.159
Use the page inspection feature of the google chrome browser to verify the Headers from your server.

Optionally, you may use the CURL command of a Linux computer to test the HSTS installation.
Here is the command output.
Congratulations! You successfully configured the HSTS feature on the IIS server.
