Would you like to learn how to install the Let's Encrypt certificate on the IIS server of a computer running Windows? In this tutorial, we are going to show you how to install the Let's Encrypt client and configure an HTTPS website on the IIS server.
• Windows 2012 R2
• Windows 2016
• Windows 2019
In our example, the IIS server IP address is 35.160.86.106.
Hardware List:
The following section presents the list of equipment used to create this tutorial.
Every piece of hardware listed above can be found at Amazon website.
Windows Tutorial:
On this page, we offer quick access to a list of Windows tutorials.
Tutorial Windows - IIS Installation
Open the Server Manager application.
Access the Manage menu and click on Add roles and features.

On the Server Roles screen, select the option named: Web Server IIS.
Click on the Next button.
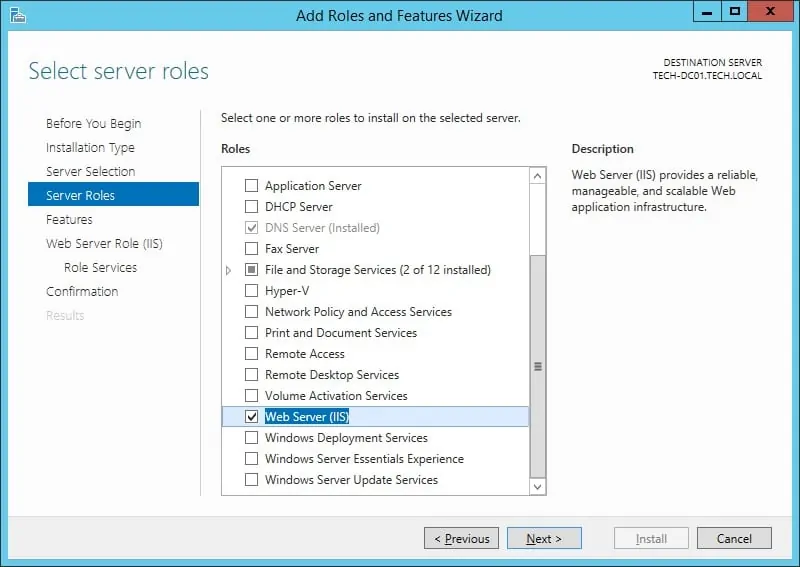
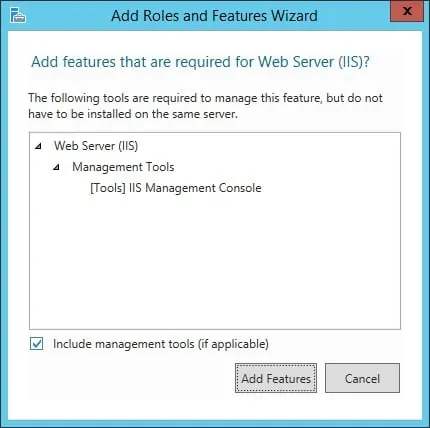
On the following screen, click on the Add features button.
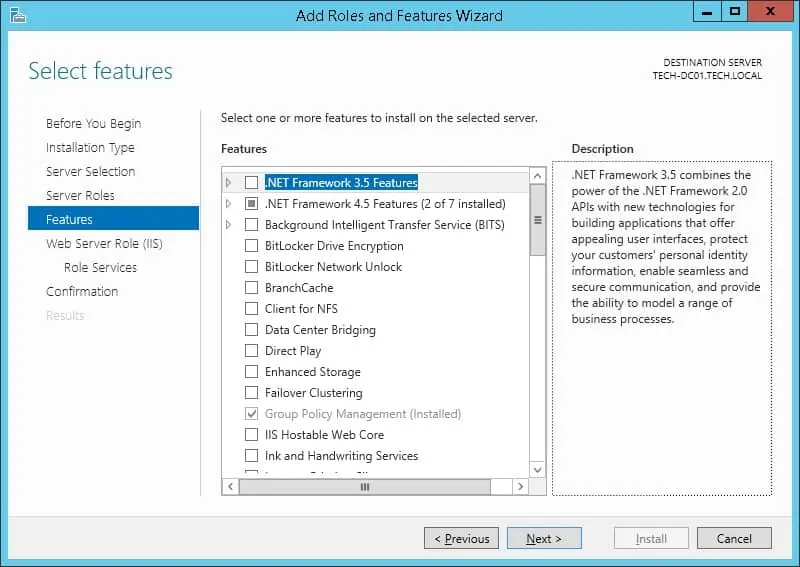
On the Features screen, click on the Next button.
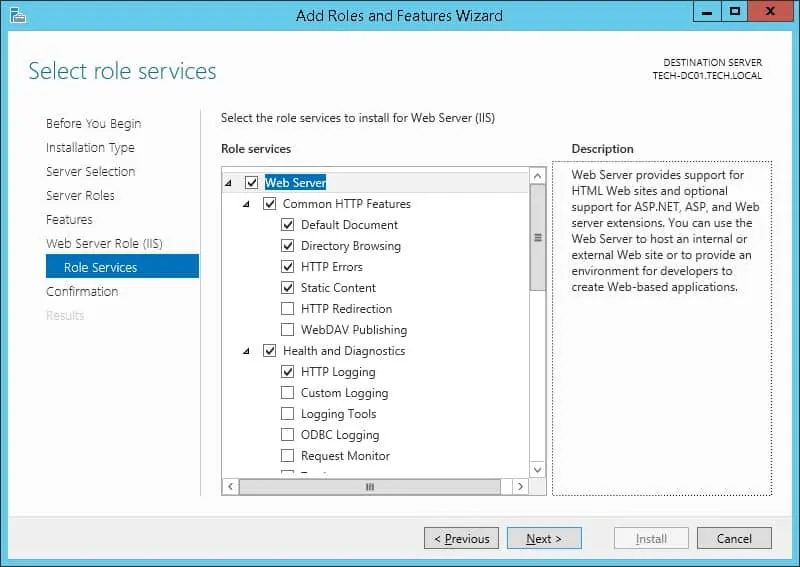
On the Role service screen, click on the Next button.
On the Summary screen, click on the Install button.
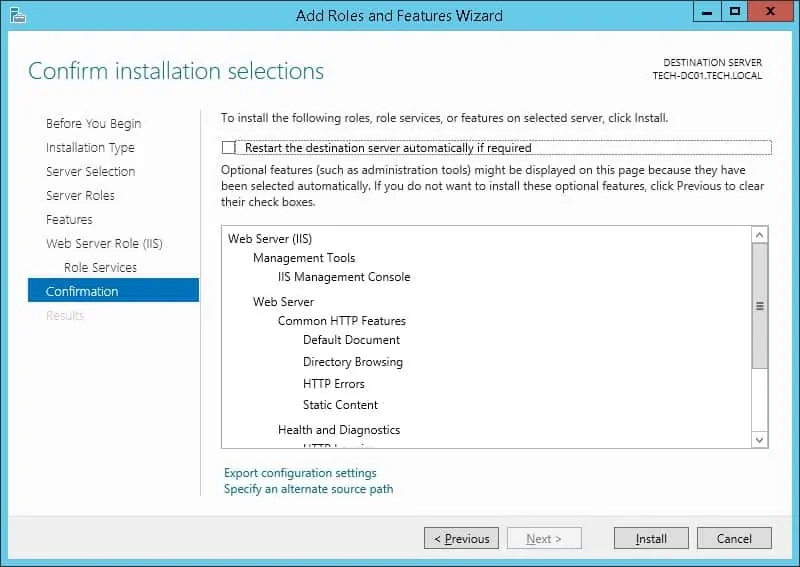
Congratulations! You have finished the IIS service installation on a computer running Windows.
Tutorial IIS Virtualhost - DNS configuration
Access the GODADDY website and purchase a DNS domain.
In our example, we purchased a domain named:
You can use any website to purchase a DNS domain, GoDaddy is just my personal choice.
Create a DNS entry pointing your website to the computer running IIS.
In our example, we created a DNS entry pointing WWW.GAMEKING.TIPS to 35.160.86.106.

Use the NSLOOKUP command to test your DNS configuration.
Here is the command output.
Open your browser and try to access the HTTP version of the website.
In our example, the following URL was entered in the Browser:
• http://www.gameking.tips
Congratulations! You have finished the required DNS configuration.
Tutorial IIS - Creating a Website on IIS
Start the application named: IIS Manager.

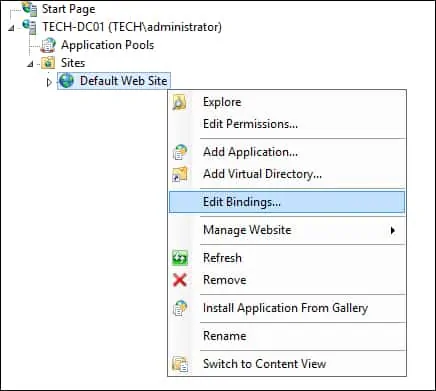
On the IIS Manager application, right-click on the default website.
Select the option named Edit bindings.
Select the HTTP option and click on the Edit button.
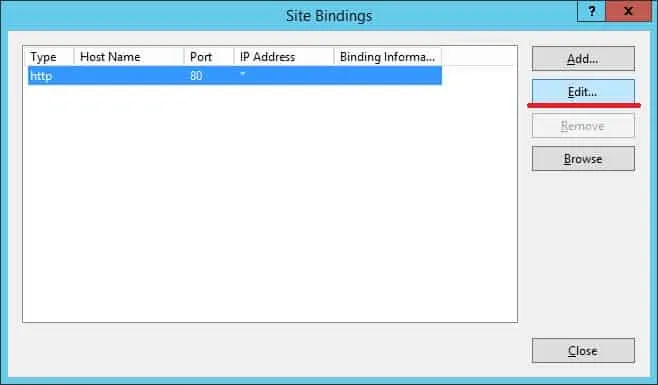
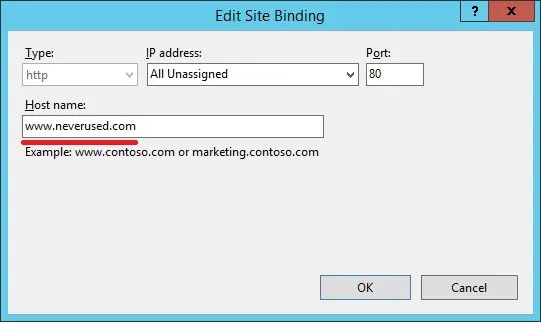
Enter a nonexistent website hostname and click on the OK button.
This will make sure that the IIS default website is never used.
Create a directory to store the virtual host files.
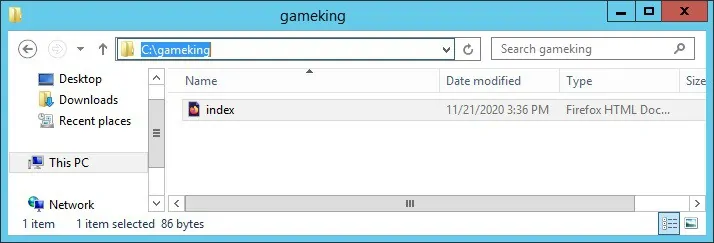
In our example, we created a directory named GAMEKING on the root of drive C.
Inside this directory, create an HTML file to be used as a test page.
On the IIS Manager application, select the folder named Sites
On the right part of the screen, access the option to Add a Website.

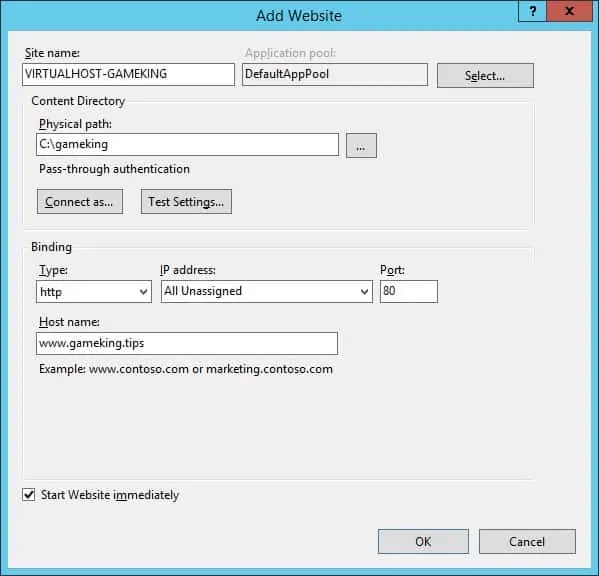
On the Website configuration screen, perform the following configuration:
• Site name - Enter an identification to the new Website.
• Application pool - DEFAULTAPPPOOL.
• Physical path - Select the directory where the Website files are stored.
• Type - HTTP
• IP address - All Unassigned.
• Port - 80.
• Hostname - Enter the website DNS address.
• Start Website immediately - Yes.
Click on the OK button.
Open your browser and enter the DNS address of the new website.
In our example, the following URL was entered in the Browser:
• http://www.gameking.tips/
The Test page should be presented.

Congratulations! You successfully configured the IIS virtual host feature.
Tutorial IIS - Installing the Let's Encrypt certificate
Access the WIN-ACME website and download the client for Windows.

Extract the latest version of the WIN-ACME Zip file.
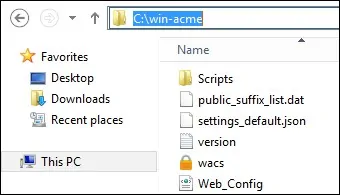
In our example, we created a directory named WIN-ACME on the root of drive C.
Double-click the file named WACS to start the HTTPS certificate installation.
Press (N) to create a new certificate.
Enter the identification number of the website.
Press (A) to automatically perform the required configuration.
Press (Y) to confirm the selection.
Press (Y) to continue the installation.
Press (Y) to agree with the Terms of service.
Enter an email address to be notified about issues detected.
Wait for the Let's Encrypt certificate installation to finish.
The IIS server will be automatically configured.
Press (Q) to quit.
In our example, we used Lets's Encrypt to automatically install an HTTPS certificate on the IIS server.
The system automatically creates a scheduled task to verify and renew the Let's Encrypt certificate.

Open your browser and enter the DNS address of the new website using the HTTPS protocol.
In our example, the following URL was entered in the Browser:
• https://www.gameking.tips/
The HTTPS Test page should be presented.

Verify the certificate properties.
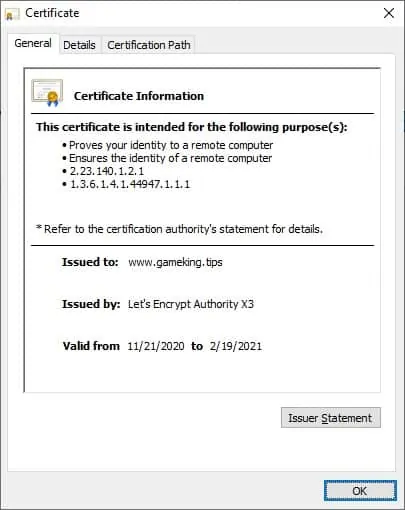
Congratulations! You successfully configured the IIS virtual host feature.
