Would you like to learn how to install the FTP server on a computer running Windows? In this tutorial, we are going to show you how to enable the FTP server on a computer running Windows.
• Windows 2012 R2
• Windows 2016
• Windows 2019
• IIS 8.5
Windows Tutorial:
On this page, we offer quick access to a list of Windows tutorials.
Tutorial Windows - FTP Server installation
Open the Server Manager application.
Access the Manage menu and click on Add roles and features.

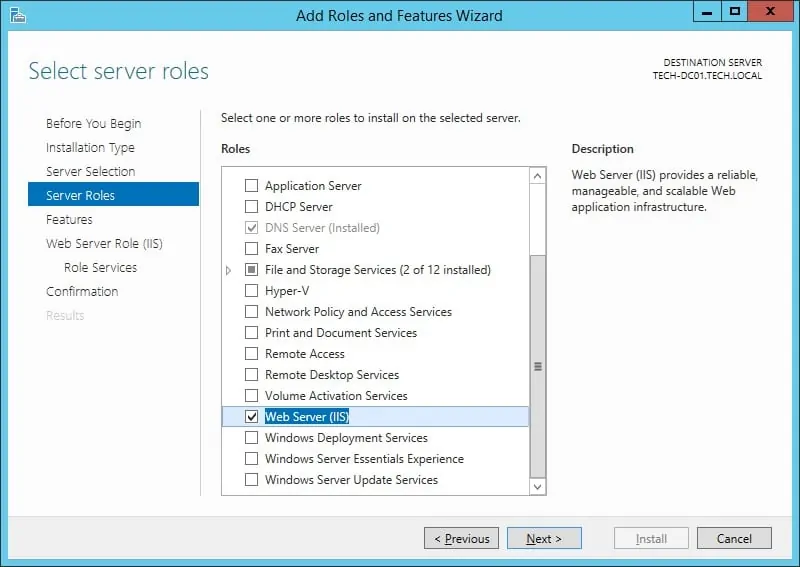
On the Server Roles screen, select the option named: Web Server IIS.
Click on the Next button.
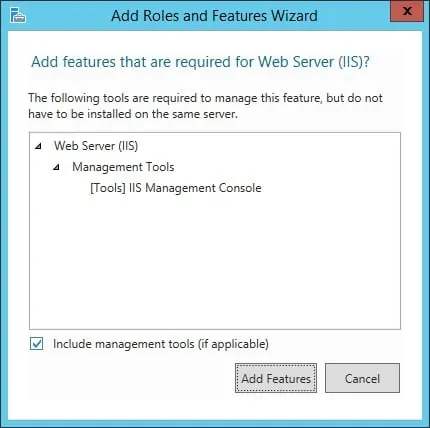
On the following screen, click on the Add features button.
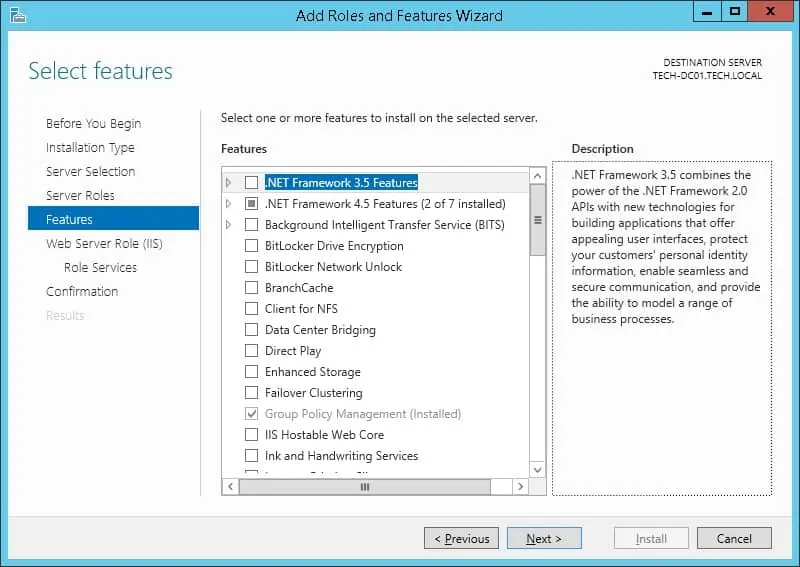
On the Features screen, click on the Next button.
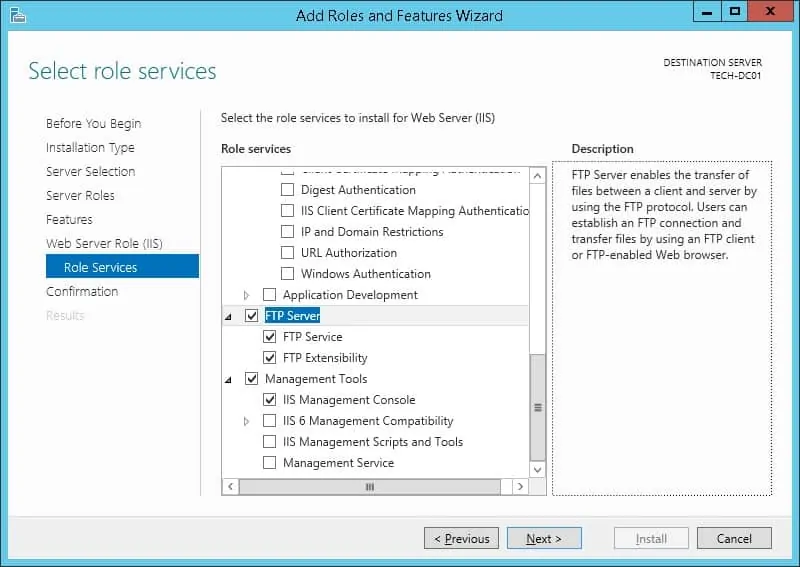
On the Role service screen, select the option named FTP Server and both suboptions.
On the Summary screen, click on the Install button.
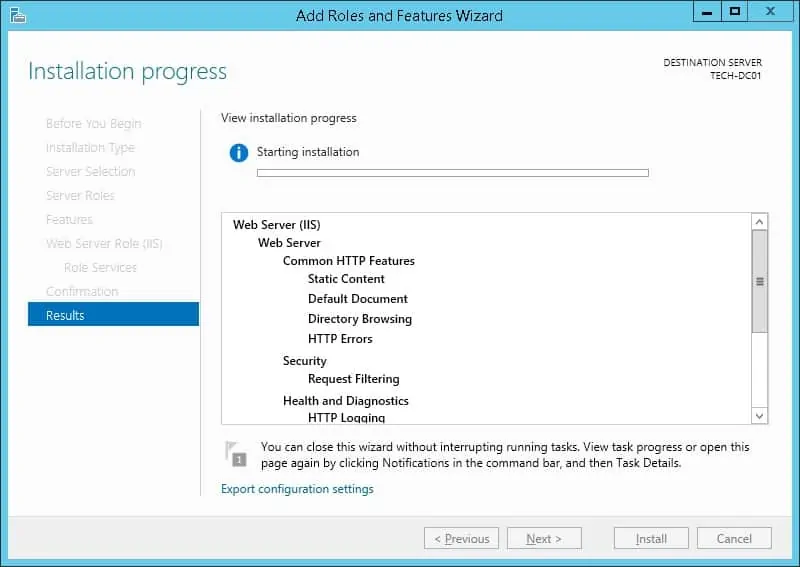
Congratulations! You have finished the FTP service installation on a computer running Windows Server.
Tutorial Windows - FTP server configuration
After finishing the installation, create a group of users.
Members of this group will be authorized to use the FTP server.
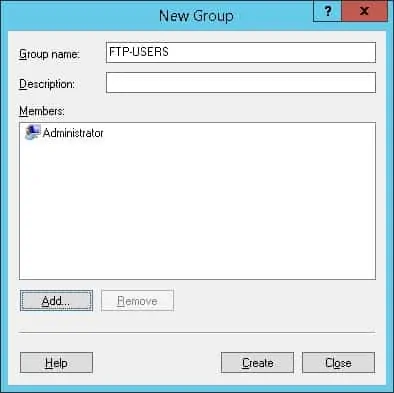
In our example, we created a local group named FTP-USERS.
Create a directory to be used by the FTP server.
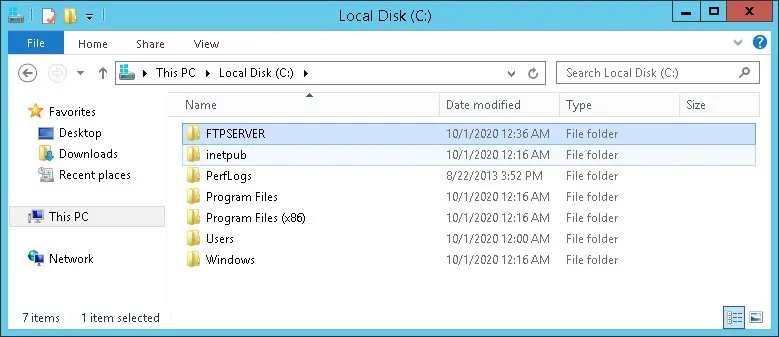
In our example, we created a directory named FTPSERVER on the root of drive C.
Start the application named: IIS Manager.

Right-click the folder named Sites and select the option to add an FTP site.
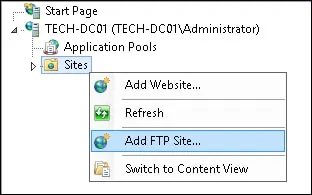
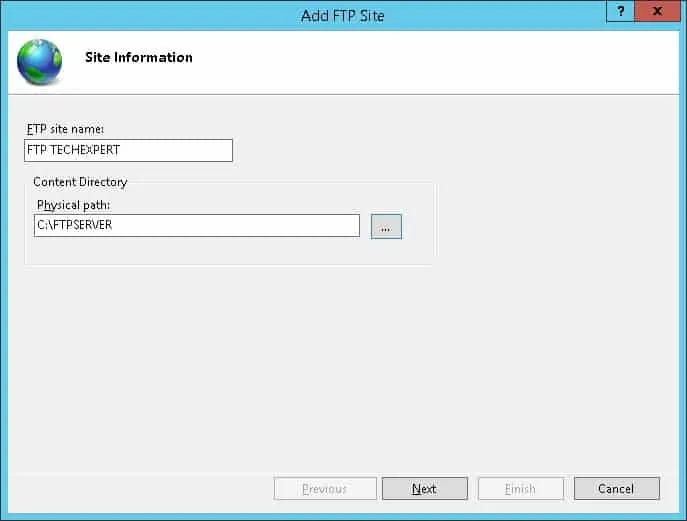
Enter an identification to the new FTP site and select the desired directory.
In our example, we selected the directory previously created.
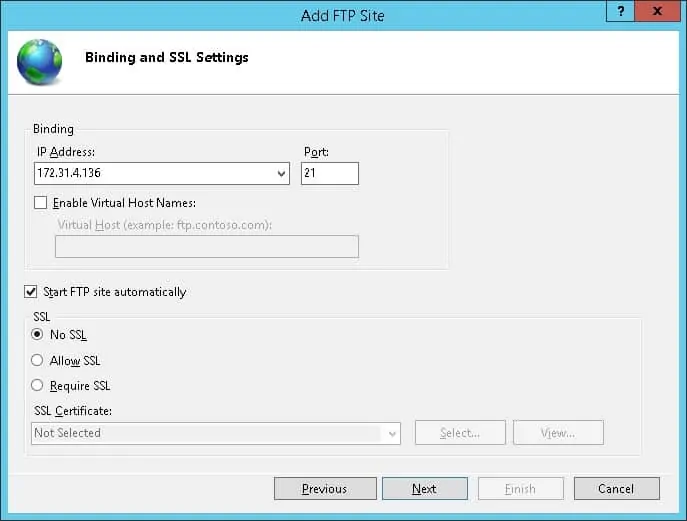
On the next screen, perform the following configuration.
• IP Address - Select the desired IP address
• Start FTP site automatically - Yes
• SSL - No SSL
Click on the Next button.
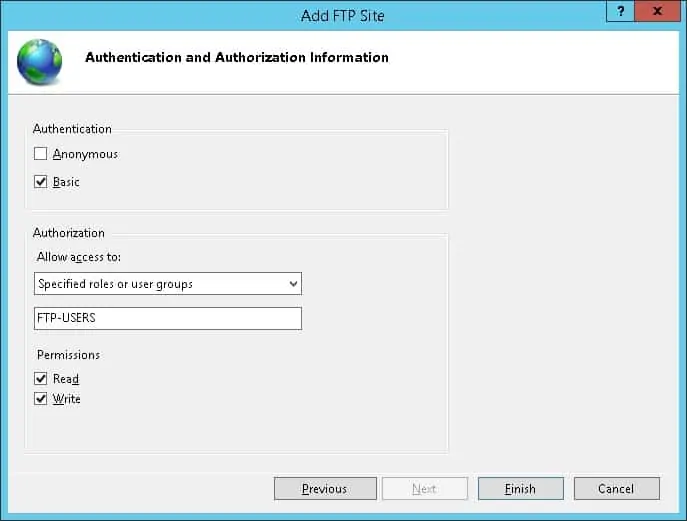
On the next screen, perform the following configuration.
• Anonymous authentication - No
• Basic authentication - Yes
• Allow access - Specified roles or user groups
• Group name - FTP-USERS
• Permissions - Read and write
Click on the Finish button.
Congratulations! You successfully configured the FTP server on a computer running Windows 2012 R2.
Windows firewall - Allow the FTP connection
Open the application named Windows Firewall with Advanced Security
Select the Inbound rules options and make sure the FTP rules are enabled.

On a remote computer, open a DOS prompt and try to connect to your FTP server.
Here is the output of a successful connection.
Even if the FTP firewall rules are in place, there is a possibility that your connection will be blocked.
Optionally, you may create a firewall rule to allow the FTP connection.
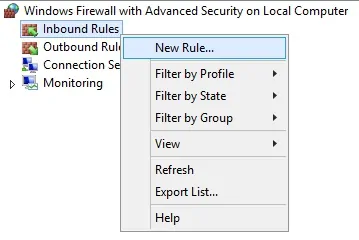
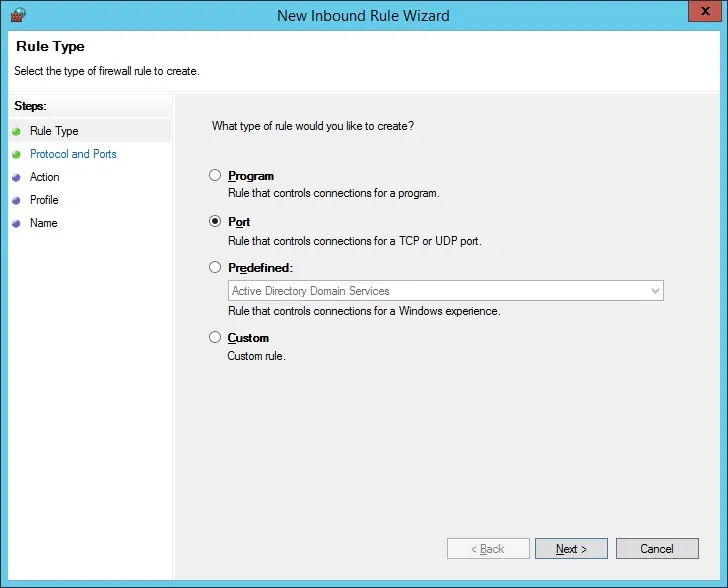
Create a new Inbound firewall rule.
Select the PORT option.
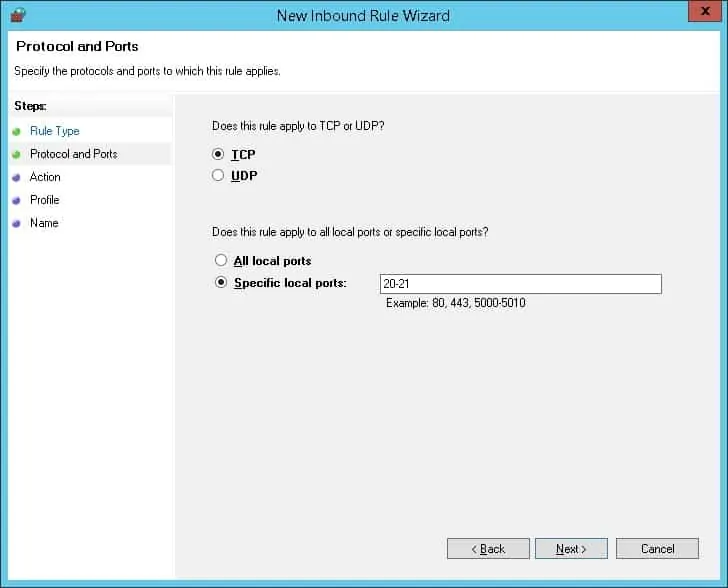
Select the TCP option.
Select the Specific local ports option.
Enter the TCP port: 20-21
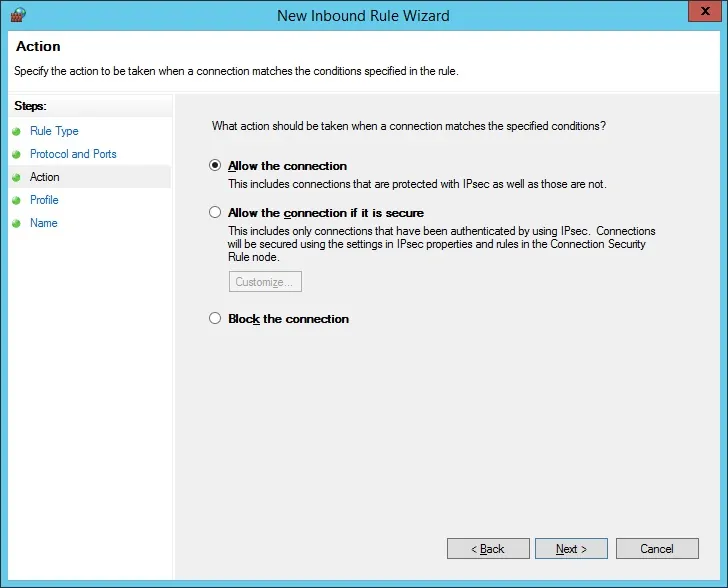
Select the Allow the connection option.
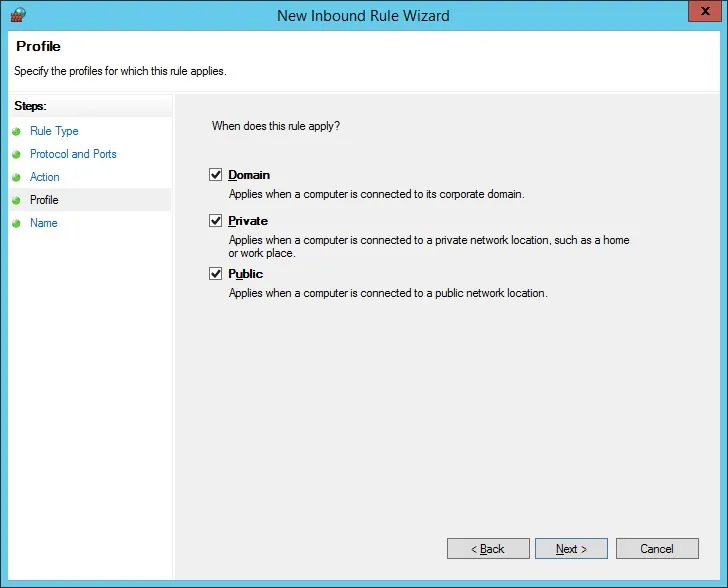
Check the DOMAIN option.
Check the PRIVATE option.
Check the PUBLIC option.
Enter a description to the firewall rule.
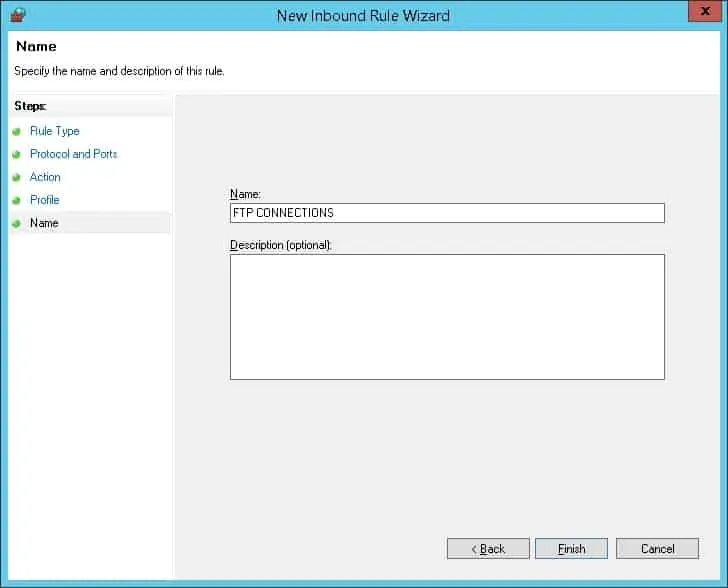
You have finished the firewall configuration.
