Would you like to learn how to configure a dynamic DNS address on the TP-LINK ARCHER C20 AC750? In this tutorial, we are going to configure a dynamic DNS on the AC750 router.
• TP-LINK ARCHER C20 AC750 - Version 5.0
Equipment list
Here you can find the list of equipment used to create this tutorial.
This link will also show the software list used to create this tutorial.
TPLINK - Related Tutorial:
On this page, we offer quick access to a list of tutorials related to TP-LINK AC750.
Archer C20 AC750 - Dynamic DNS
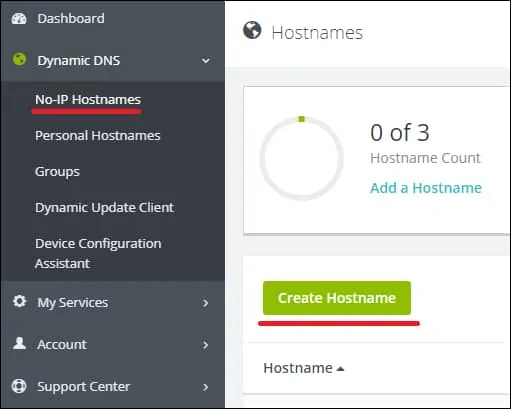
Access the NOIP website, create a new account, and create a new host.

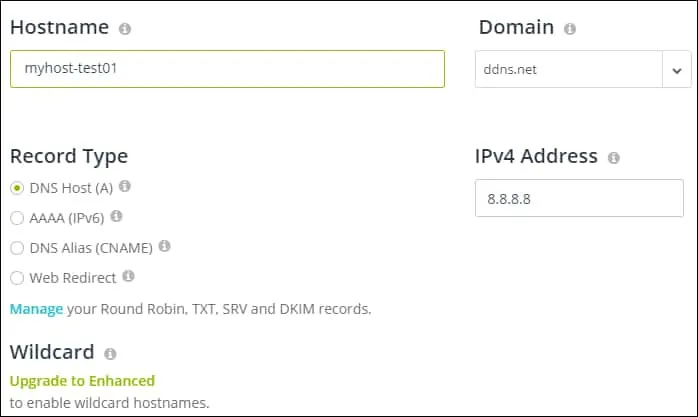
Enter the new Host information.

In our example, we created the following host entry.
Open your browser and enter the IP address of your wireless router.
In our example, the following URL was entered in the Browser:
• http://192.168.0.1
The AC750 web interface should be presented.
On the login screen, enter the management password.

Access the Advanced tab on the top of the screen.

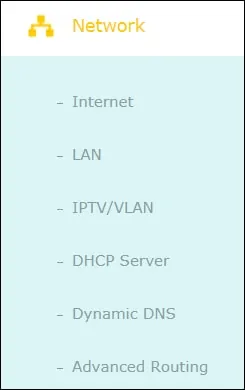
Access the NETWORK menu and select the DYNAMIC DNS option.

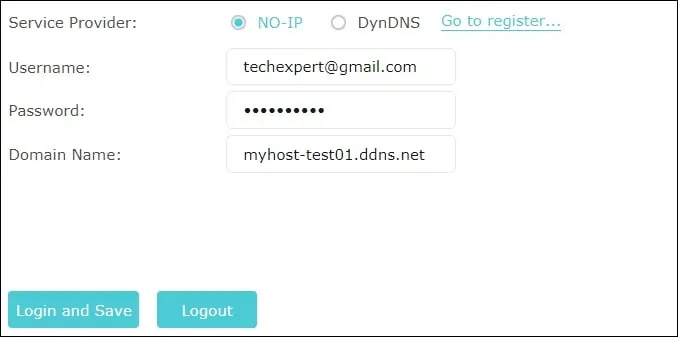
On the Dynamic DNS screen, enter the following configuration.
• Service provider: NO-IP.
• Username: Enter your NOIP account.
• Password: Enter your NOIP password.
• Domain name: Enter the Host entry created on the NOIP website.
Click on the Update button.

Congratulations, you have finished the Dynamic DNS configuration of the AC750 router.
