Would you like to learn how to configure a VLAN trunk on Vmware ESXi? In this tutorial, we are going to show you all the steps required to create a VLAN and configure a trunk using a Vmware ESXi server.
This tutorial was tested on Vmware ESXi 6.5
This tutorial was tested on Vmware ESXi 6.7
The video above shows how to configure VLAN using older versions of Vmware ESXi 6, 5.5 and 5
Vmware ESXi Playlist:
On this page, we offer quick access to a list of videos related to Vmware ESXi.
Don't forget to subscribe to our youtube channel named FKIT.
VMware ESXi Related Tutorial:
On this page, we offer quick access to a list of tutorials related to Vmware Esxi.
Tutorial - Vmware ESXi Trunk Configuration
First, you need to access the Vmware web interface.
Open a browser software, enter the IP address of your Vmware ESXi server and access web interface.

On the prompt screen, enter the administrative login information.
After a successful login, the Vmware dashboard will be displayed.
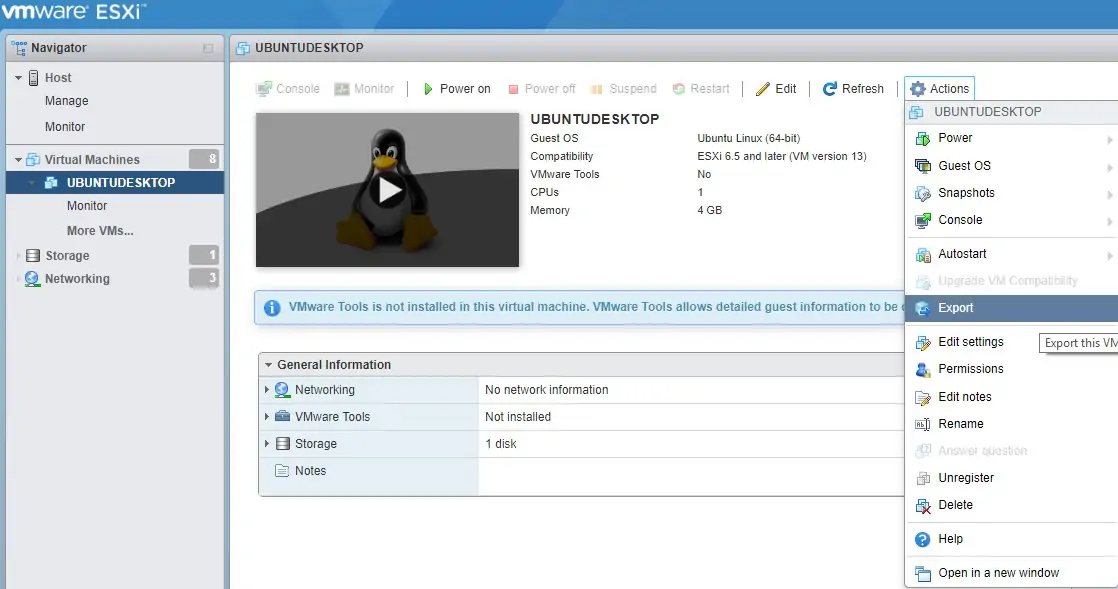
On the Vmware Dashboard, Access the Networking Menu.
Access the Port Groups tab.
Click on the Add port group option.

On the next screen, you need to configure the following items:
• Name - Enter an identification to your Vlan.
• VLAN ID - Enter the VLAN identification number.
After finishing your configuration, click on the Add button.
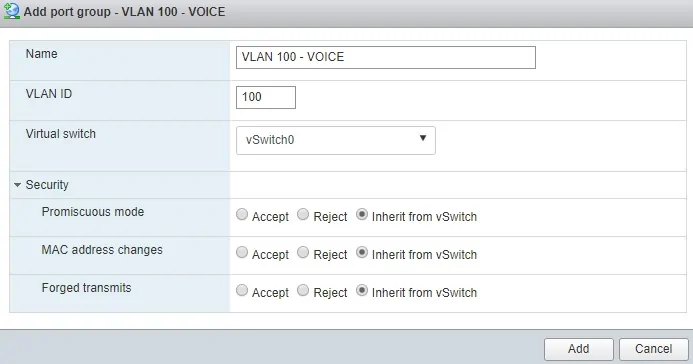
If you need to add another VLAN, click again on the Ad port group option.
Perform the same configuration to the second VLAN.
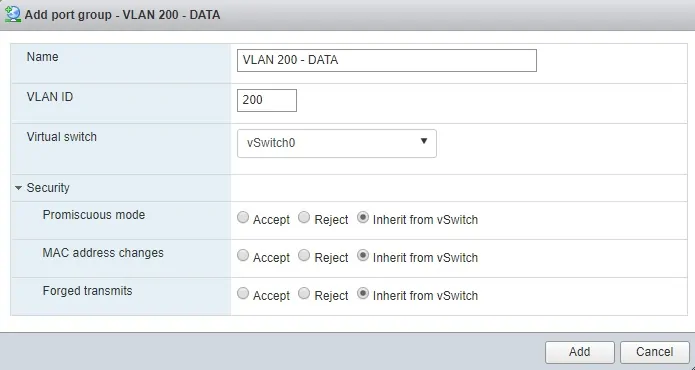
Don't forget to save your configuration.
To verify your configuration, access the Networking menu.
Access the Virtual Switches tab.
Click on the Virtual Switch.

On the right part of the screen, you are able to see the trunk configuration.
In our example, we can see that VLANS 100, 200 and 0 are able to pass through the VMNIC1 interface.
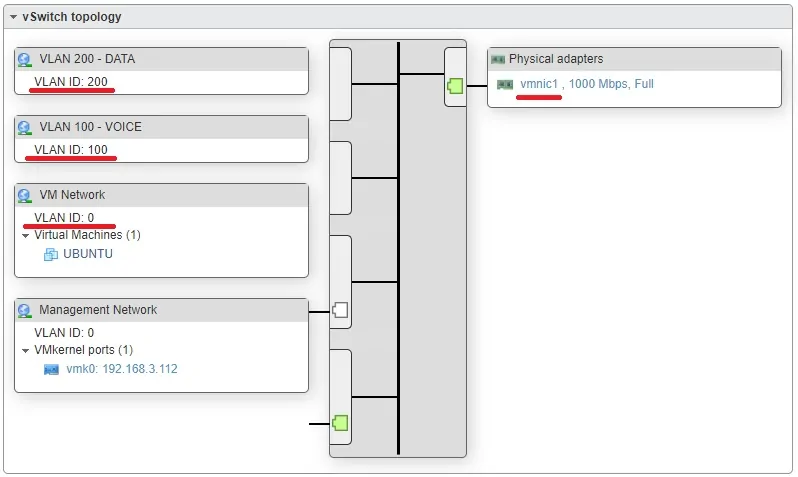
The VLAN 0 means a network packet without any VLAN tag.
Keep in mind that the Vmware interface VMNIC1 needs to be connected to a switch port previously configured as a trunk.
The switch port needs to be configured to allow the traffic of VLANS 100, 200.
The switch port also needs to set a default VLAN.
Any packet that arrives at the switch port without VLAN tags will be considered a member of the native VLAN.
Usually, all network switches set VLAN1 as the native VLAN.
Congratulations! You have successfully configured a VLAN trunk on Vmware ESXi.
Tutorial - Vmware Virtual Machine VLAN Configuration
Now, we are going to teach you how to assign a virtual machine to a specific VLAN.
Access the Vmware Dashboard.

On the Vmware Dashboard, Access the Virtual Machines menu Menu.
Select the desired virtual machine.
Click on the Actions button and select the option named Edit settings.
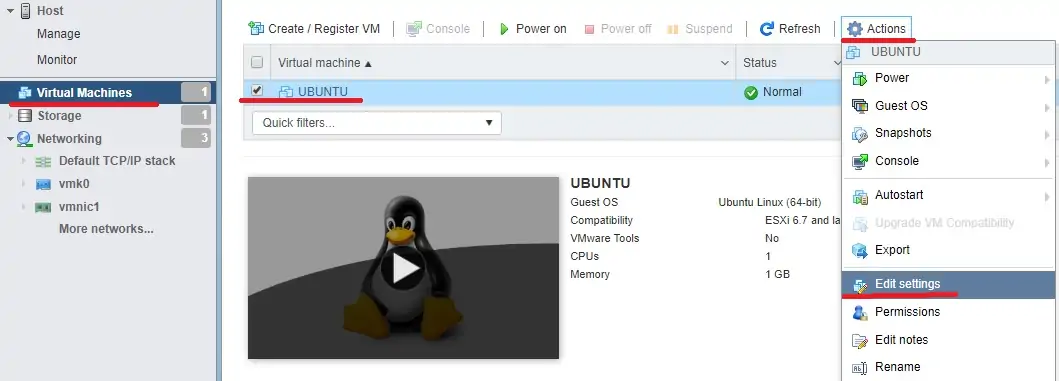
On the virtual machine properties screen, you need to perform the following configuration:
• Locate the desired network adapter
• Select the desired VLAN
After finishing your configuration, click on the Save button.
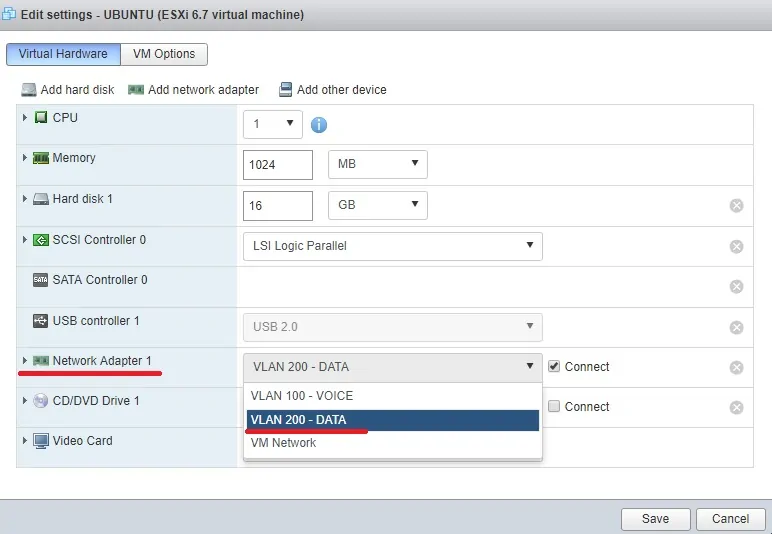
In our example, the network interface of a virtual machine was assigned to the VLAN 100.
Don't forget to save your configuration.
Congratulations! You have successfully configured a virtual machine as a VLAN member using Vmware ESXi.
