Would you like to learn how to create a Windows virtual machine template on Vmware ESXi? In this tutorial, we are going to show you how to create a Windows virtual machine template using Vmware ESXi server.
This tutorial was tested on Vmware ESXi 6.5
This tutorial was tested on Vmware ESXi 6.7
This tutorial does not use Vcenter.
Copyright © 2018-2021 by Techexpert.tips.
All rights reserved. No part of this publication may be reproduced, distributed, or transmitted in any form or by any means without the prior written permission of the publisher.
Vmware ESXi Playlist:
On this page, we offer quick access to a list of videos related to Vmware ESXi.
Don't forget to subscribe to our youtube channel named FKIT.
VMware ESXi Related Tutorial:
On this page, we offer quick access to a list of tutorials related to Vmware Esxi.
Tutorial - Create the Original Windows Virtual Machine
First, you need to create the original Windows virtual machine.
Access the Vmware web interface.
Open a browser software, enter the IP address of your Vmware ESXi server and access web interface.

On the prompt screen, enter the administrative login information.
After a successful login, the Vmware dashboard will be displayed.
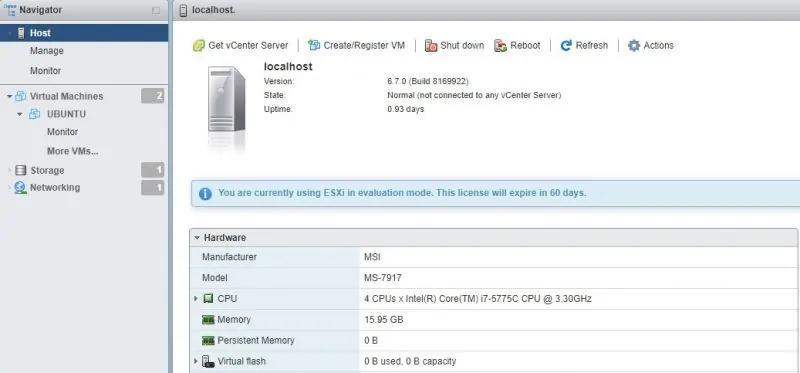
On the Vmware Dashboard, Access the Virtual Machines menu Menu.
Click on the Create / Register VM button.

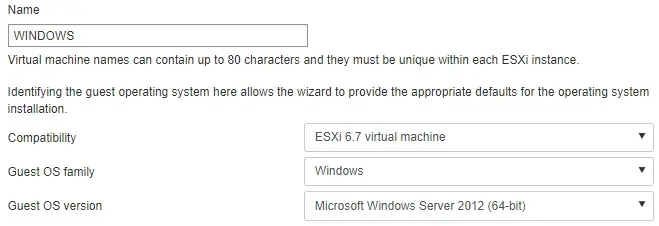
On the Vmware creation assistant, select the following options:
• Compatibility - ESXI 6.7 Virtual Machine
• Guest OS Family - Windows
• Guest OS Version - Microsoft Windows Server 2012 (64 bits)
In our example, we are installing a new Windows server 2012 R2 virtual machine.
Next, select the datastore where the virtual machine should be created.

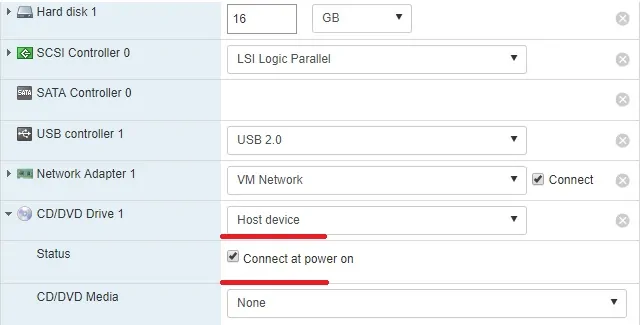
On the Setting customization screen, you need to change the following configuration:
• CD/DVD Drive - Host device
• Status - Connect at power on.
Finish the Virtual machine creation assistant.
Insert the Windows installation CD/DVD on the Vmware ESXi driver.
Turn on the new Virtual Machine.
The system should start automatically a new operating system installation.
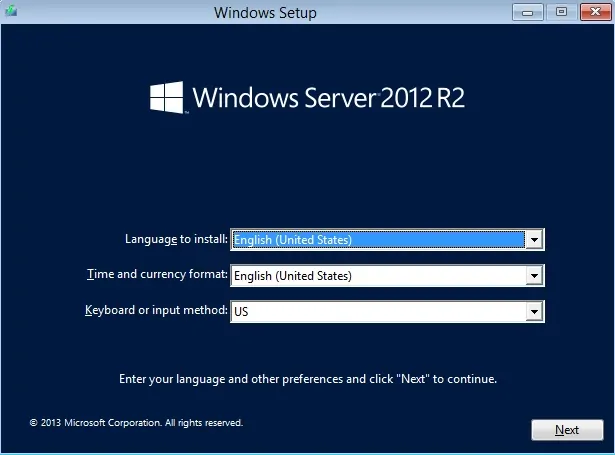
Perform a regular Windows installation.
At the end of this process, you will have a clean installation of a new Windows virtual machine.
Tutorial - Customize the Windows Virtual Machine
Now, you need to customize the Windows virtual machine to fit your needs:
• Perform the installation of Windows updates - We recommend the installation of all Windows updates.
• Perform the installation of desired software - install at least 7-ZIP, Chrome, PDF reader, and antivirus.
• Perform the modification of Windows settings - We recommend that you enable the remote access.
• Clean the Trash and delete the temporary files.
After finishing the customization, restart the Windows virtual machine.
Tutorial - Create the Windows Template using Sysprep
After finishing all the customizations desired, you need to Run the Sysprep Application.
Sysprep is a tool created by Microsoft to prepare a Windows installation to become a template.
We are going to use the Sysprep tool to prepare this computer to become a Windows template.
Caution! The Sysprep tool has the potential to cause loss of data.
Open the Windows Explorer and access the following folder:
• C:\Windows\System32\Sysprep
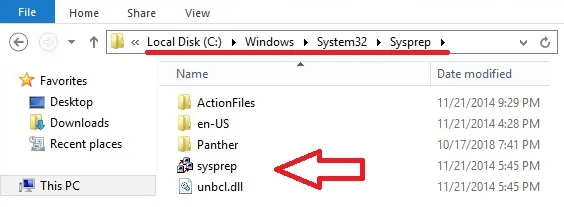
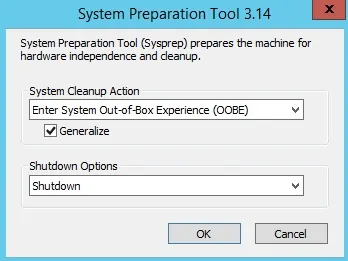
On the Sysprep application screen, perform the following configuration:
• System Cleanup Action - Enter System Out-of-Box Experience (OOBE)
• Generalize - Yes
• Shutdown Options - Shutdown
Click on the Ok button to start the process.
After finishing the process, your computer will shutdown automatically.
Caution! Do not turn on this computer anymore.
Tutorial - Create the Vmware ESXi Windows Template Repository
Now, you need to create a Vmware Datastore repository to the template.
On the Vmware Dashboard, Access the Storage Menu.
Access the Datastores tab and select the Datastore browser option.

On the Vmware datastore browser screen, click on the Create directory option.

Enter the desired name to the template repository folder.
In our example, we created a directory named TEMPLATES.

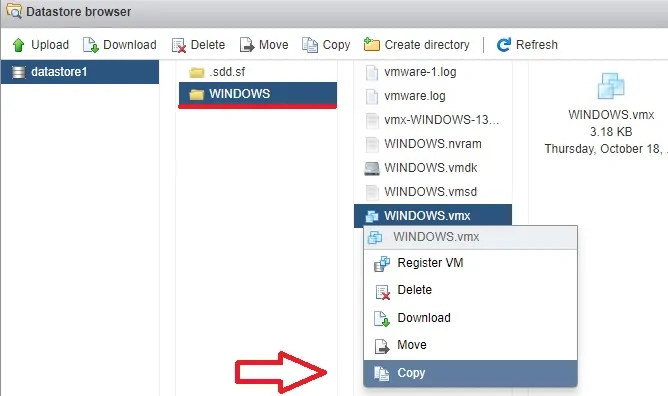
Now, you need to access the datastore folder of your Windows virtual machine.
Copy the VMX file from the original Windows virtual machine to the template folder.
Copy the VMDK file from the original Windows virtual machine to the template folder.
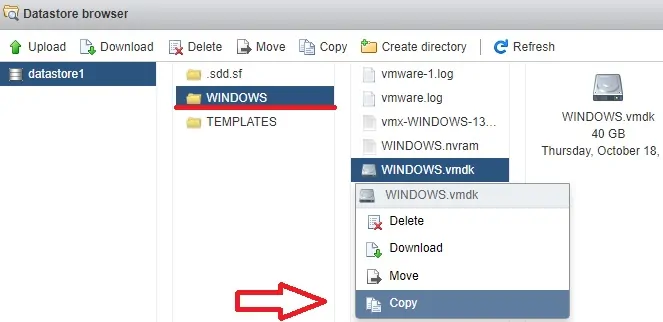
Don't forget to select the TEMPLATES folder as the copy destination.
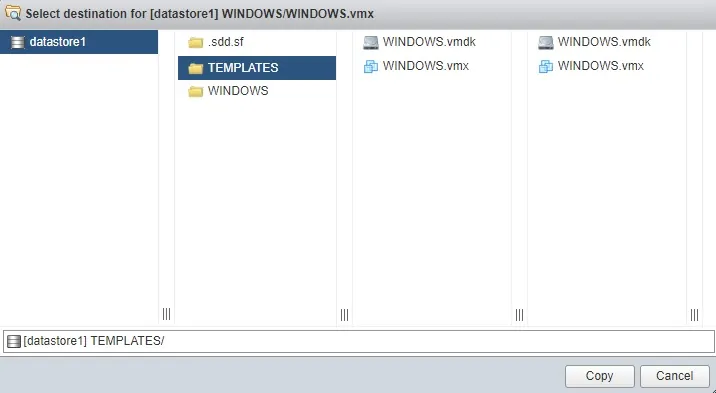
Congratulations! You created a Windows virtual machine template on Vmware ESXi.
Tutorial - Create a Windows Virtual Machine from a Template
Now, we are going to show you how to create a new Windows virtual machine from our template.
On the Vmware Dashboard, Access the Storage Menu.
Access the Datastore tab and select the Datastore browser option.

On the Vmware datastore browser screen, click on the Create directory option.

Enter the desired name to the new virtual machine folder.
In our example, we created a directory named NEW-VM.
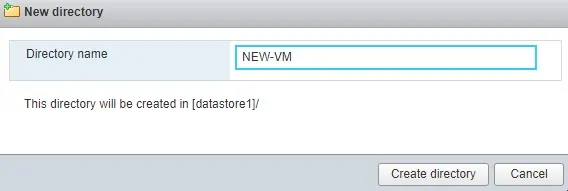
Now, you need to access the datastore folder where your virtual machine template is located.
In our example, the virtual machine template files are located inside the TEMPLATES folder.
Copy the VMX and VMDk files from the template folder to the new virtual machine folder.
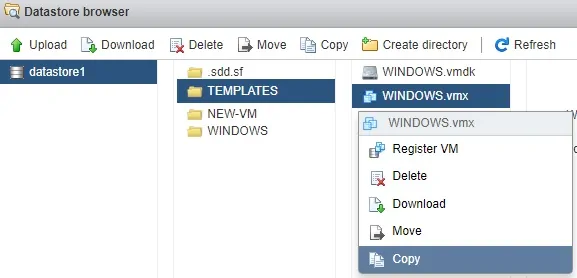
On the new virtual machine folder, right click on the VMX file and select the Register VM option.
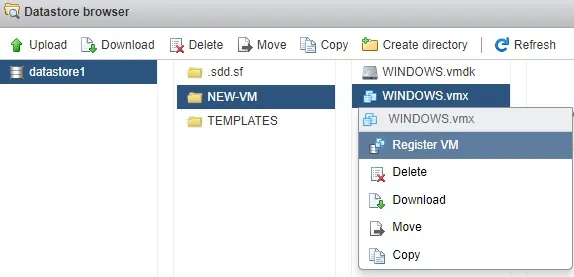
Access the Vmware Dashboard and power on the new virtual machine.
The system will display the following warning.:
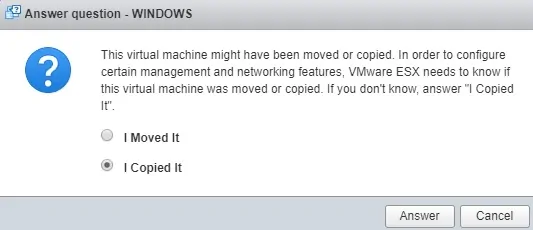
Select the option Named: I Copied it and click on the Answer button.
You are now able to turn on your new virtual machine.
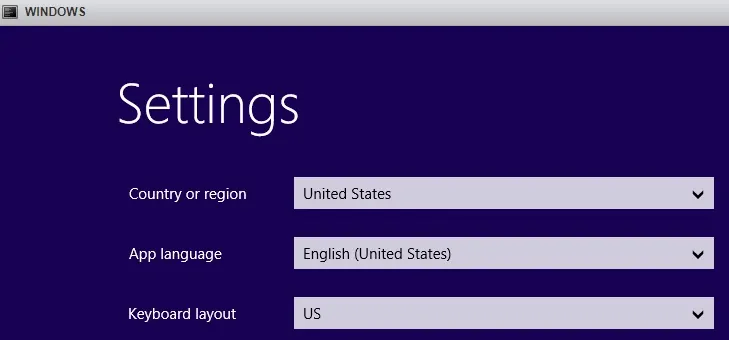
Congratulations! You created a new virtual machine from a template.
