Would you like to learn how to Resize Linux Virtual machine Disk on Vmware ESXi? In this tutorial, we are going to show you all the steps required to expand the virtual disk of a Linux virtual machine on a Vmware ESXi server.
This tutorial was tested on Vmware ESXi 6.5
This tutorial was tested on Vmware ESXi 6.7
This tutorial was tested on Ubuntu Linux 18.04.
Caution! Resize Linux Partitions has the potential to cause loss of data.
Vmware ESXi Playlist:
On this page, we offer quick access to a list of videos related to Vmware ESXi.
Don't forget to subscribe to our youtube channel named FKIT.
VMware ESXi Related Tutorial:
On this page, we offer quick access to a list of tutorials related to Vmware Esxi.
Tutorial - Expand Disk on Vmware
First, you need to access the Vmware web interface.
Open a browser software, enter the IP address of your Vmware ESXi server and access web interface.

On the prompt screen, enter the administrative login information.
After a successful login, the Vmware dashboard will be displayed.
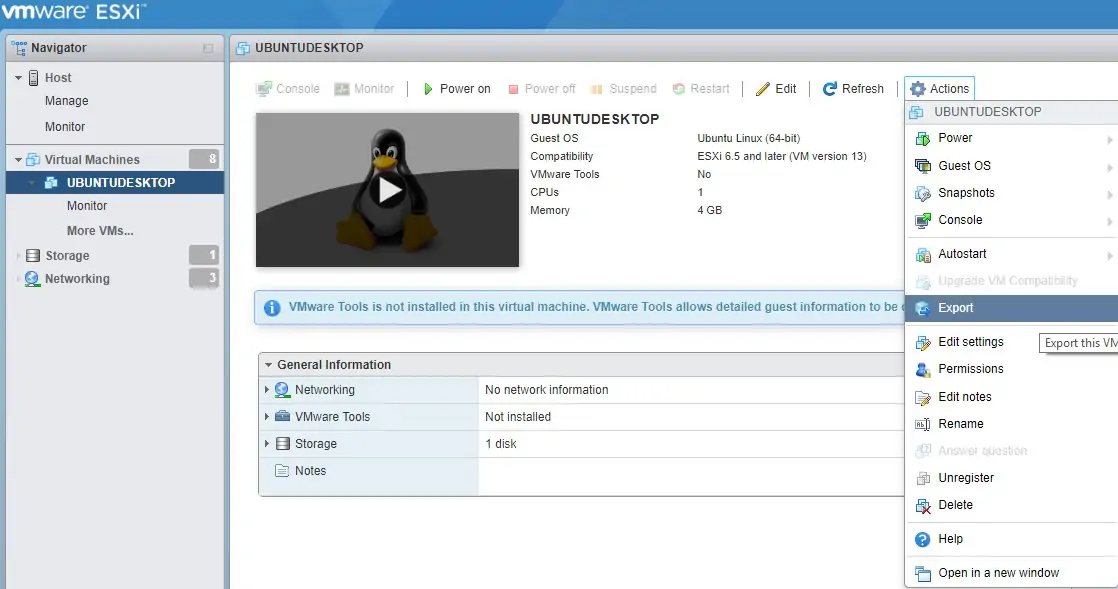
On the Vmware Dashboard, Access the Virtual Machines menu Menu.
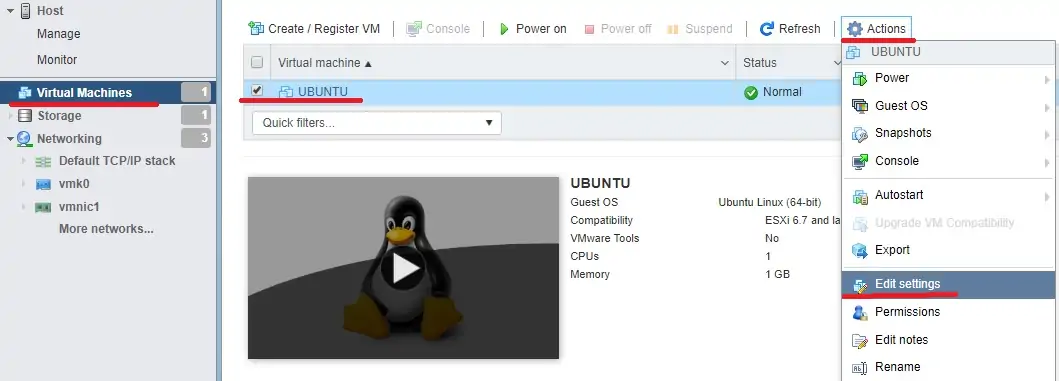
Select the desired virtual machine.
Click on the Actions button and select the option named Edit settings.
On the Vmware properties screen, expand the Disk size to the desired value.
After finishing your configuration, click on the Save button.
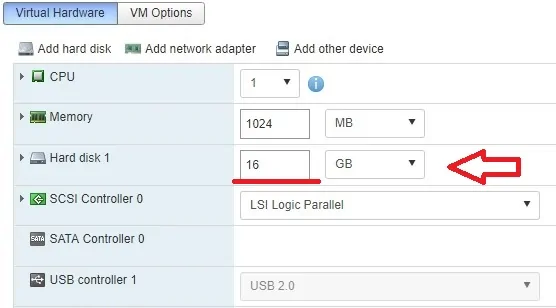
In our example, we increased the disk of the Ubuntu virtual machine from 16GB to 25GB.
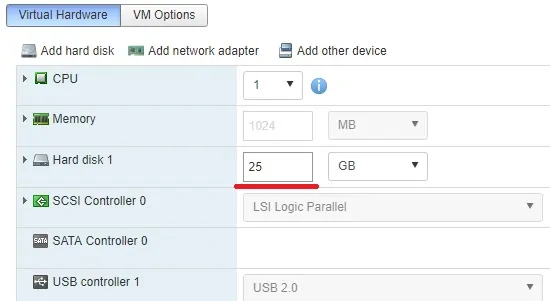
Congratulations! You have finished the disk expansion on the Vmware ESXi server.
Tutorial - Expand Disk on Linux Virtual Machine
Now, you need to expand the disk partition on the Linux Virtual machine.
To expand the disk on the virtual machine, you need to download the latest Gparted ISO from gparted.org.
Gparted is a Linux live-cd that is used to resize Linux partitions.
In our example, the Gparted image file gparted-live-0.32.0-1-i686 was downloaded.
Now, turn off the virtual machine and boot the Linux virtual machine using the Gparted live-cd.

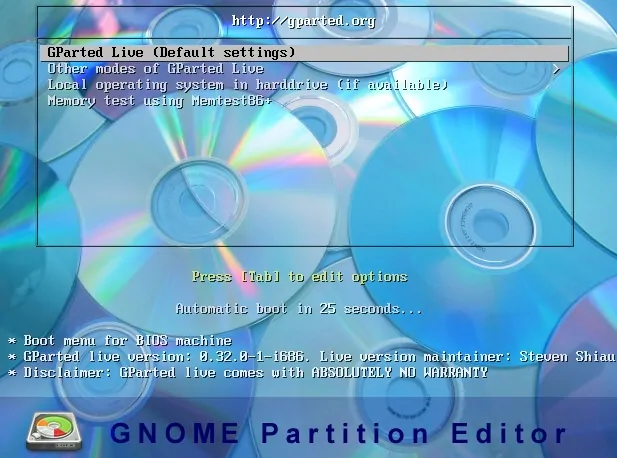
After booting using the Gparted CD or ISO, the following screen should be displayed.
Press enter to start the Gparted boot process.
After finishing the boot process the system will ask the following questions:
• Policy for handling keymaps: Don't touch keymap
• Which language do you prefer? 33 For English
• Which mode do you prefer? 0 to start Gparted in graphical user mode
If you are presented to the following Libparted warning message, click on the Fix button.
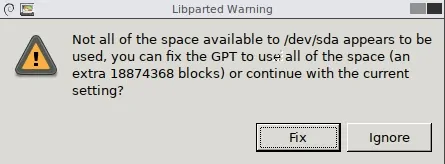
On the dashboard, open the Gparted Application.

On the Gparted application screen, select the desired Linux partition and click on the Resize/Move button.
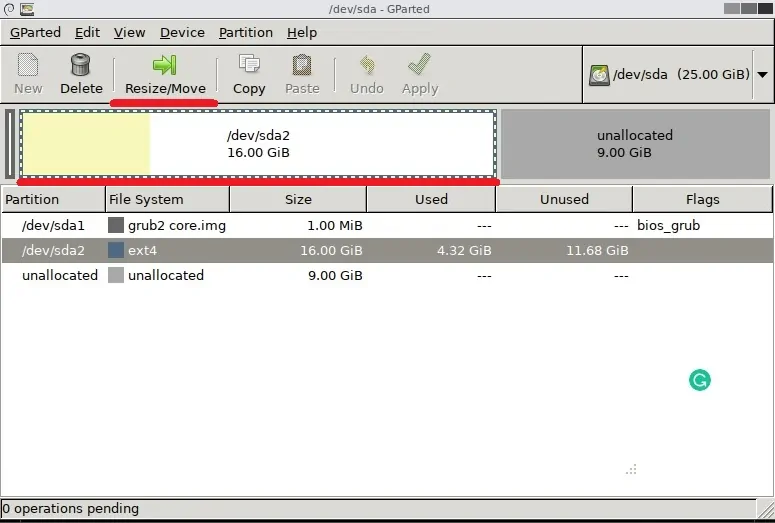
In order to export the partition, drag the bar on the top of the screen to the right.
Click on the Resize/Move button.
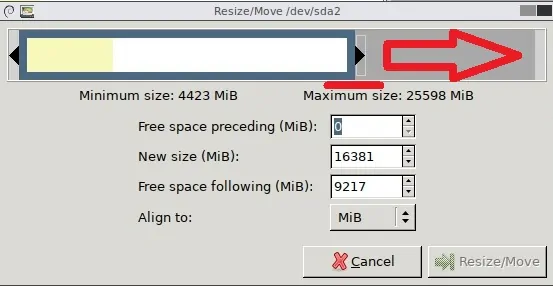
After finishing your configuration, click on Apply button.

The system will apply the desired configuration and resize the Linux partition as instructed.

Close the Gparted application and select the Exit application.

Select the option to reboot your computer and remove the Gparted CD or ISO.
On the Linux console, use the following command to verify the disk partition size.
As you can see, the Linux partition went from 16GB to 25GB.
Congratulations! You have successfully resized a Linux virtual machine partition.
