Would you like to learn how to install PHP on the IIS server? In this tutorial, we are going to show you how to install and configure PHP on the IIS server.
• Windows 2012 R2
• Windows 2016
• Windows 2019
• PHP 7
Hardware List:
The following section presents the list of equipment used to create this Windows tutorial.
Every piece of hardware listed above can be found at Amazon website.
Windows Playlist:
On this page, we offer quick access to a list of videos related to Windows installation.
Don't forget to subscribe to our youtube channel named FKIT.
Windows Tutorial:
On this page, we offer quick access to a list of Windows tutorials.
Tutorial IIS - PHP Installation on Windows
First, we need to access the PHP website for Windows.
Locate and download the Non-Thread Safe (NTS) versions of PHP.

In our example, the following file was downloaded: php-7.2.9-nts-Win32-VC15-x86.zip.
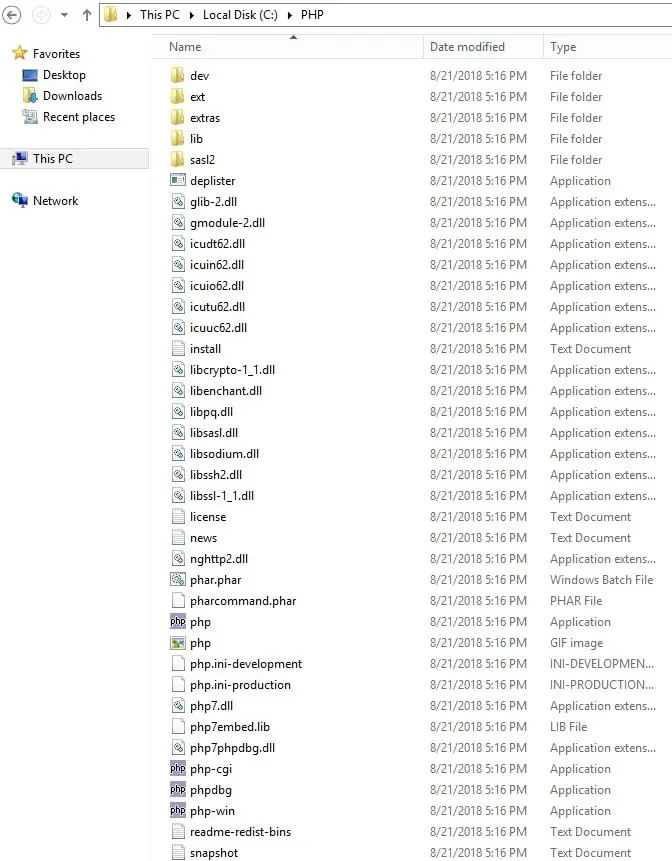
Create a directory named PHP on the root of your C drive.
Extract the content of the file inside the PHP folder.
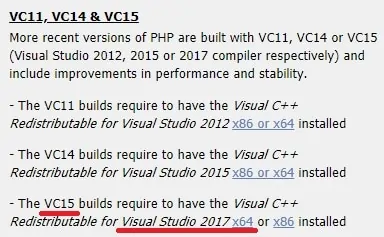
PHP for Windows requires the installation of a specific version of Microsoft Visual Studio.
In our example, we downloaded the PHP package build VC15.
PHP Build VC 15 requires the installation of the Microsoft Visual Studio version 2017.
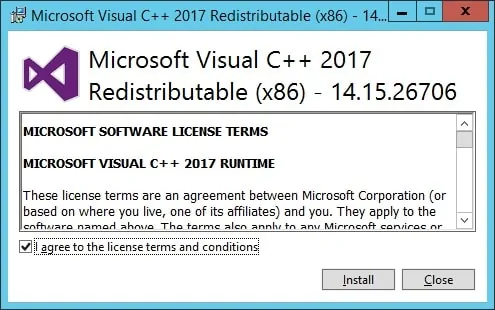
Download and install Microsoft Visual Studio version 2017 x86.
After finishing the Visual Studio installation, we need to add the PHP directory to the PATH environment variable.
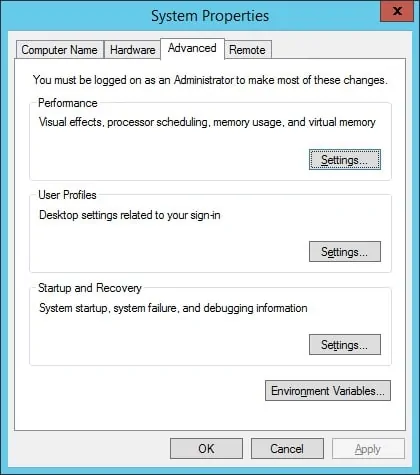
Access the System properties window.
Access the Advanced tab and click on the Environment variables button.
Select the PATH variable and click on the Edit button.
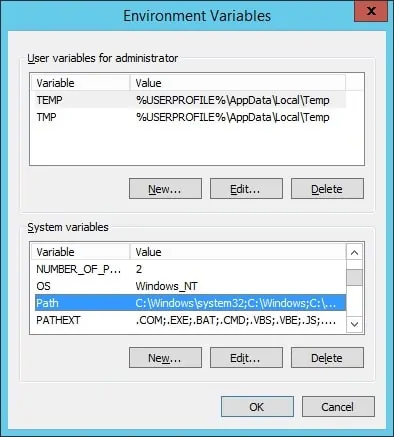
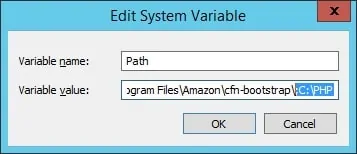
Add the PHP directory to the end of the PATH variable value.
Open the Windows explorer application and access the PHP folder.
Locate the file named PHP.INI-PRODUCTION.

Rename PHP.INI-PRODUCTION to PHP.INI
Edit the file named PHP.INI.
Here is the original file, before our configuration:
Here is the file, after our configuration.
Keep in mind that your timezone file may not be the same as mine.
Test the PHP installation.
Open a DOS command prompt and enter the following command.
Congratulations! you installed PHP on the Windows server.
Tutorial - IIS Installation on Windows
Open the Server Manager application.
Access the Manage menu and click on Add roles and features.

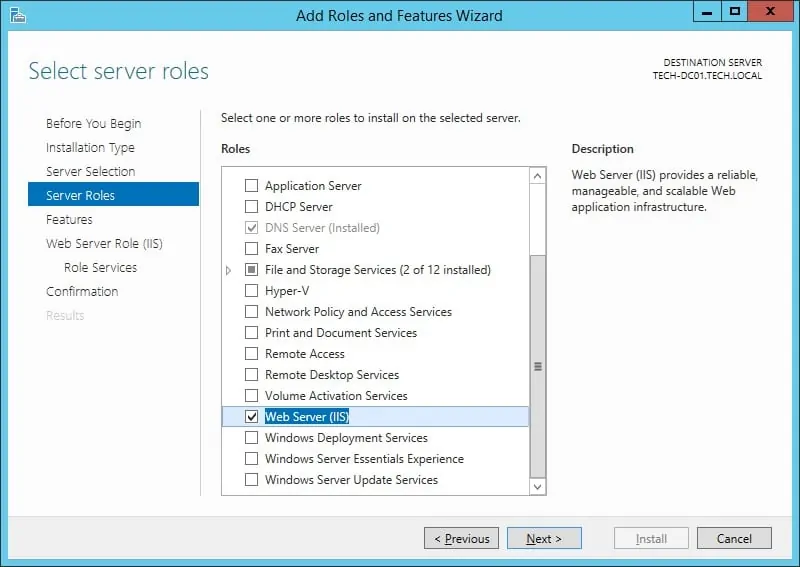
Access the Server roles screen, select the Web Server (IIS) option and click on the Next button.
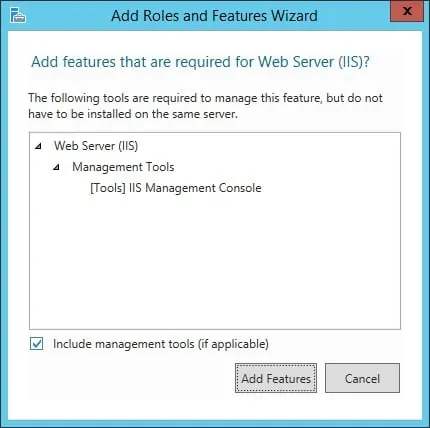
On the following screen, click on the Add features button.
On the IIS service screen, select the CGI option and finish the installation.
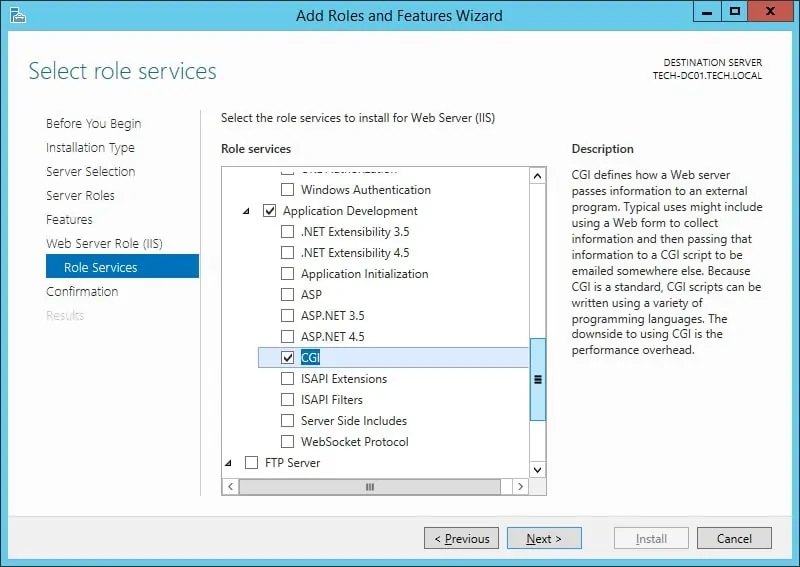
The IIS server was installed on your computer but we still need to configure the PHP integration.
Open the IIS manager application and access the Handler Mappings option.

On the right part of the screen, select the option named: Add Module Mapping.
On the Module mapping screen, you will have to enter the following information:
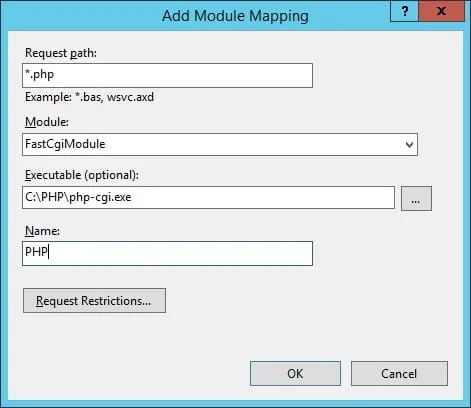
Click on the button named: Request Restrictions.
Select the File or Folder option and click on the OK button.
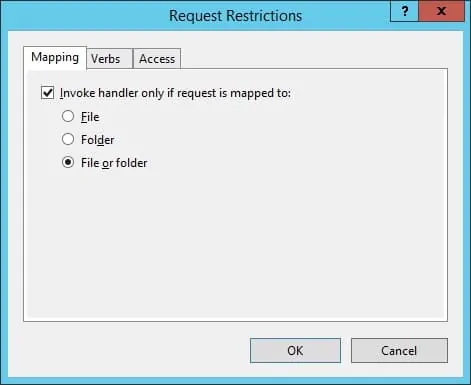
Click on the OK button.
If the following message is presented, click on the Yes button.
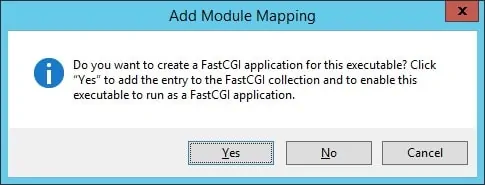
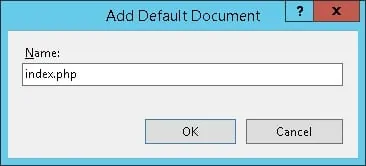
Now, we need to configure IIS to accept index.php as a default page.
Open the IIS manager application and access the Default Document option.

On the right part of the screen, select the option named: Add...
On the Add default document window, you will have to enter the following information:
To finish the installation you need to restart the IIS service.
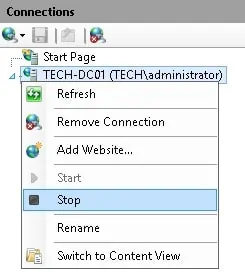
Right click on the server name on the top left part of the screen and select the option Stop.
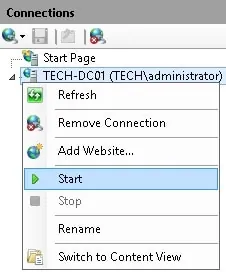
Right click on the server name on the top left part of the screen and select the option Start.
Congratulations! You have installed PHP on the Windows server.
The IIS server is now supporting the use of PHP.
Testing Your PHP installation on Windows IIS
Open the notepad application and create a document named test.php
This document should be placed inside the WWWROOT folder.
Open your browser and enter the IP address of your IIS web server plus /test.php
In our example, the following URL was entered in the Browser:
• http://35.162.85.57/test.php
The following content should be presented.
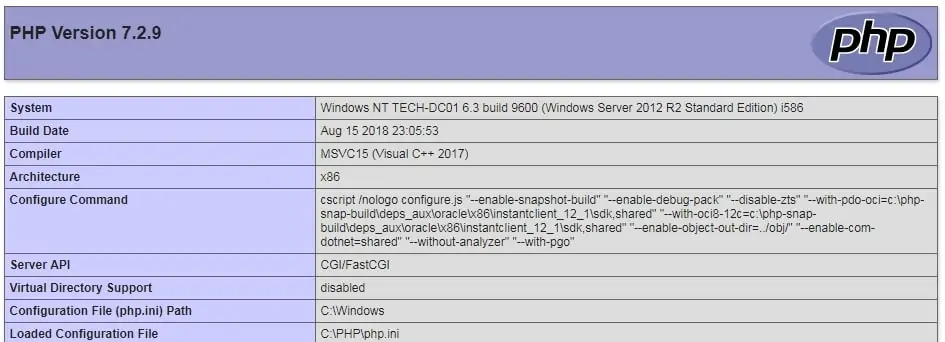
The PHP installation on IIS was tested successfully.
