Would you like to learn how to configure Vmware ESXi Active Directory Authentication? In this tutorial, we are going to show you how to authenticate Vmware users using the Microsoft Windows database Active directory and the LDAP protocol.
This tutorial was tested on Vmware ESXi 6.5
This tutorial was tested on Vmware ESXi 6.7
This tutorial does not use Vcenter.
Copyright © 2018-2021 by Techexpert.tips.
All rights reserved. No part of this publication may be reproduced, distributed, or transmitted in any form or by any means without the prior written permission of the publisher.
Vmware ESXi Playlist:
On this page, we offer quick access to a list of videos related to Vmware ESXi.
Don't forget to subscribe to our youtube channel named FKIT.
VMware ESXi Related Tutorial:
On this page, we offer quick access to a list of tutorials related to Vmware Esxi.
Windows Domain Controller Firewall
First, we need to create a Firewall rule on the Windows domain controller.
This firewall rule will allow the Vmware server to query the Active Directory database.
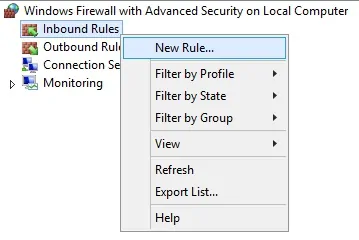
On the domain controller, open the application named Windows Firewall with Advanced Security.
Create a new Inbound firewall rule.
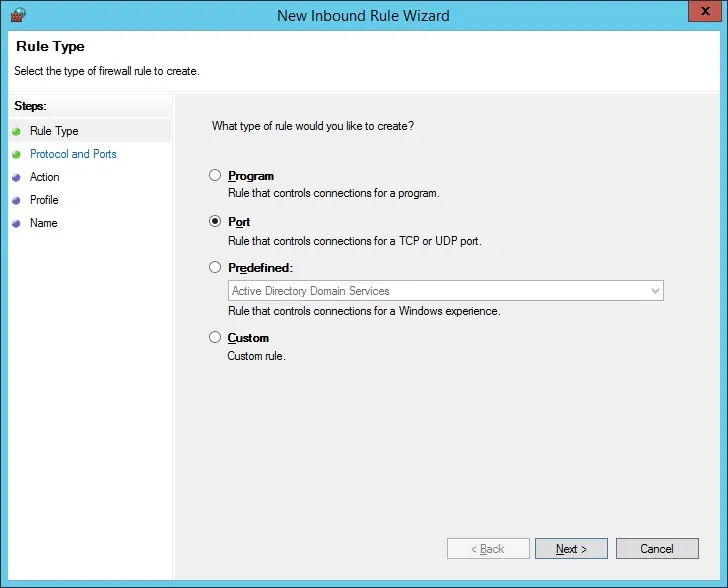
Select the PORT option.
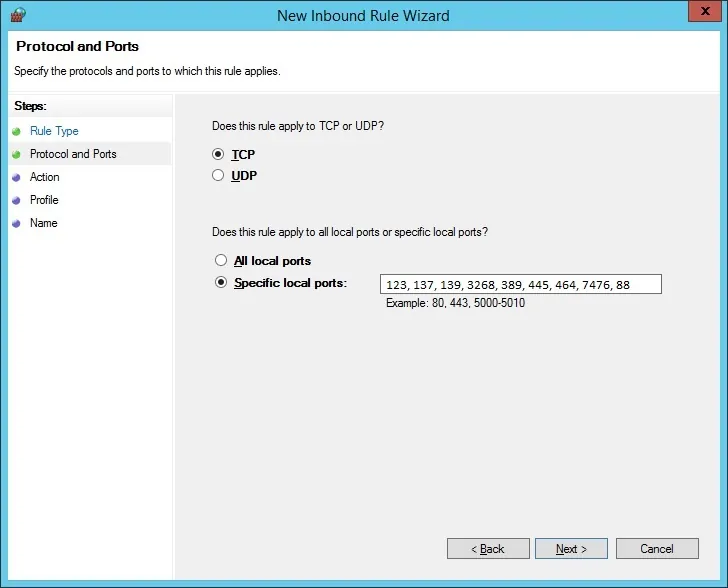
Select the TCP option.
Select the Specific local ports option.
Enter the following TCP ports: 123, 137, 139, 3268, 389, 445, 464, 7476, 88
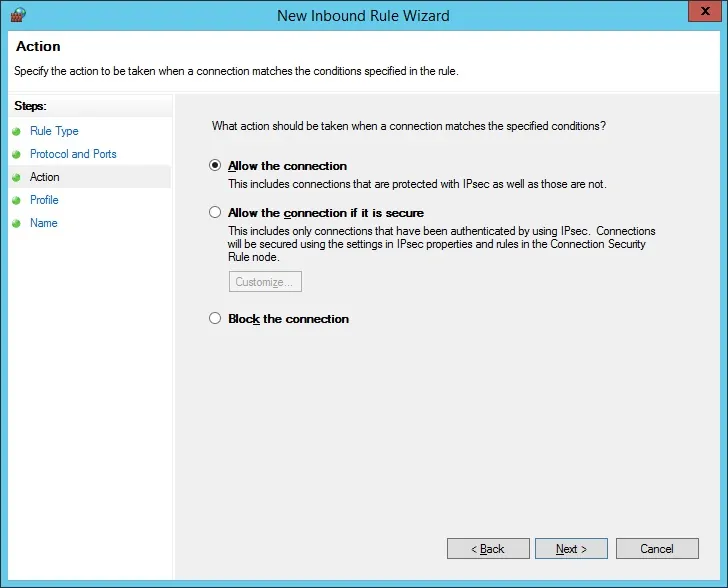
Select the Allow the connection option.
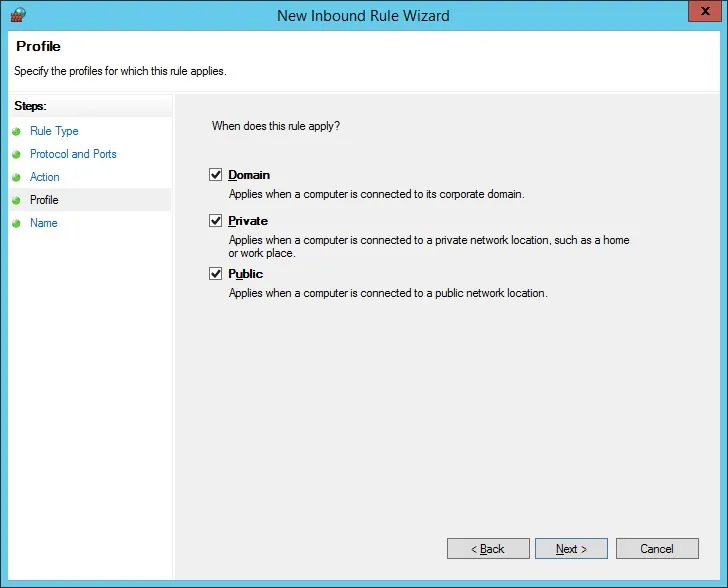
Check the DOMAIN option.
Check the PRIVATE option.
Check the PUBLIC option.
Enter a description to the firewall rule.
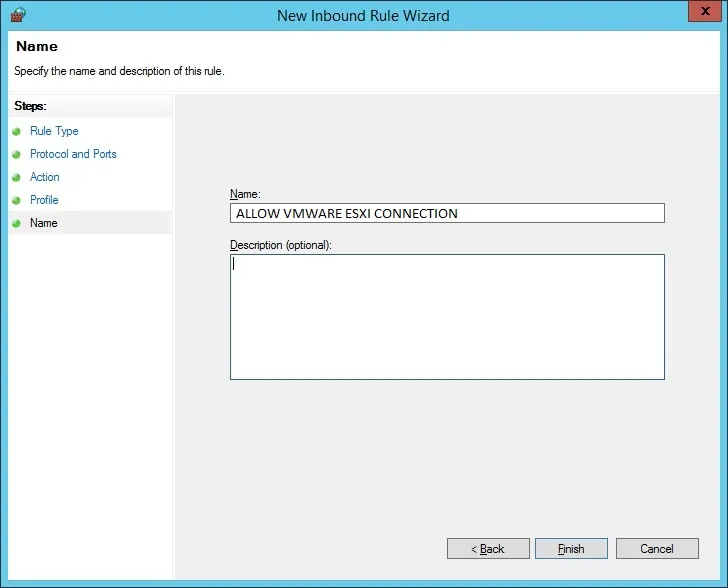
Congratulations, you have created the required firewall rule.
This rule will allow Vmware ESXi to query the Active Directory database.
Windows Domain Account Creation
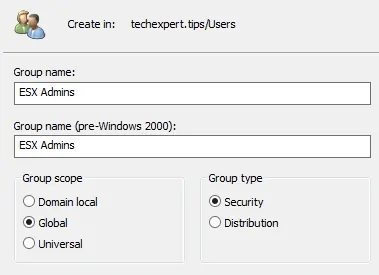
Next, we need to create a domain group named: ESX Admins.
The name of the group must be: ESX Admins
Members of the ESX Admins group will be allowed to login on the Vmware ESXi web interface.
Members of the ESX Admins group will have administrative permission over the VMware ESXi server.
On the domain controller, open the application named: Active Directory Users and Computers
Create the new group inside the Users container.
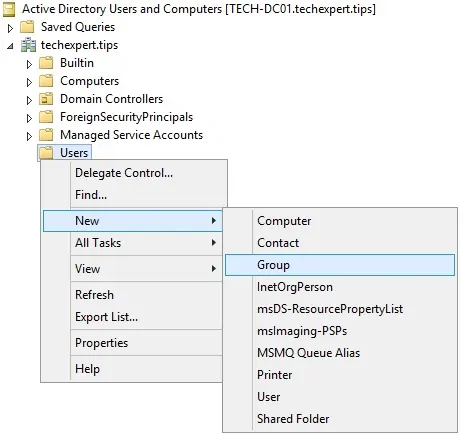
Create a new account named: ESX Admins
Add members to this group.
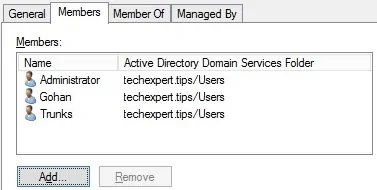
In our example, the following users were included as members of the ESX Admins group:
• Administrator
• Gohan
• Trunks
Congratulations, you have created the required Active Directory configuration.
Vmware Date and Time Configuration
The Vmware server and the Active Directory domain controller must have the same date and time.
We are going to use NTP to configure the correct date and time on the Vmware ESXi server.
First, you need to access the Vmware web interface.
Open a browser software, enter the IP address of your Vmware ESXi server and access web interface.

On the prompt screen, enter the administrative login information.
After a successful login, the Vmware dashboard will be displayed.
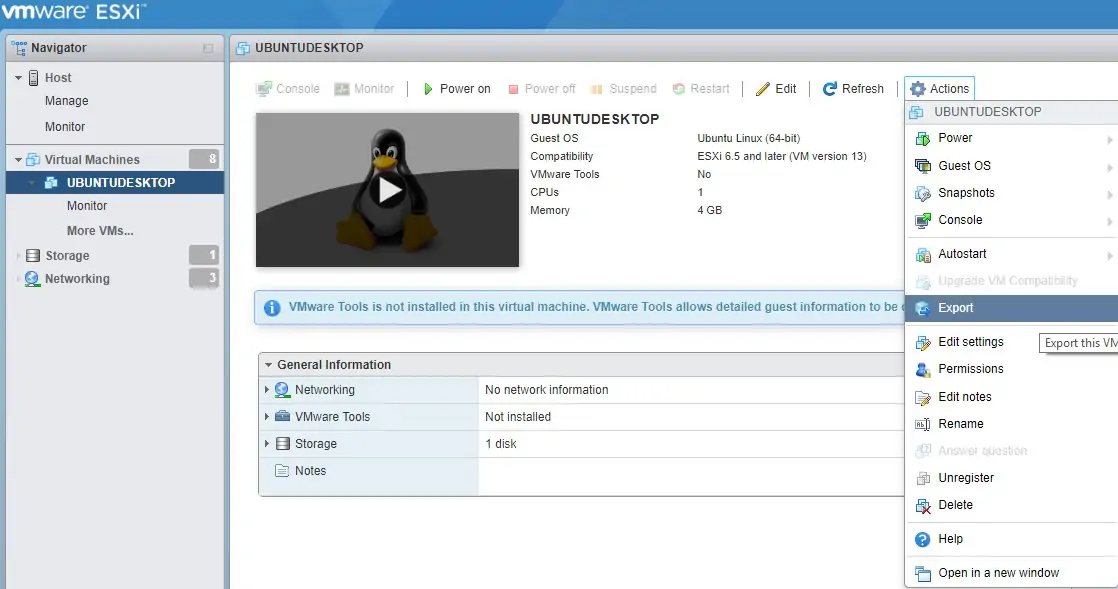
On the Vmware Dashboard, Access the Manage Menu.
Access the System tab and select the Time and Date option.
Click on the Edit settings option.

On the new screen, enter the NTP configuration desired.
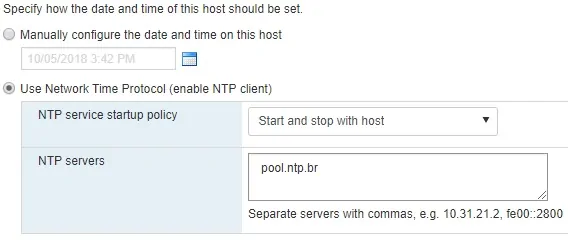
In our example, the Vmware will receive the Date and time from NTP server: POOL.NTP.BR
In our example, the Vmware will start the NTP service during boot time.
Now, we need to start the NTP service.
Click on the Actions button.
Select the NTP service menu.
Click on the Start option.
The NTP will start immediately.

You finished the Vmware ESXi NTP configuration.
Vmware Firewall Configuration
The Vmware firewall must be configured to allow the communication between the ActiveDirectory domain controller and the Vmware ESXi server.
On the Vmware Dashboard, Access the Networking Menu.
Access the Firewall rules tab.
Select the option named Active Directory All.
Click on the Actions button and select the Enable option.

You finished the Vmware ESXi Firewall configuration.
Vmware DNS Settings
The Vmware ESXi server must be configured as a DNS client of the Active Directory domain.
On the Vmware Dashboard, Access the Networking Menu.
Access the TCP/IP stacks tab.
Click on the Default TCP/IP stack option.
On the new screen, click on the Actions menu and select the Edit settings option.

On the Top of the screen, click on the Actions menu and select the Edit settings option.

On this screen, you are able to change the following network configuration:
• Hostname - Vmware server hostname
• DNS Domain Name - Active Directory Domain name
• DNS Servers - Domain controllers IP address
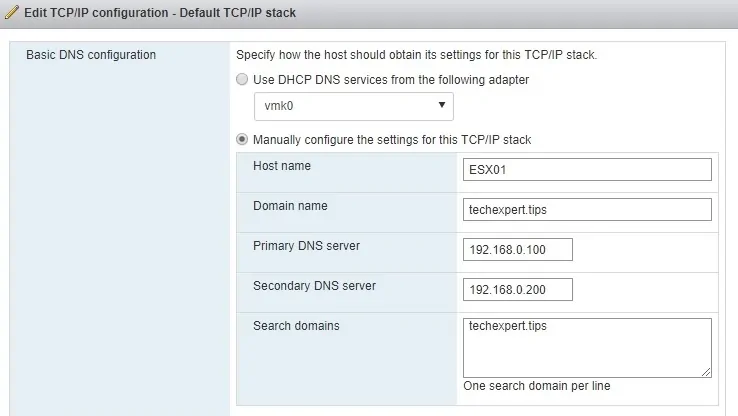
You finished the Vmware ESXi DNS configuration.
Vmware Joining the Active Directory Domain
The Vmware ESXi server must be a member of the Active directory domain.
On the Vmware Dashboard, Access the Manage Menu.
Access the Security & Users tab.
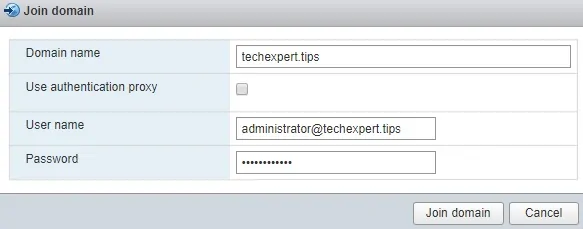
Select the Authentication option and click on the Join domain button.

On the new screen, you need to configure the following items:
• Domain name - Your Active Directory Domain
• Use authentication proxy - No
• Username - Domain administrator account
• Password - Domain administrator password
After finishing the configuration, click on the Join domain button.
Wait for the system to confirm that your Vmware ESXi server is now a member of the domain.
You finished the Vmware ESXi Active Directory integration.

You finished the Vmware ESXi DNS configuration.
Vmware Active Directory Authentication
All members of the ESX Admins group are now able to remotely login on the Vmware ESXi server.
Open a browser software, enter the IP address of your Vmware ESXi server and access web interface.

On the prompt screen, enter the login information of a user that is a member of the ESX Admins group.
Keep in mind, that you need to enter the information using this format: USERNAME@DOMAIN
After a successful login, the Vmware dashboard will be displayed.

You successfully integrated the Vmware ESXi login to the Active Directory domain.
