Would you like to learn how to enable SSH on APC UPS? In this tutorial, we are going to show you how to remotely access an APC UPS using the SSH protocol and the software PUTTY.
This tutorial was tested on APC UPS model SRT6KXLI also know as Smart-UPS SRT 6000.
This tutorial was tested on APC UPS model AP9631 also know as RT6000.
Copyright © 2018-2021 by Techexpert.tips.
All rights reserved. No part of this publication may be reproduced, distributed, or transmitted in any form or by any means without the prior written permission of the publisher.
Equipment list
Here you can find the list of equipment used to create this tutorial.
This link will also show the software list used to create this tutorial.
APC UPS Playlist:
On this page, we offer quick access to a list of videos related to the APC UPS.
Don't forget to subscribe to our youtube channel named FKIT.
APC UPS - Related Tutorial:
On this page, we offer quick access to a list of tutorials related to APC UPS.
Tutorial APC UPS - Enable SSH
First, we need to access the APC UPS web interface.
Open your browser and enter the IP address of the APC UPS.
On the login screen, use the default username and default password.
• Default Username: apc
• Default Password: apc
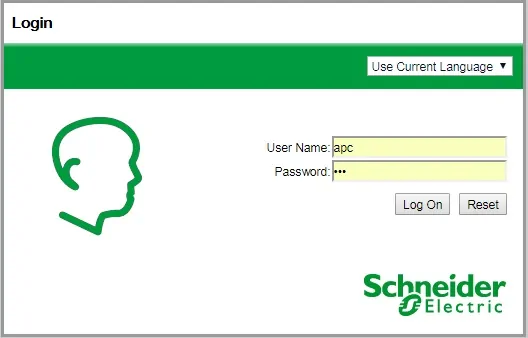
After a successful login, you will be sent to the APC UPS Dashboard.
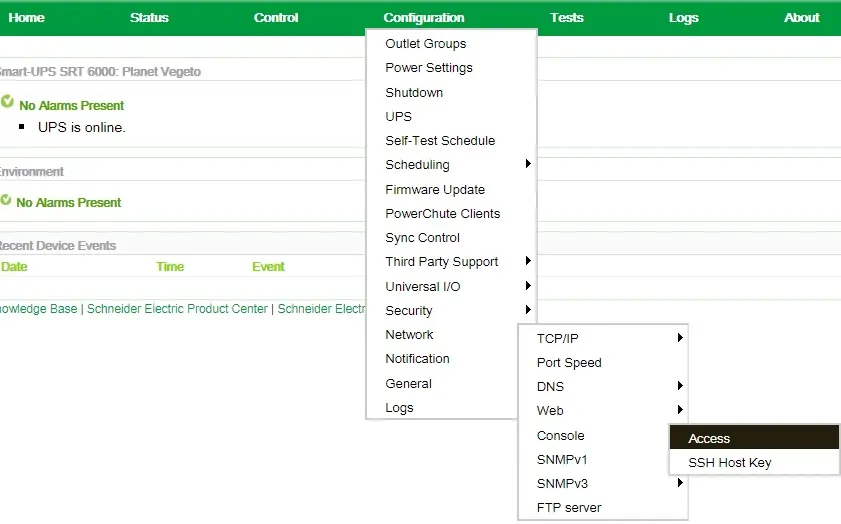
On the Web interface, access the Configuration menu and select the following option:
Select the SSH check box and click on the Apply button.
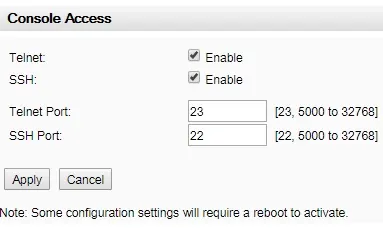
You will have to reboot the UPS's network management interface.
Access the following menu option:

Select the Reboot Management Interface and click on the Apply button.
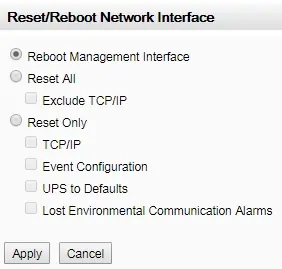
In our example, the Network Management Interface will restart and enable the SSH service.
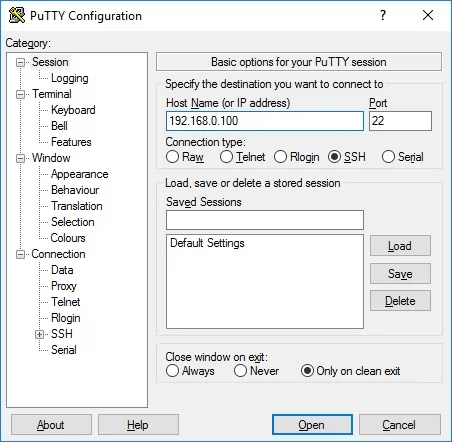
You can now use a software like PUTTY to remotely access the APC UPS.
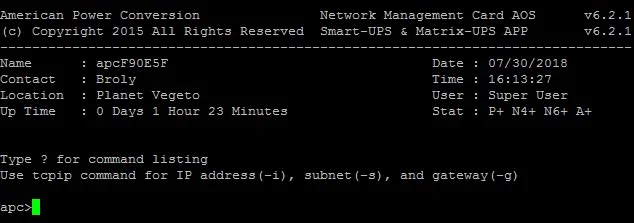
After the login, you should see the following screen.
Congratulations! You have enabled the SSH service on an APC UPS.
