Would you like to learn how to install the ASP extension on a computer running the IIS server? In this tutorial, we are going to show you how to install the IIS service and enable the ASP extension on a computer running Windows.
• Windows 2012 R2
• Windows 2016
• Windows 2019
Windows Playlist:
On this page, we offer quick access to a list of videos related to Windows installation.
Don't forget to subscribe to our youtube channel named FKIT.
Windows Tutorial:
On this page, we offer quick access to a list of Windows tutorials.
Tutorial - IIS Installation
Open the Server Manager application.
Access the Manage menu and click on Add roles and features.

On the Server Roles screen, select the option named: Web Server IIS.
Click on the Next button.
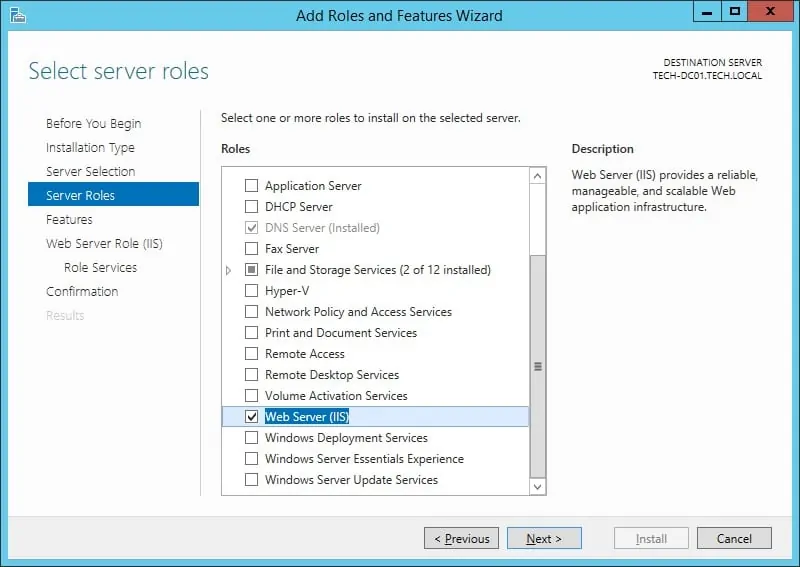
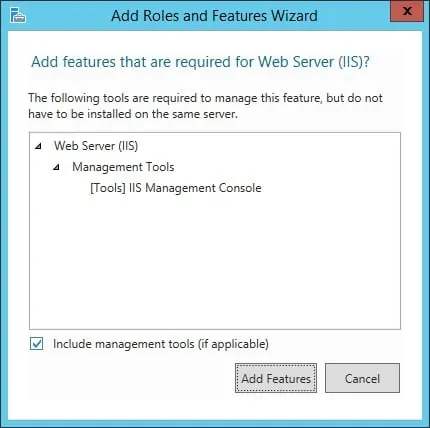
On the following screen, click on the Add features button.
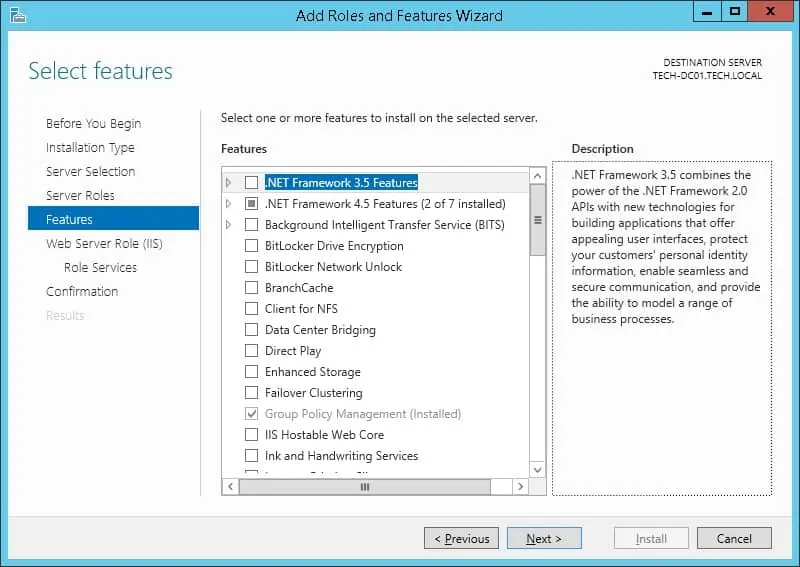
On the Features screen, click on the Next button.
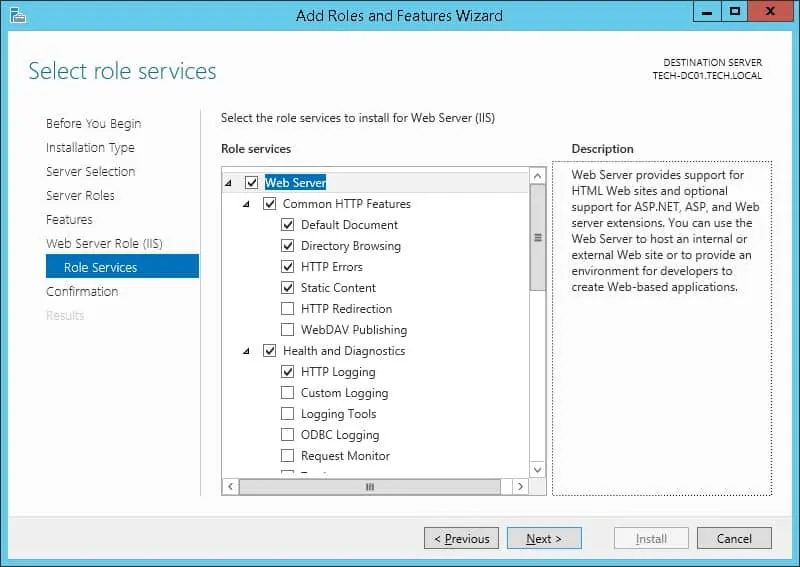
On the Role service screen, click on the Next button.
On the Summary screen, click on the Install button.
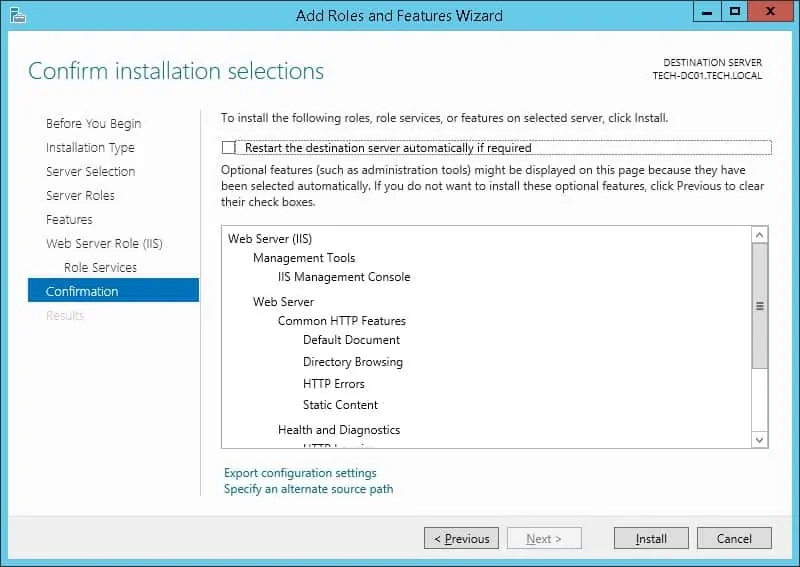
Congratulations! you have finished the IIS service installation on a computer running Windows 2012.
Tutorial IIS - Enabling the ASP Extension
Open the Server Manager application.
Access the Manage menu and click on Add roles and features.

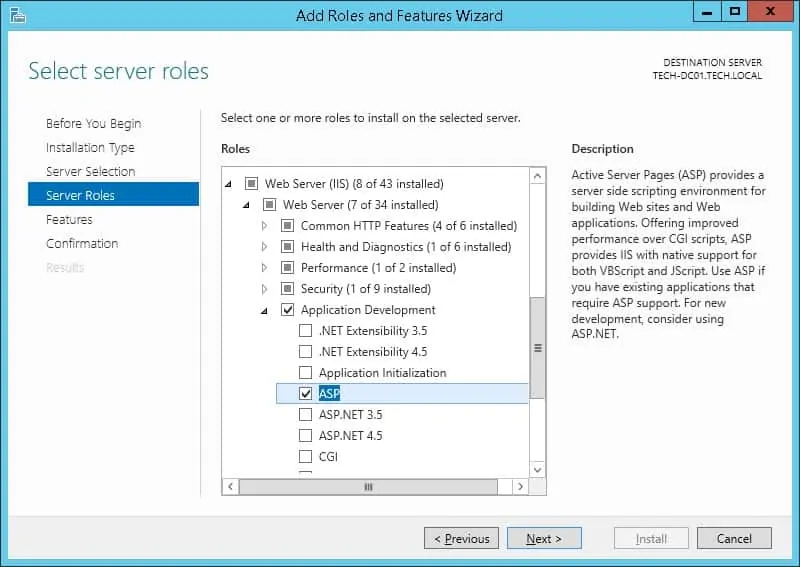
On the Server Roles screen, expand the entry named: Web Server IIS.
Access the Application development menu and select the option named: ASP
Click on the Next button.
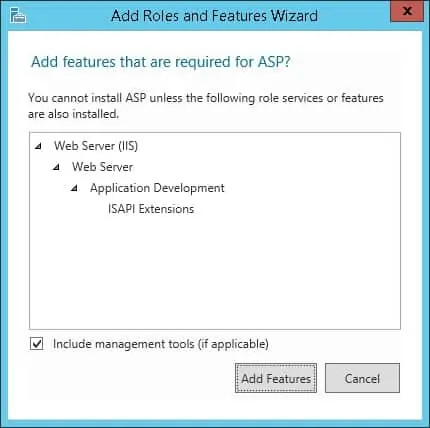
On the following screen, click on the Add features button.
On the Features screen, click on the Next button.

On the Summary screen, click on the Install button.
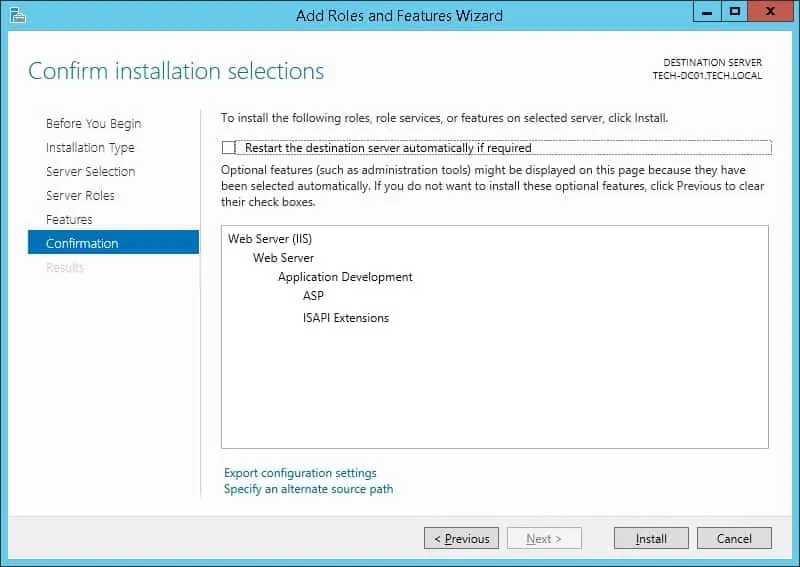
Congratulations! you have finished the ASP installation on IIS.
Tutorial IIS - Creating an ASP page
Start a new DOS command-line prompt.

Access the IIS root directory.
Create an ASP test page.
Open your browser and enter the IP address of your web server plus /test.asp.
In our example, the following URL was entered in the Browser:
• http://172.31.7.220/test.asp
The ASP page should display the date and time.
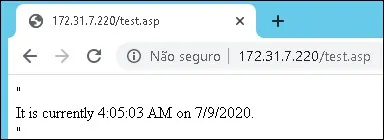
Congratulations! The ASP extension was installed successfully on IIS.
