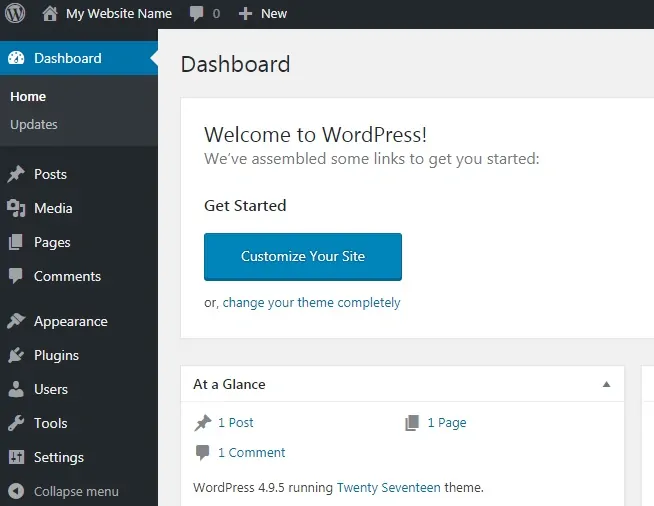
Would you like to learn how to Install WordPress on a Ubuntu Linux VPS? In this tutorial, we are going to show you how to create a new account at Amazon AWS cloud service, how to create an Ubuntu virtual machine instance, how to access the new virtual machine running Ubuntu Linux and how to install the WordPress Content Management System.
• Ubuntu Linux version 18.04
• WordPress version 5.0.1
Playlist:
On this page, we offer quick access to a list of videos related to Amazon AWS and WordPress.
Don't forget to subscribe to our youtube channel named FKIT.
Related Tutorial:
On this page, we offer quick access to a list of tutorials related to Amazon AWS and WordPress.
1. Create an Amazon Keypair
To access a Linux Virtual Machine on AWS, first, you need to create a private Key.
Open your browser, access the Amazon AWS website and enter your login information.
After a successful login, you will be sent to the AWS Dashboard.
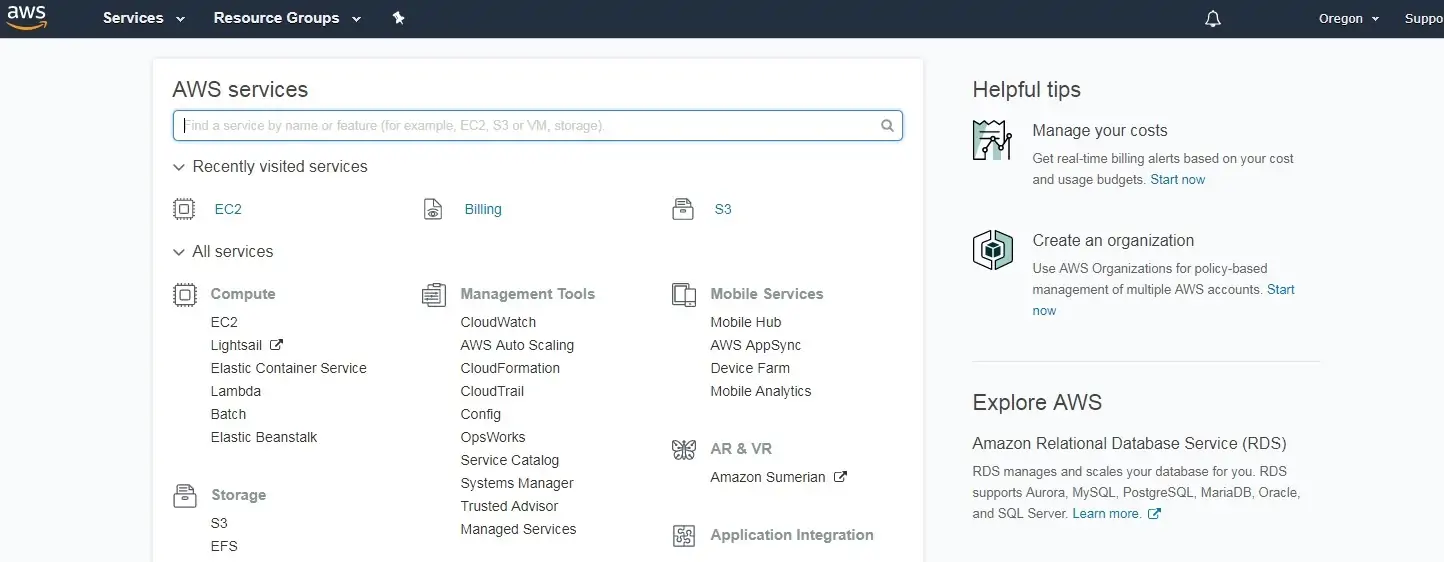
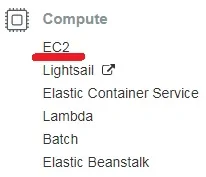
Access the COMPUTE menu and select the EC2 option.
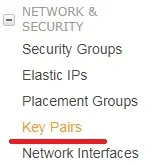
On the EC2 Dashboard, access the Network & Security menu and click on the Key Pairs option.
On the Key Pairs screen, click on the Create Key Pair button.
You will have to enter a name to the new Key Pair.
You will have to save locally your private key.
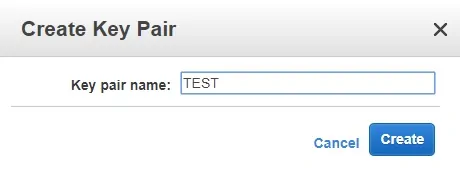
In our example, we created a key pair named TEST.
In our example, we saved a file named TEST.PEM.
2. Create an Ubuntu Linux Virtual Machine
On the EC2 Dashboard, access the Instances menu and click on the Instances option.
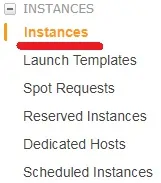
On the EC2 Instance screen, click on the Launch Instance button.

Now, it is time to select the desired Operational system image.
On the list presented, locate and select the Ubuntu Linux image.

As the second step, you will have to select the type of virtual machine that will run the Ubuntu Linux.
Basically, you will select the number of processors and the amount of RAM that you want.

If you do not want to specify the amount of hard disk available to this virtual machine, click on the Review and Launch button.
If you want to specify the amount of hard disk available to this virtual machine, click on the Configure instance detail button.
On the summary screen, click on the Launch button.

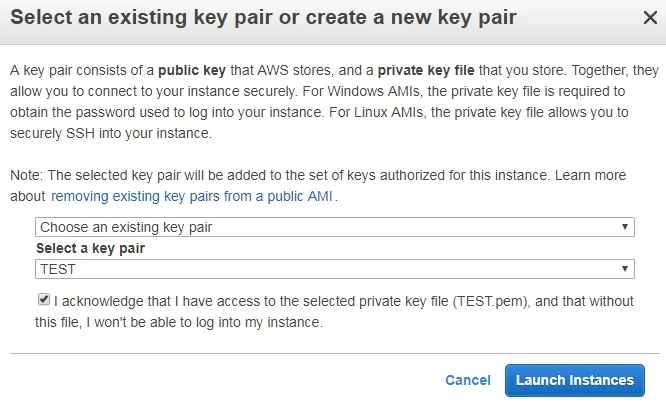
Select the Key pair authorized to connect to the new virtual machine and click on the Launch Instances.
In our example, the key pair named TEST was selected.
On the EC2 Dashboard, access the Instances menu and click on the Instances option.
As you can see a new virtual machine was created.

In our example, the virtual machine got the Dynamic IP address: 34.217.14.140
3. Access the Ubuntu VPS Machine
To access the Linux virtual machine you will have to download the following software:
• Putty
• PuttyGen
First, we need to convert the private key from the PEM format to the PPK format.
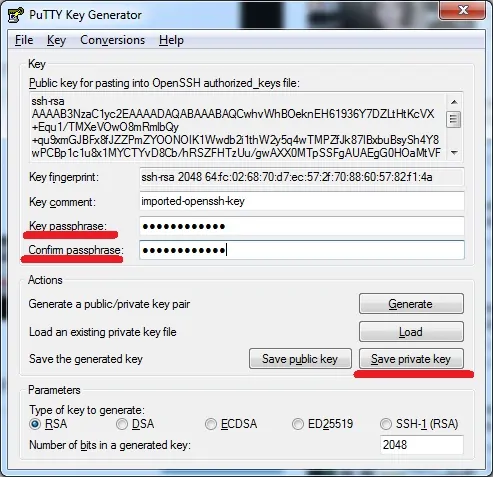
Open the PuttyGen software, access the Conversions menu and select the Import key.
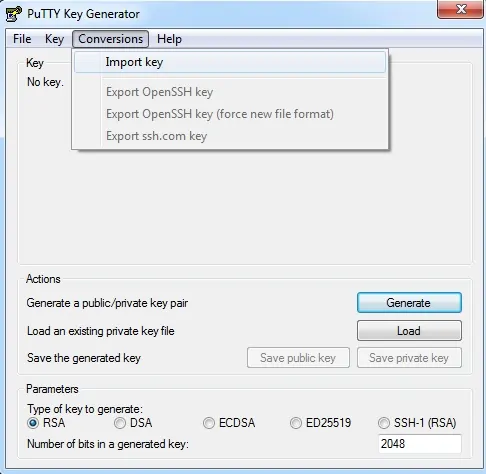
After importing the PEM file, you need to set a password to protect your private key.
Click on the Save private key button to generate a file with the PPK extension.
In our example, a file named TEST.PPK was created.
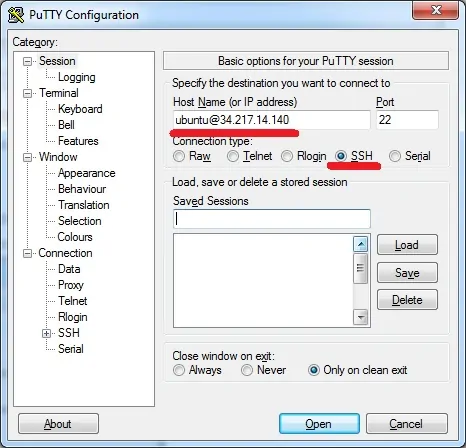
Open the Putty software, select the SSH option and enter the username ubuntu@ followed by the IP address of the AWS virtual machine.
In our example, we used ubuntu@34.217.14.140.
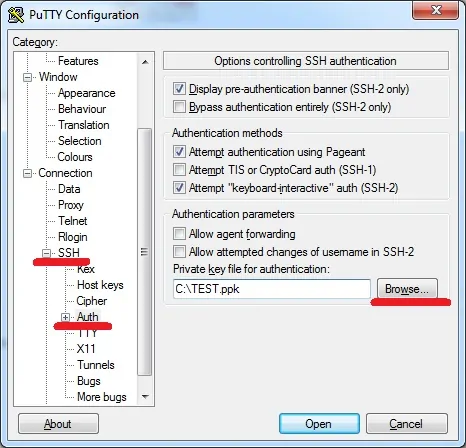
Access the SSH authentication tab, click on the Browse button, locate the PPK file and click on the Open button.
An SSH connection will be started to your Ubuntu virtual machine.
Use the following command to become the root user on the Ubuntu virtual machine.
# sudo su -
You have successfully created an Ubuntu virtual Machine on Amazon AWS.
4. Configure Date and Time using NTP
Configure the system to use the correct date and time using NTP.
On the Linux console, use the following commands to set the correct timezone.
# dpkg-reconfigure tzdata
Install the Ntpdate package and set the correct date and time immediately.
# apt-get update
# apt-get install ntpdate
# ntpdate pool.ntp.br
The Ntpdate command was used to set the correct date and time using the server: pool.ntp.br
Let's install the NTP service.
# apt-get install ntp
NTP is the service that will keep our server updated.
Use the command date to check the date and time configured on your Ubuntu Linux.
# date
If the system shown the correct date and time, this means that you followed all the steps correctly.
5. Install MySQL on Ubuntu Linux VPS
Now, we can proceed to the installation of the database service.
On the Linux console, use the following commands to install the required packages.
# apt-get update
# apt-get install mysql-server mysql-client
After finishing the installation, use the following command to access the MySQL database server.
# mysql -u root -p
Use the following SQL command to create a database named wordpress.
CREATE DATABASE wordpress CHARACTER SET UTF8 COLLATE UTF8_BIN;
Use the following SQL command to create a database user named wordpress.
CREATE USER 'wordpress'@'%' IDENTIFIED BY 'kamisama123';
Give the sql user named wordpress permission over the database named wordpress.
GRANT ALL PRIVILEGES ON wordpress.* TO 'wordpress'@'%';
quit;
6. Allow HTTP Connection to the Ubuntu Linux VPS
Now, we need to allow external connection to the Ubuntu Linux Virtual Machine using the HTTP protocol.
On the EC2 Dashboard, access the Network & Security menu and click on the Security Groups.
Edit the inbound rules of your virtual machine.
Click on the Add rule button and allow the HTTP connection from Anywhere.

In our example, we configured the Ubuntu VPS Security group to allow external connections to the HTTP port.
7. Install Apache on Ubuntu Linux VPS
Now, we need to install the Apache web server and all the required software.
On the Linux console, use the following commands to install the required packages.
# apt-get install apache2 php7.2 php7.2-mysql libapache2-mod-php7.2
# service apache2 stop
# service apache2 start
# service apache2 status
Find the location of the php.ini file on your system.
After finding, you need to edit the php.ini file.
# updatedb
# locate php.ini
# vi /etc/php/7.2/apache2/php.ini
Keep in mind that your PHP version and the location of the file may not be the same of mine.
Here is the original file, before our configuration.
Find the location of the php.ini file on your system.
After finding, you need to edit the php.ini file.
file_uploads = On
max_execution_time = 30
memory_limit = 128M
post_max_size = 8M
max_input_time = 60
; max_input_vars = 1000
Here is the new file with our configuration.
file_uploads = On
max_execution_time = 300
memory_limit = 256M
post_max_size = 32M
max_input_time = 60
max_input_vars = 4440
You should also restart apache manually and verify the service status.
# service apache2 stop
# service apache2 start
# service apache2 status
Here is an example of the Apache service status output.
● apache2.service - LSB: Apache2 web server
Loaded: loaded (/etc/init.d/apache2; bad; vendor preset: enabled)
Drop-In: /lib/systemd/system/apache2.service.d
└─apache2-systemd.conf
Active: active (running) since Mon 2018-04-23 00:02:09 -03; 1min 4s ago
8. Install WordPress on Ubuntu Linux VPS
Now, we need to install the WordPress CMS on Ubuntu Linux.
On the Linux console, use the following commands to download the WordPress package
# mkdir /downloads
# cd /downloads
# wget https://wordpress.org/latest.tar.gz
# tar -zxvf latest.tar.gz
# ls
latest.tar.gz wordpress
Move all the WordPress files to the root directory of your Apache installation.
Set the correct file permission on all moved files.
# mv wordpress /var/www/html/wordpress
# chown www-data.www-data /var/www/html/wordpress/* -R
Edit the WordPress configuration file.
# cd /var/www/html/wordpress
# mv wp-config-sample.php wp-config.php
# vi wp-config.php
Here is the original file, before our configuration.
define('DB_NAME', 'database_name_here');
define('DB_USER', 'username_here');
define('DB_PASSWORD', 'password_here');
define('DB_HOST', 'localhost');
define('DB_CHARSET', 'utf8');
define('DB_COLLATE', '');
Here is the new file with our configuration.
define('DB_NAME', 'wordpress');
define('DB_USER', 'wordpress');
define('DB_PASSWORD', 'kamisama123');
define('DB_HOST', 'localhost');
define('DB_CHARSET', 'utf8');
define('DB_COLLATE', '');
Open your browser and enter the IP address your web server plus /wordpress.
In our example, the following URL was entered in the Browser:
• http://34.217.14.140/wordpress
The WordPress web installation interface should be presented.
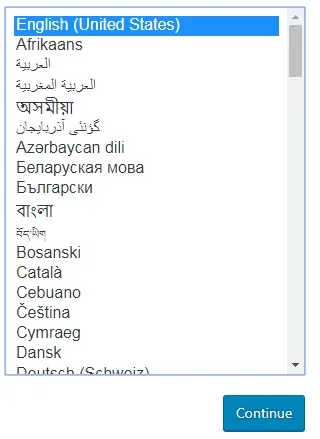
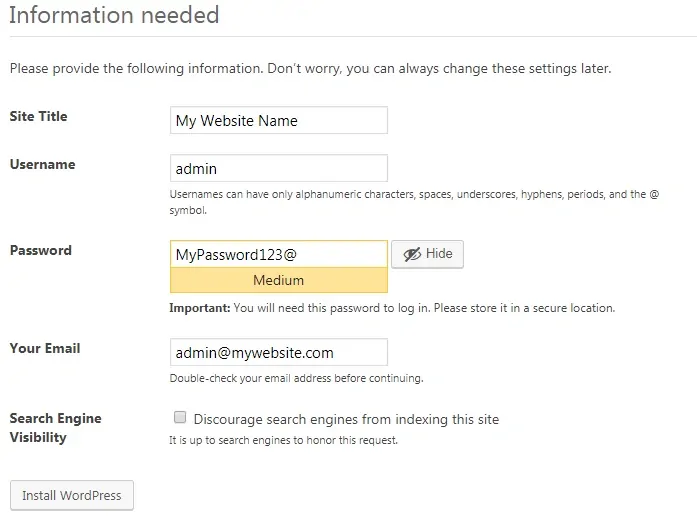
On the next screen you will have to enter the following information:
• Your website Name.
• Your administrator username.
• Your administrator password.
• Your administrator e-mail account.
After entering the desired information you need to click on the Install WordPress button.
On the next screen, you will receive the confirmation of your WordPress installation.
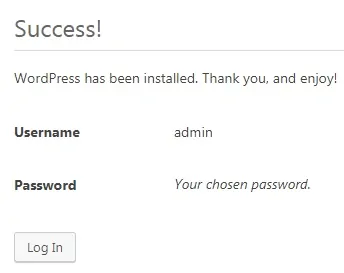
Click on the Log in button to be sent to the official login screen.
On the login screen, you need to enter the administrator account and password.
After a successful login, you will be sent to the WordPress Dashboard.
