Would you like to learn how to install the Zabbix agent on Pfsense? In this tutorial, we are going to show you all the steps required to perform the Zabbix agent installation on a Pfsense server in 5 minutes or less.
• Pfsense 2.4.4-p3
PFsense Related Tutorial:
On this page, we offer quick access to a list of tutorials related to pfSense.
PFSense - Zabbix Agent Installation
Open a browser software, enter the IP address of your Pfsense firewall and access web interface.
In our example, the following URL was entered in the Browser:
• https://192.168.15.11
The Pfsense web interface should be presented.

On the prompt screen, enter the Pfsense Default Password login information.
• Username: admin
• Password: pfsense
After a successful login, you will be sent to the Pfsense Dashboard.
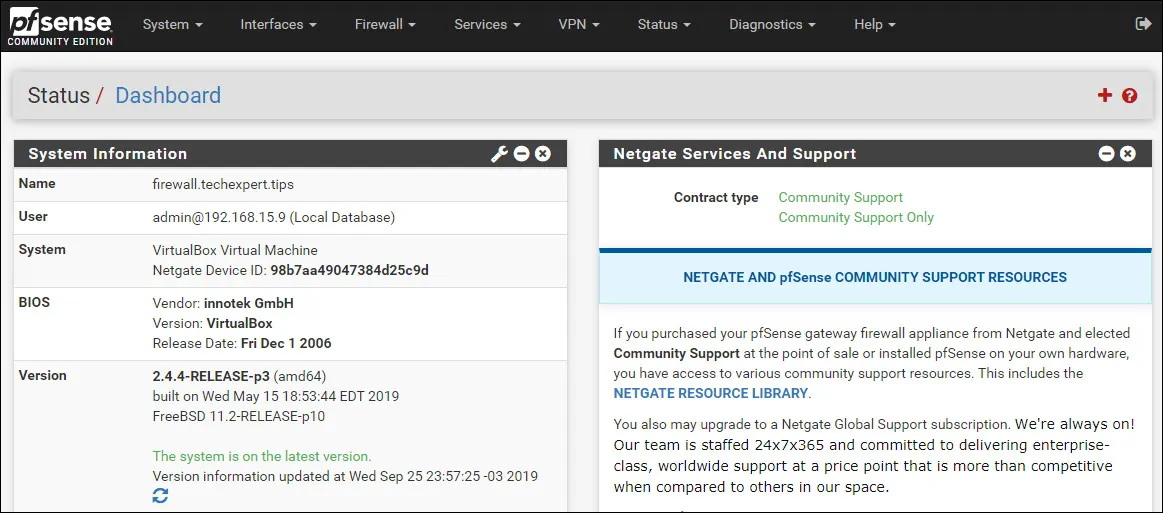
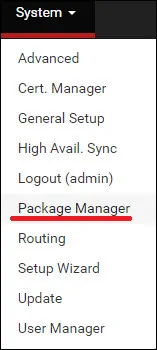
Access the Pfsense System menu and select the Package manager option.
On the package manager screen, access the Available packages tab.
On the Available packages tab, search for zabbix-agent and install the Zabbix agent package.
There are multiple agent versions available, make sure you select the same version of your Zabbix server.

In our example, we have a Zabbix server version 4.2.6.
In our example, we installed the Zabbix agent package named: zabbix-agent42
Wait the Zabbix agent installation to finish.
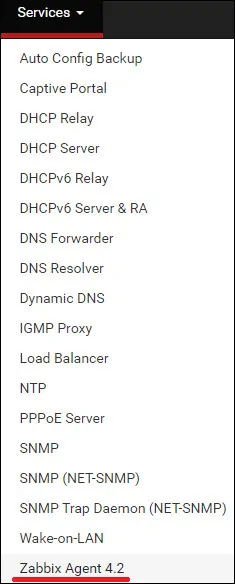
Access the Pfsense Services menu and select the Zabbix Agent option.
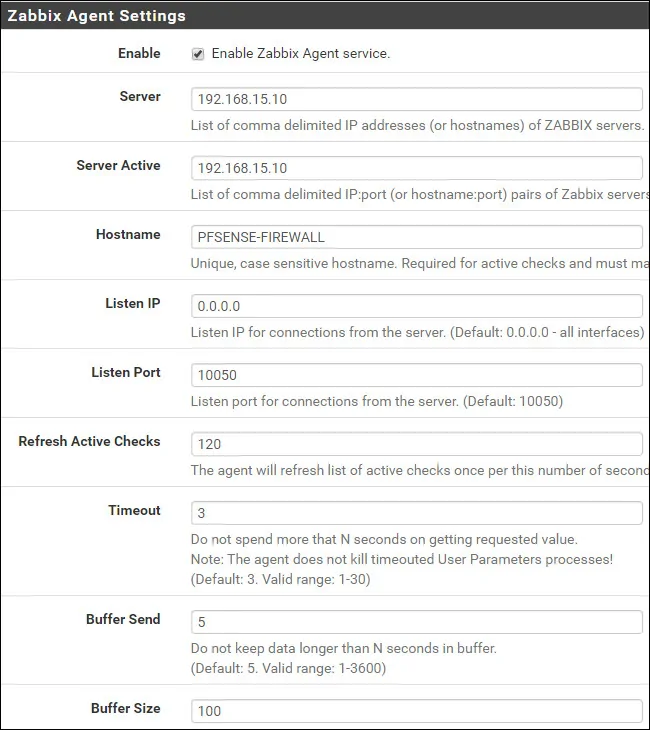
On the General tab, enable the Zabbix agent service and perform the following configuration:
• Server - The IP address of the Zabbix server
• ServerActive - The IP address of the Zabbix server
• Hostname - The hostname of the PFsense firewall
• Listen IP - Use 0.0.0.0 to listen on All IP addresses
• Listen Port - Zabbix agent default port 10050
On the TLS-RELATED Parameters area, you need to perform the following configuration:
• TLS Connect - PSK
• TLS Accept - PSK
• TLS PSK IDENTITY - key-pfsense-01
• TLS PSK - fb6616cd582a2fa0aa161cab3423a9ca640c931b21c8c2e3b7132d6db75aadff (Create your own key)
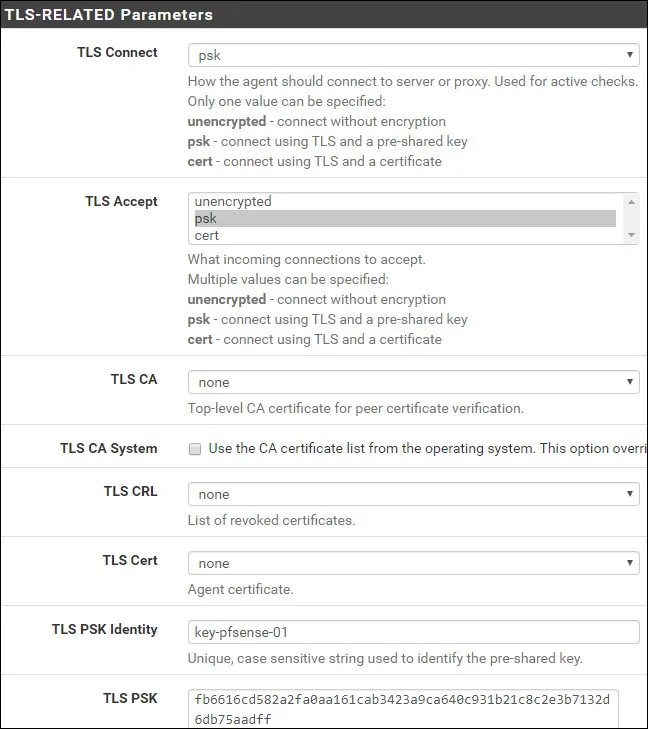
If you need help to create a PSK key, you may use websites like: https://www.browserling.com/tools/random-hex
After finishing the configuration, click on the Save button on the bottom part of the screen.
In our example, we used the following configuration:
• The Zabbix server has the IP address: 192.168.15.10.
• The PFSense firewall has the IP address: 192.168.15.11.
• The Pfsense firewall hostname is: PFSENSE-FIREWALL
• The PSK Identification key was named: key-pfsense-01
• The communication will be encrypted using the following key: fb6616cd582a2fa0aa161cab3423a9ca640c931b21c8c2e3b7132d6db75aadff
You have successfully installed the PFsense Zabbix agent.
PFSense - Zabbix Firewall Configuration
By default, the PFsense firewall does not allow external Zabbix connections to the WAN interface.
In our example we are going to create a firewall rule to allow the Zabbix communication.
Access the Pfsense Firewall menu and select the Rules option.
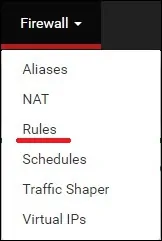
Click on the Add button to add a rule to the Top of the list.
On the Firewall rule creation screen, perform the following configuration:
• Action - Pass
• Interface - WAN
• Address family - IPV4
• Protocol - TCP
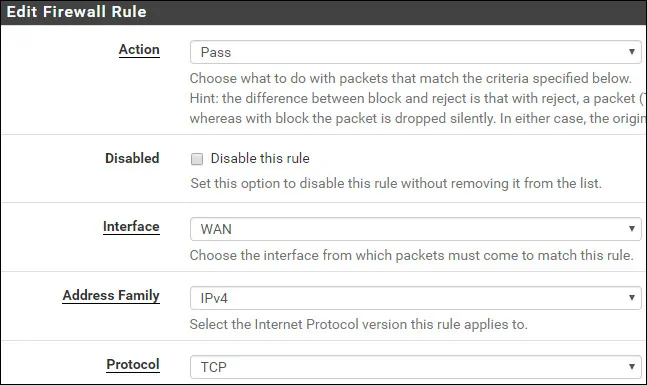
On the Source configuration screen, you need to define the Zabbix server IP address.
This IP address should be allowed to communicate with the Zabbix agent installed on the Pfsense firewall.
In our example, only the computer using the IP address 192.168.15.10 will be able to communicate with the PFsense Zabbix agent.

On the Firewall destination screen, perform the following configuration:
• Destination - Wan address
• Destination port range- From (Other) 10050 to (Other) 10050

On the Firewall Extra options screen, you may enter a description to the firewall rule.
Click on the Save button, you will be sent back to the Firewall configuration screen.
Now, you need to reload the firewall rules to apply the Zabbix communication firewall rule.
Click on the Apply changes button to reload the firewall configuration.

You have finished the PFsense firewall configuration to allow the Zabbix server communication using the WAN interface.
PFSense - Testing the Zabbix Agent Configuration
To test the Pfsense Zabbix agent configuration, access the command-line of your Zabbix server.
First, we need to create a file containing the PSK key for communication encryption.
Create a temporary PSK key file on the Zabbix server.
Insert the PSK Key previously defined inside this file.
Use the following command to test the communication between the Zabbix server and the Zabbix agent.
If everything worked, the Zabbix agent should report the agent version installed on the Pfsense server.
Keep in mind that you need to change the Zabbix agent IP address, the PSK identification name and the PSK key value to reflect your environment.
You have successfully performed a communication test between the Zabbix server and the Zabbix agent installed on the Pfsense firewall.
